Tuesday, December 31, 2019

WINTER WONDERLAND TAGS | with Anabelle

I love anything that is glittery and fun. So it's no surprise that the Winter Wonderland collection is one of my favorites. I decided to create some winter themed tags with it and glitzed them up! They were a lot of fun to create.
I started off by cutting the tags from patterned paper. I always choose papers that have a small pattern on which I can layer the larger elements. For this first tag, I chose the Yetti Doodlepop and a cute die cut from the Chit Chat pack. I added a border to the bottom and layered the transparent snowflakes onto the tag. These snowflakes are my absolute favorite element from the collection. I topped each of them with a Shape Sprinkle snowflake.
I broke out my glitter glue and added some white frosted dots to each of the tags. You can see the border I created on this one. I love how it looks on the snowflakes. The jewels add an extra bit of sparkle and shine.
My next tag uses another one of the Doodlepops - the polar bear. Isn't it cute???  I paired it with the wintery tree die cut and some more snowflakes. 

This last tag is a bit different. I create  a rosette and added some sparkly glitter glue. Then I adhered it to the tag with more snowflakes and the die cut.
Finally, I finished each tag with a washi tape bow. To create the bows, I took a length of washi tape and folded it over onto itself. That I made a large loop, pinched it in the middle to create a bow and added it to the tag with some chunky twine. I love how they look so coordinated.
I'm planning on using these tags as thank you notes for some gifts that I received from my students. But, you can use them as a gift tag or add them to a card. They are very versatile.

Thanks so much for stopping by!

Doodlebug Supplies:
Winter Wonderland Collection

Other Supplies:
Stickles Glitter Glue in Frosted Lace

Monday, December 30, 2019

WINTER WONDERLAND UNBELIEVABLE FRIEND CARD | with Kathy

Have you seen the Yeti in the Winter Wonderland Collection?  He is just so stinkin' cute...I'm a tad obsessed with him!  I thought he deserved to be featured prominently in my next project, so I created this card with him in mind!


I had a lot of fun making the little scene in this card.  I used the mountains, fox and Yeti from the Odds & Ends pack.  I added the tree & little bird from the Icons Stickers, then finished it off with some of the acetate snowflakes from the Snowflake Odds & Ends.  I thought it would be cute to have them peeking in a window!  The window is backed with acetate as well.  Here's a close-up.

I just love the Yeti's little tooth... adorable!  I finished the card with some little hearts from the Winter Hugs Shaped Sprinkles and a sentiment banner I created.

Have you created any projects using the Winter Wonderland Collection?  Be sure to tag Doodlebug Design on Facebook and Instagram.  We would love to see your creations!  That's it for me today, thanks for stopping by to peek!


Doodlebug Products Used
Winter Wonderland Collection

Other
Acetate Sheet
Silhouette Cameo


Saturday, December 28, 2019

WINTER WONDERLAND SCRAPBOOK LAYOUT | with Erica

I am so excited to share my first layout using the brand new Winter Wonderland collection. A few weeks ago I took the kids to our downtown Christmas walk to see Elsa and Olaf. Our youngest loves Olaf and the movie Frozen so I just had to take him and get his photo! He was a little shy at first but he warmed up to Olaf and then he did not want to leave. I started out with a piece of white cardstock and pulled some inks from my stash that matched the kit. I added a lot of splatter to the background so that it looked like falling snow. Once the ink splatters were dry I started to build my layout. I added some pattern paper to the back of one of my photos and added them to the center of my layout. I did add some fun foam to the back of the photos. I pulled out some some different embellishments from the collection to start building a little scene around the photos. I used the tress from the odds & ends and placed them on the left and right of my photo. I used some foam adhesive to some of them to give them some dimension. I also pulled out one of the doodle-pops and some snowflake odds & ends. One of the chit chat pieces was perfect for my photos so I just had to use it! Here is a look at my completed layout! Thanks so much for stopping by today!

Doodlebug Products Used:
 Winter Wonderland collection

Friday, December 27, 2019

WINTER WONDERLAND REVERSE STAMPING TUTORIAL | with Karen

I thought that playing around with Doodle Stamps could not get any more fun than it has been since they were introduced earlier this year. But oh, was I ever wrong! Because just when I thought they couldn't get any better, the new Winter Wonderland collection was released with a whole set of adorable new characters!
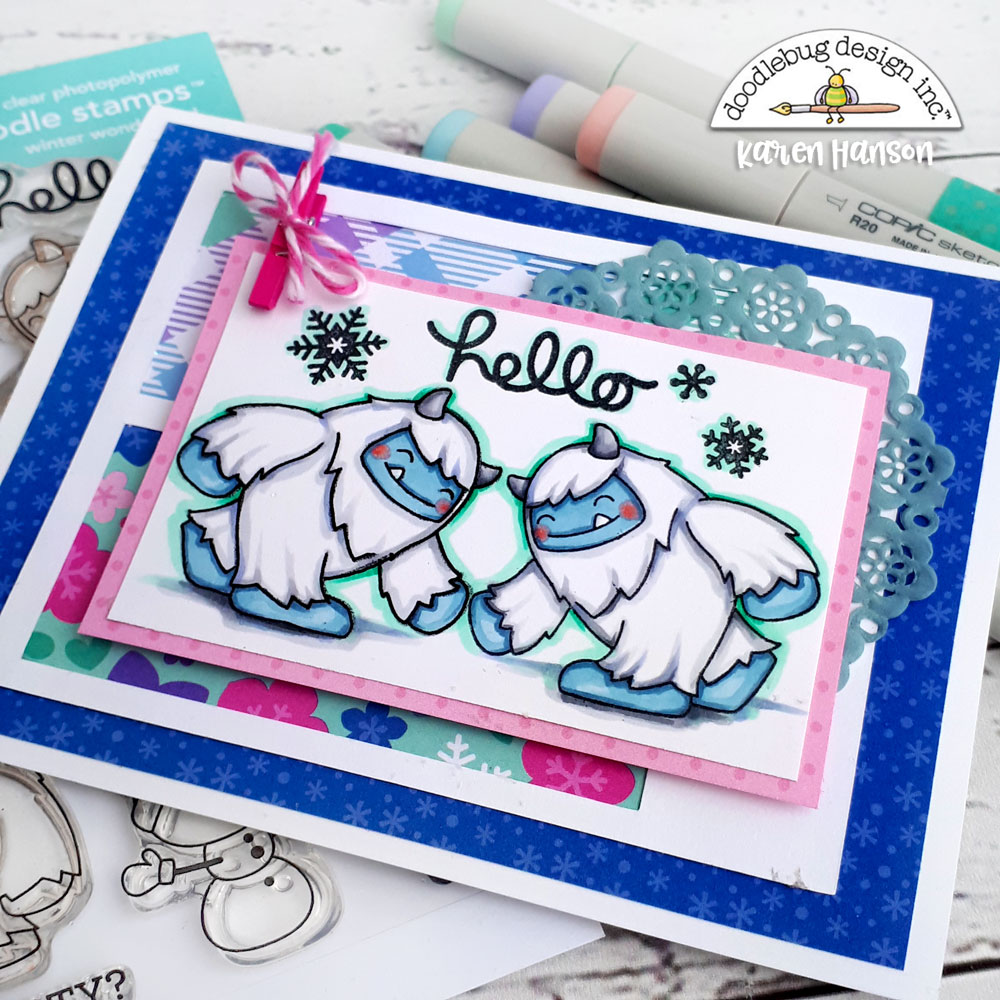
But I have to admit that the only thing better than the new Yeti character is that he comes in more than one pose. And if that still isn't enough for you, I am going to share a little tutorial with you today so you can see how you can get even more characters out of your stamps! Reverse stamping is a technique used when you have a stamp that you would like facing the opposite direction when it is stamped. For this little card, I actually just used one stamp of the Yeti, reversing one to create the yeti facing the opposite direction by stamping it twice - first onto a mat and then onto paper. While there are stamping tools designed to help with this process, a few simple product that you have in your crafty collection will do the trick too! Here's how:
To create this effect, all you need are your regular stamping tools together with a silicone mat. I actually use the silicone mat that came with my die cutting machine, but any silicone mat will do as long as it is larger than your stamp.
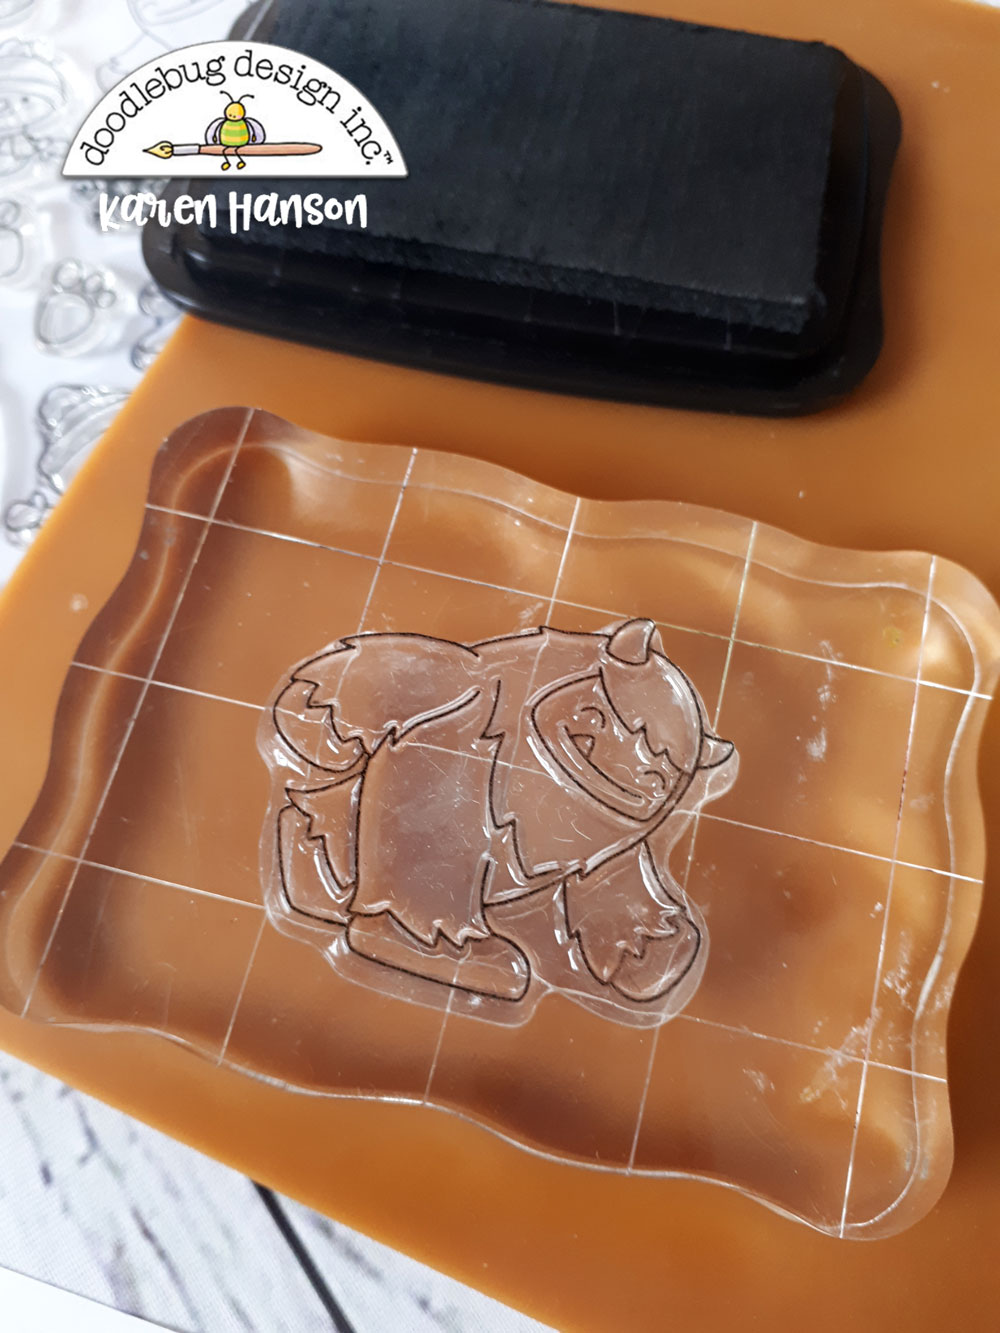
Ink up your stamp just as you would normally do.
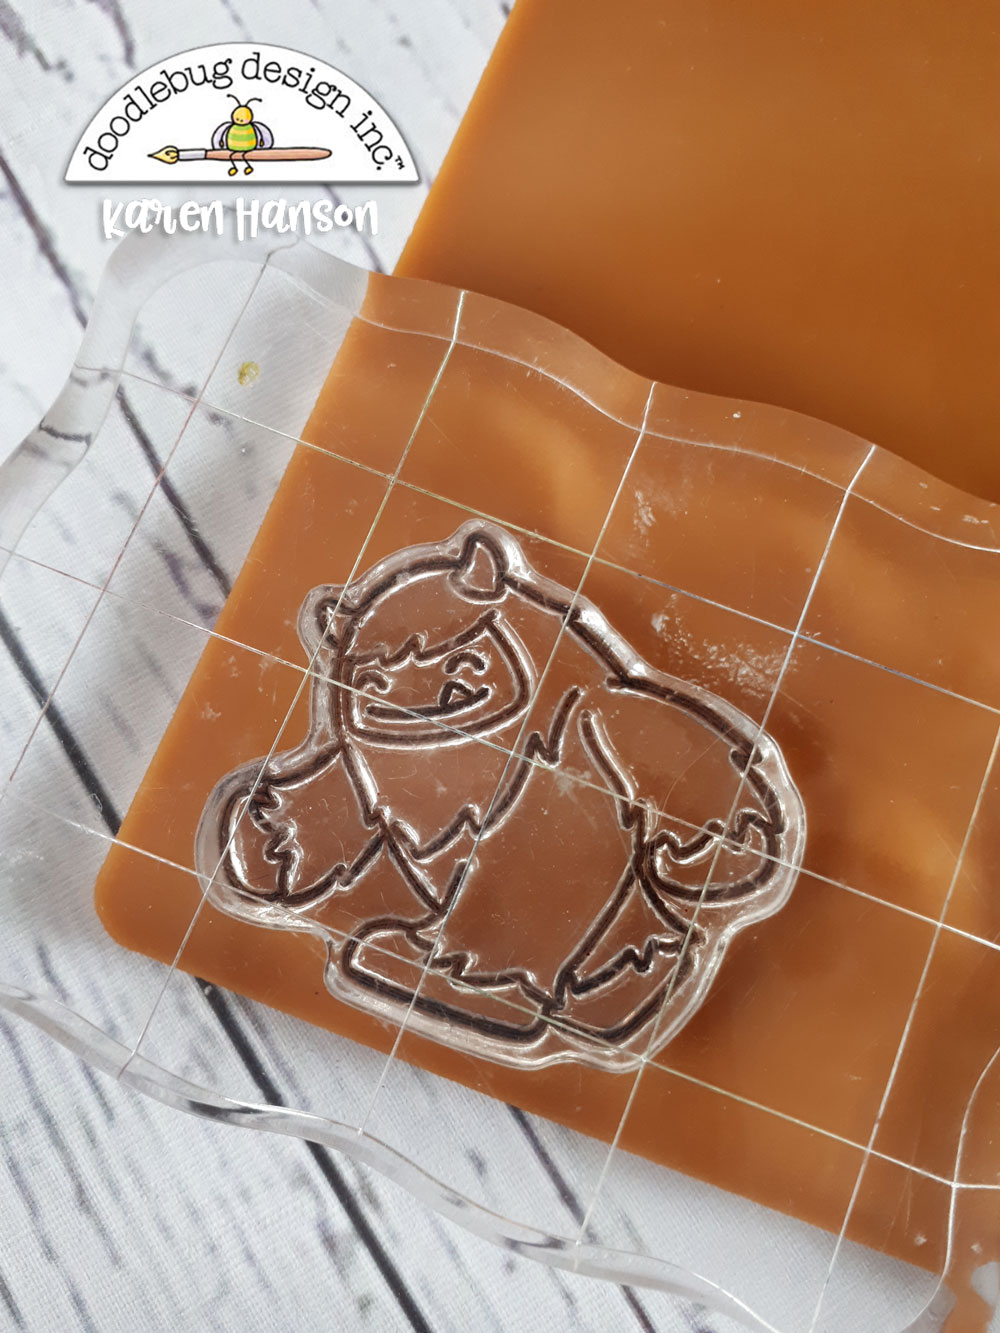
Instead of stamping onto your paper, stamp the image onto your silicone mat. One of the reasons I like the silicone mat is that it is a bit tacky, so your stamp doesn't slide around creating a "fuzzy" image. When you are first trying out this technique, you may have to stamp it a few times before you get a crisp stamp you are happy with. Don;t rush - take your time and simply wipe of the mat if you are not happy with the quality of the stamp.
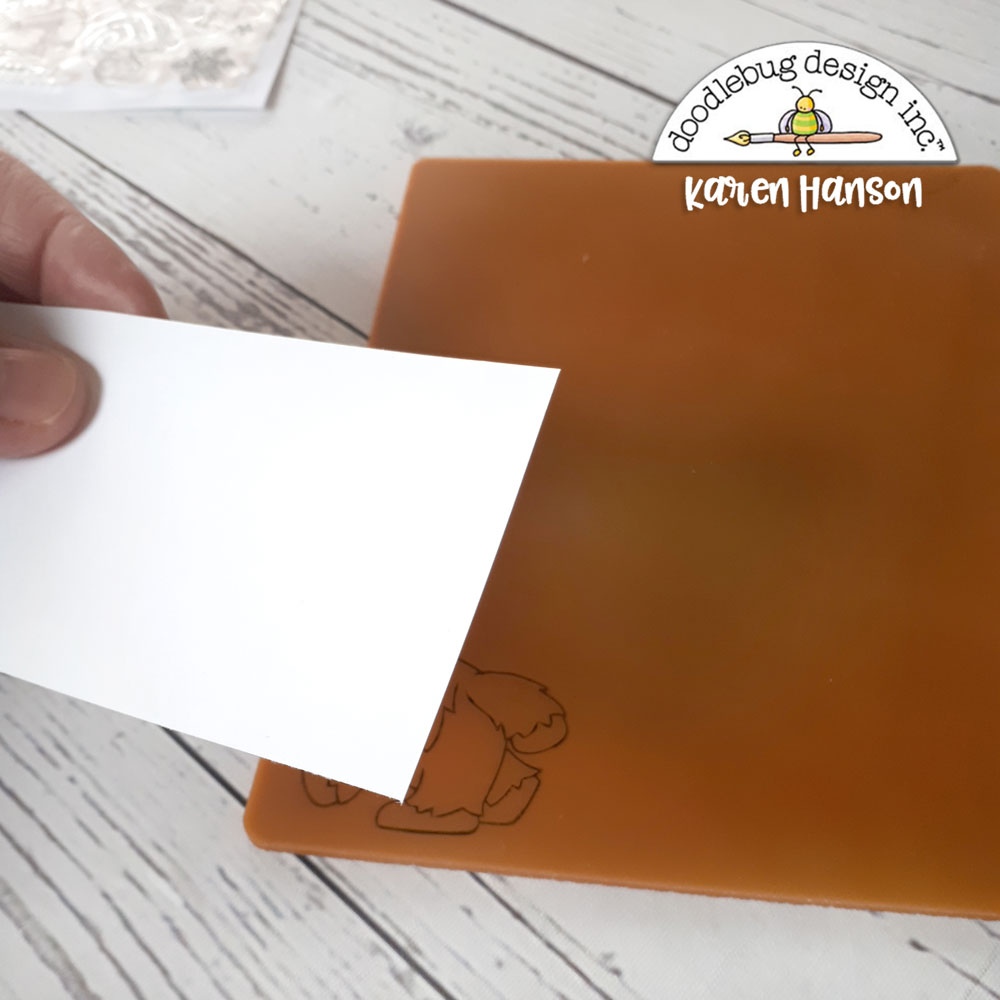
Now take the piece of paper you are stamping onto and place it over the stamped image. Be sure not to move the paper and place it straight down onto the mat, securing with a strong grip. Again, the "tackiness" of the mat will help keep the paper in place. Note: I highly recommend putting the paper to the mat rather than trying to place the mat down onto the paper to stamp. It is difficult to get the mat down without moving it, resulting in a blurry image. Placing the paper down onto the stamp always works better for me!
Hold the paper down onto the mat and run your fingers gently over top in a circular motion, transferring the ink from the mat to the paper.
Carefully lift off the paper, and you will have your reversed design! Don't worry if you don't get a great image the first time. It sometimes takes a couple of tries!
To create the mirrored image, simply ink up the stamp again and place it down facing the reversed image.
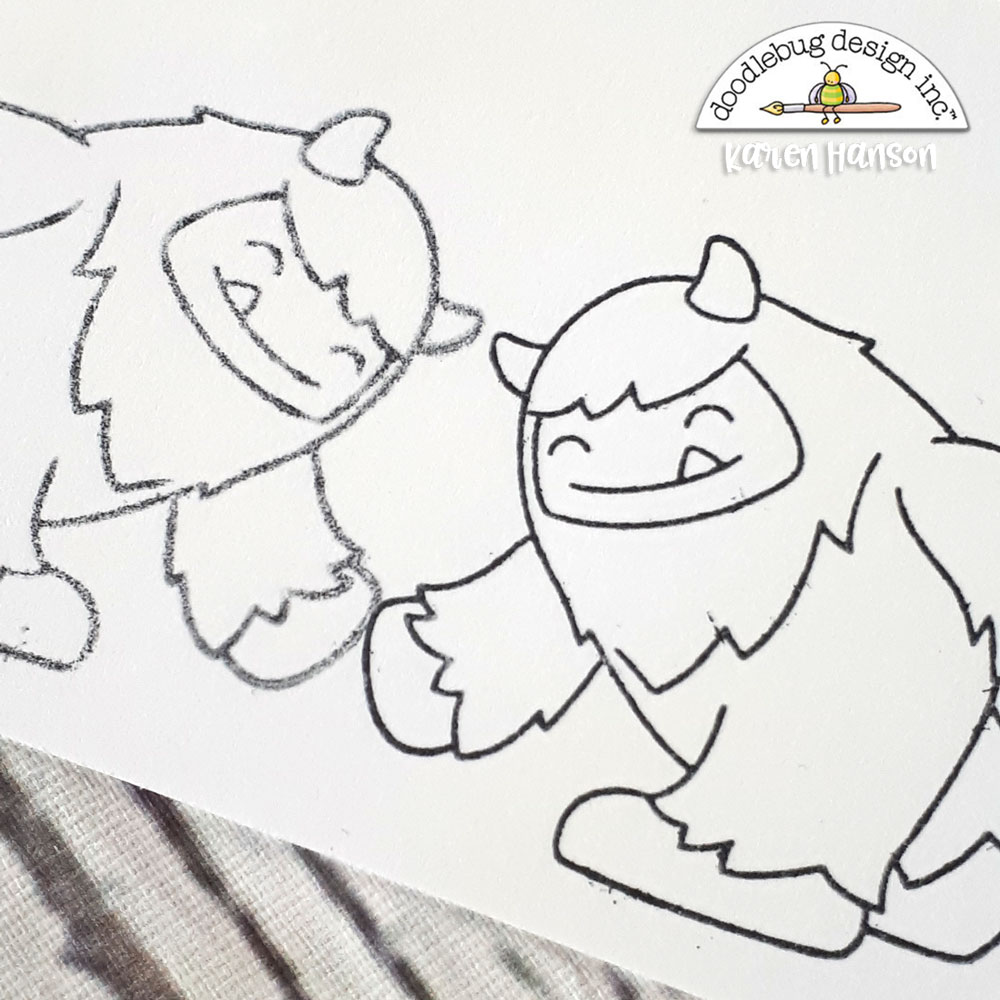
 
Note: You will notice that the reversed stamp is never as crisp and clean as the stamp created the regular way. But hang in with me and I will show you that in the end, it won't matter at all!
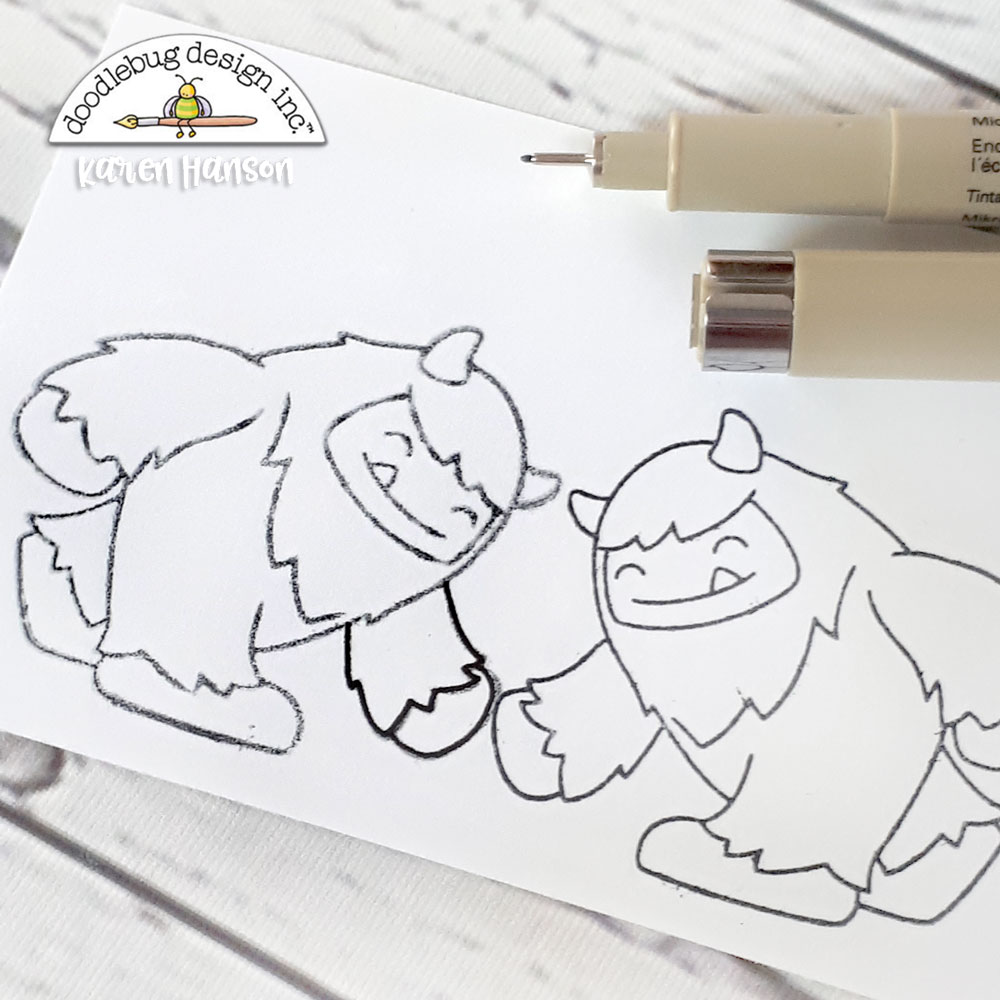
One of the tricks that I have (and I actually use this trick all the time when stamping the regular way in situations where I don't get the perfect press), is simply to go over the reverse stamped image with an ultra thin black pen. This cleans up the line and will actually create a nice bold line. And while this line will appear darker than the other stamped image at first...
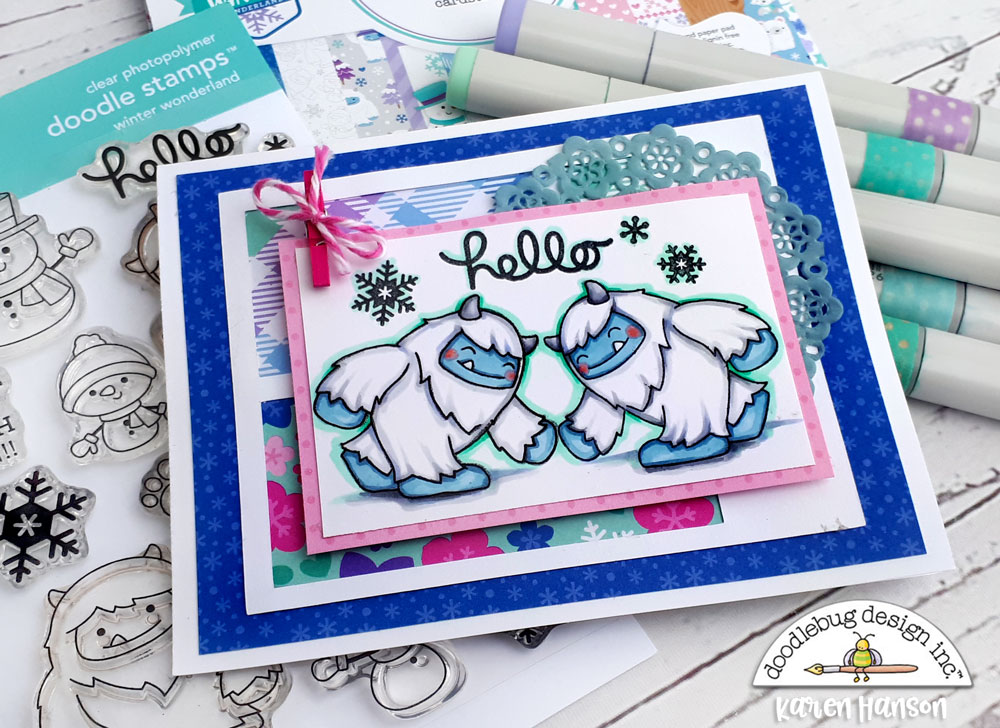
...by the time you colour them in and add some shading, you will not be able to tell the difference at all! I promise - no camera tricks here. This is the same image I stamped in the tutorial pictures!
Now, let's say you don't happen to have a silicone mat to work with. Don't worry- you can still create this effect. In fact, you can find the perfect tool right on the back of your Doodlebug stamps - a clear acetate sheet! Simply pull one off of your stamps and you are ready to go.
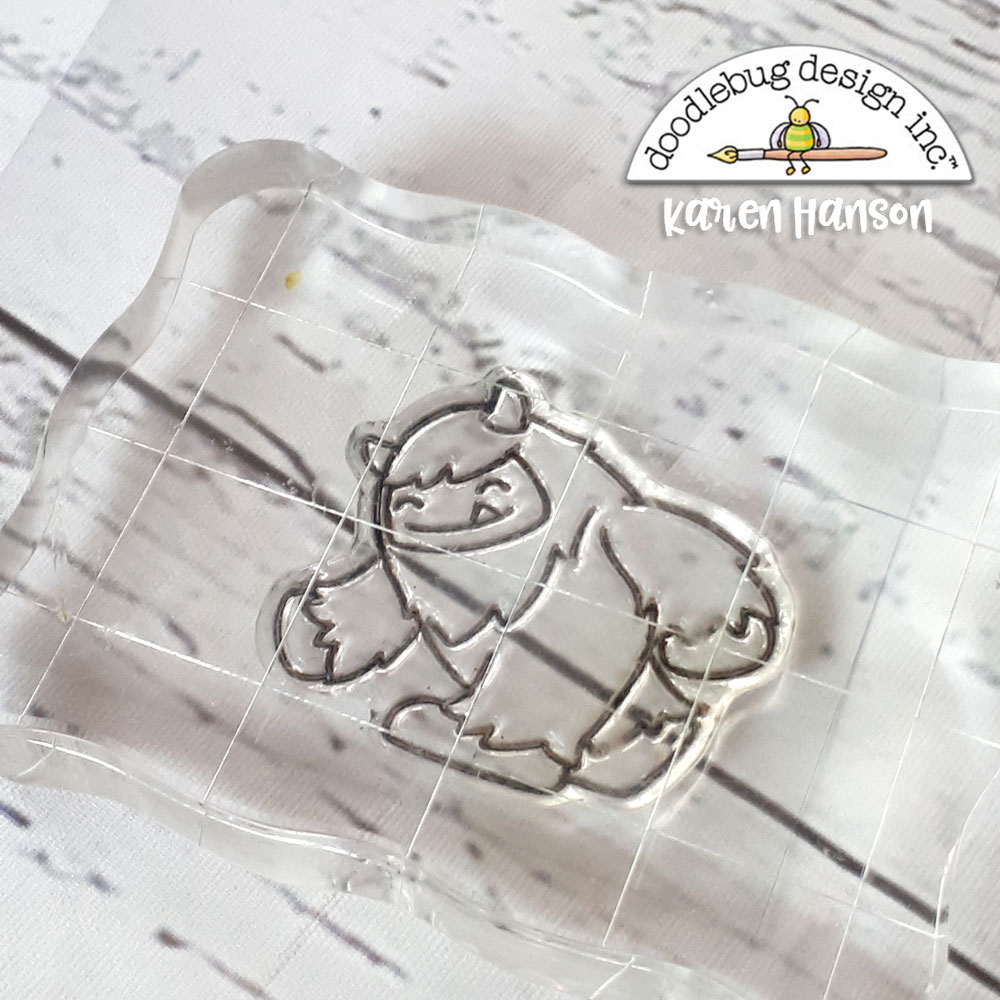
The technique is exactly the same as it is on the silicone mat, except that you are stamping onto the acetate sheet.
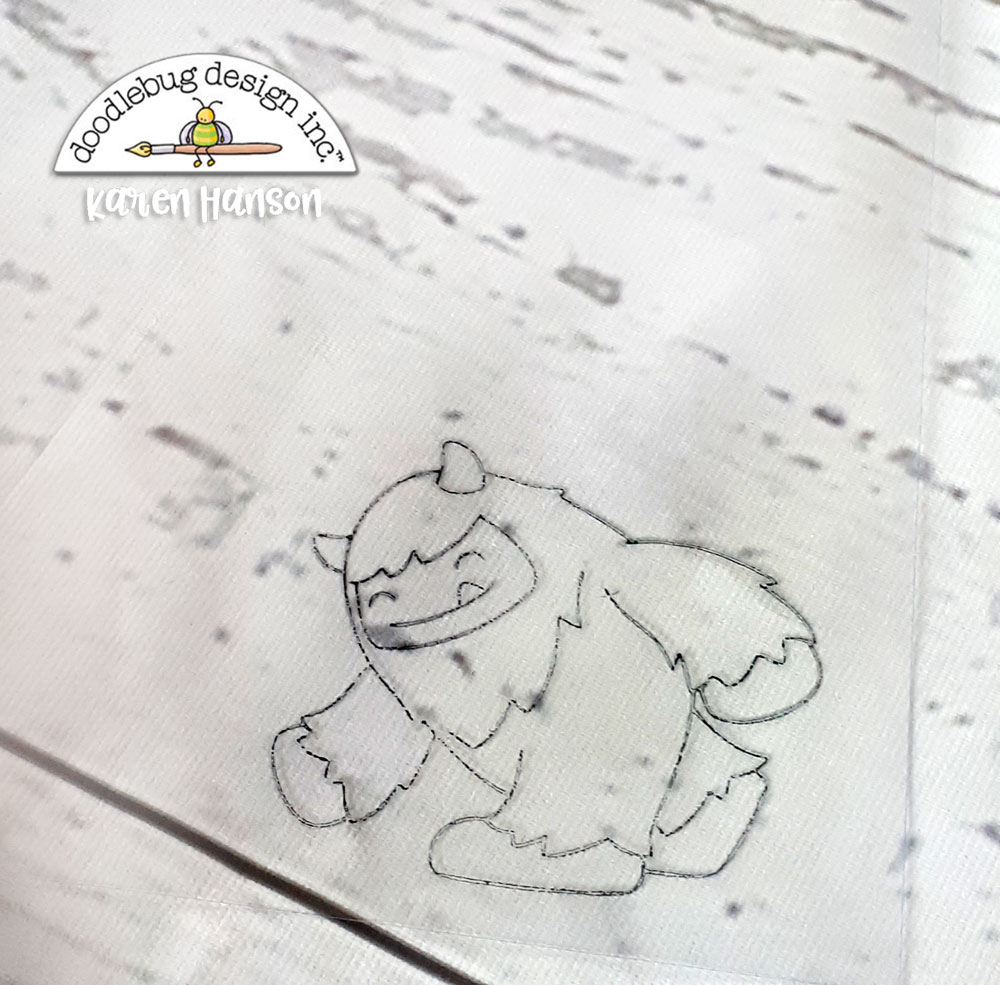
Now you will notice that the ink is a bit more "splotchy" on the acetate than it was on the silicone. I also find that it is more slippery, so you have to be extra careful when placing your paper down onto the acetate.
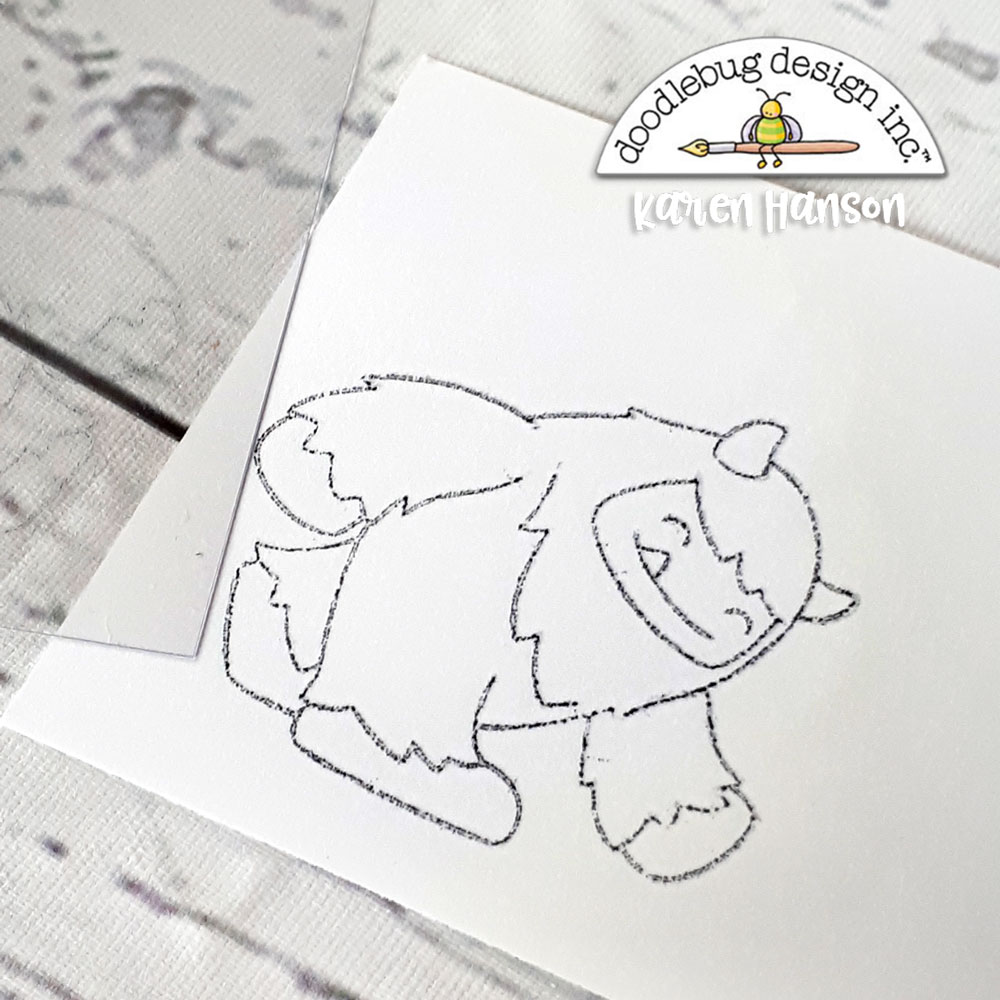
But in the end, you can get a great transfer this way too, and with a little pen work, the image will be perfect!
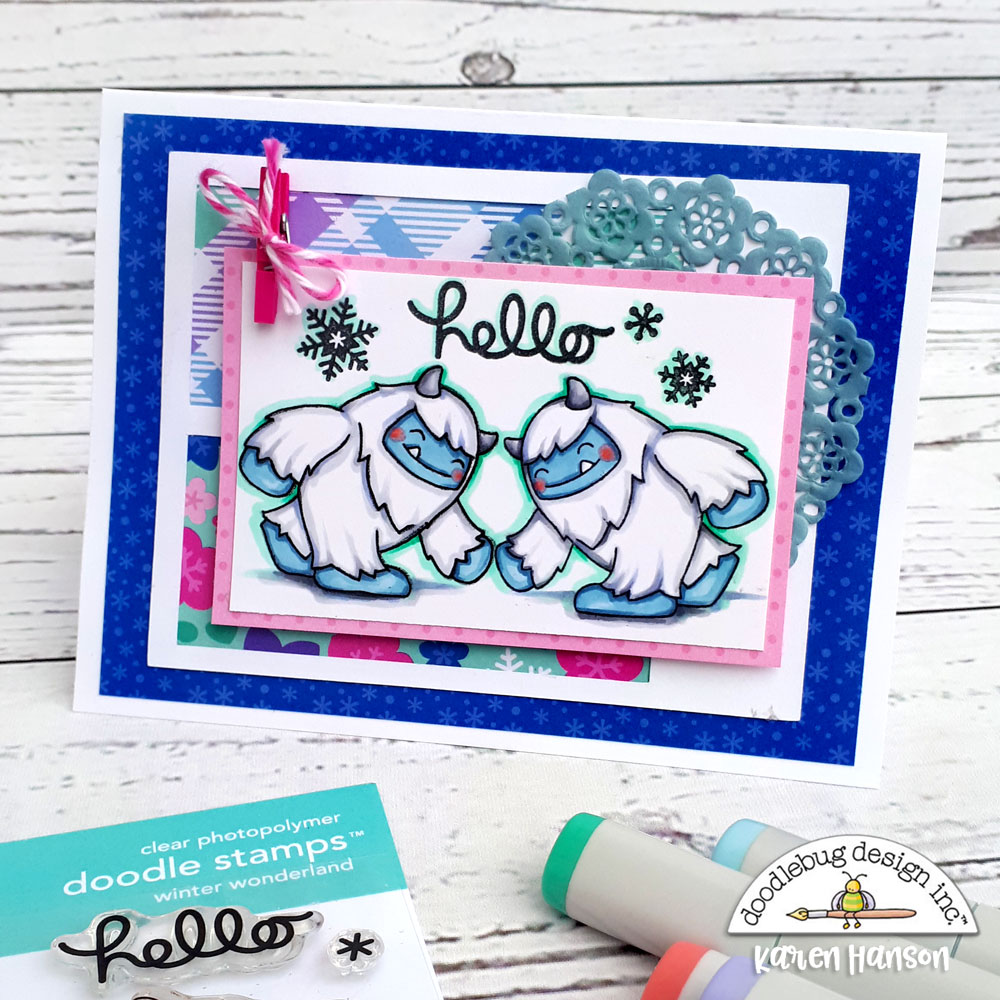
 
So there you have it - you can have twice as much fun with your Doodlebug stamps! And let's be honest, the only thing better than one adorable yeti is two!
Thanks for stopping by!
Hugs,
Doodlebug Design Product:
Winter Wonderland Collection
Winter Wonderland Stamps
Mini Clothespins
DoodleTwine
Mini Doilies
Other Products:
Silicone mat
 Alcohol markers
 Ink
 White Cardstock

Thursday, December 26, 2019

WINTER WONDERLAND LAYOUT | with Tegan

Who else is in love with the brand new Winter Wonderland collection?! I am swooning over the color palette and the adorable critter images! And it is perfect for documenting all kinds of cold weather activities like our winter walk in the woods last year!

I started out by using the pink Winter Wonderland patterned paper as my background and adhered a 4 inch strip of the aqua floral Nightfall patterned paper across the middle of it. I then used my electronic die cut machine and the Doodlebug Design Snowflake cut file to cut a large snowflake out of white cardstock. I cut this snowflake in half horizontally and attached the top half above the floral strip of paper and then the bottom half below the floral paper strip. 
There are SO MANY adorable graphics in this collection, I had a hard time deciding which Odds & Ends die cuts to use! I finally decided to go with the fun purple mountains layered underneath the 'Snow Fun' sentiment and the super cute artic fox. The Odds & Ends Snowflakes pack was great for adding a flurry of acetate and paper snowflakes around the page. 
And isn't this yeti Odds & End die cut just the cutest?!? I added a little snowflake die cut in his hand and gave him a little pink sticker heart. I embellished the tree die cut with Heart Shape Sprinkles. I then added the fun banner die cut underneath the yeti and embellished it with more Heart Shape Sprinkles. 
Thank you so much for joining me today! I hope I have inspired you to take some fun snow pictures and document them with the adorable Winter Wonderland collection!
​​BLOG | INSTAGRAM | FACEBOOK​​​

Doodlebug Products Used:
​ Winter Wonderland Collection


Monday, December 23, 2019

WINTER WONDERLAND LAYOUT | with Caroli

In the city where I live it almost does not snow, so when a miracle happens and we have few minutes of snow I definitively need to take photos and document it on my scrapbooks.
Last year during a cold winter morning it started snowing and we definitively enjoyed it,  this layout documents the silly pics we took that day.

I went to a simple two column design, on the left I created a title with my Silhouette Cameo and on the right I created a huge embellishment cluster.

I created my embellishment cluster using many snowflakes from the special Odds&Ends package, I love this because it only includes snowflakes, and let's be honest, they're never enough, so It's a great thing to have a package of snowflakes only. Also, it has acetate items, can it get any better??
I also used few snowmen from the regular Odds&Ends package and some Shape Sprinkles and regular Sprinkles to make the cluster richer and more interesting.

I cut the letters for my title and backed them with patterned paper from the 6x6 inches pad, smaller patterns fits better for backing cut files because, so I always use them for this purpose.
Of course I included journaling in my page, and in this case I wrote it in light blue color and combined some words using stickers alpha in purple colores from the Teensy Typo line.
It is a simple layout that documents happy memories of last winter, showcasing fabulous Winter Wonderland collection, perfect!

I hope you liked this idea, thank you for stopping by today!

Sunday, December 22, 2019

CHRISTMAS MAGIC MUG BOX CARD | with Kathy

I was very excited to see that the new Christmas Magic Cut Files were available in the Lori Whitlock SVG Shop!  Of course I had to play right away... I designed this box card using one of the files... take a peek...


I just love that little gingerbread man!  Now for the fun part!  This card is available exclusively in the Lori Whitlock SVG Shop here!  Following is the tutorial to assemble the card.
1)  These are the pieces that come with the file.
2)  First assemble the goodies... glue the stripes on the candy canes, the tops on the pink candies and piece the gingerbread man together.
3)  Add the candies to the center insert.  The outlines are there to guide placement.
4)  A little note on adding tiny pieces... and pieces that need particular placement.  When I cut the stripes for the candy cane, I left them in "order."  I then used the negative to help with the stripe placement.  Another helpful hint... I use a "pick-me-up" tool to help place small pieces.  It has a slightly sticky end that holds on the piece so you can more easily place it.
5)  Add the strips to the tops of both mugs to make the "lip" of the mug.
6)  Fold the 2 side pieces along the score lines.
7)  Attach the sides to one of the mug pieces.  They should be flush with the top of the mug.
8)  Glue the other side of the mug to the other tabs on the sides.

9)  Fold the tabs on the center insert so they go backward.  Add some adhesive to just the tabs.
10)  Slide the insert piece into the mug.  The bottom of the insert should be level with the bottom of the mug front and back,  and the tabs should just touch the back of the back mug.  Press the tabs to the side pieces to keep in place.
11)  The complete mug!

I embellished my mug a bit more using some shaped sprinkles and a sentiment from the Christmas Magic Chit Chat pieces.  The mug folds flat for mailing too!  If you make one, be sure to tag Doodlebug Design on Facebook and Instagram!  We would love to see what you make!  That's it for me today, thanks for stopping by to peek!


Doodlebug Products Used:
Christmas Magic Collection
Dot Stripe Petite Prints Collection
Other:  Electronic Cutting Machine

Saturday, December 21, 2019

WINTER WONDERLAND MICRO JUNK JOURNAL | with Nathalie

I love the new Winter Wonderland collection even if there's not much snow where I live! Thanks to its amazing colors and cute elements, I was inspired to create my first micro junk journal:
I built it just like a regular junk journal using papers from the 6x6 Winter Wonderland pack and sewing all the pages together in the center. The only difference is that this one measures 2.5x3.5 inches! 
Before sewing the journal, I prepped my inside pages adding pockets and a bit of machine stitching here and there. Once the base was done, the most time consuming, but also the most fun part started: embellishing and adding small "presents" using stickers, die-cuts, Sprinkles, stamps and washi tapes from the same collection.


There's a space for a note, there's envelopes, pockets and lots of fun interactive parts. I've created a flip through video so you can see everything inside.

I hope this mini project of mine has inspired you to play with the new Winter Wonderland collection! I think I will use it for pocket pages next, what about you?
Pin It button on image hover