
What is not to love about the new Doodlebug shakers?! I mean there are so many possibilities to use these! You have seen the Doodle Shaker Pops right? Well now you can create your very own shaker pops or cards or whatever you want! I decided to create a snow globe using the new DIY Snow Globe kit, the Snow Much Fun collection and of course the new shakers!

Firstly I created a scene on the back piece of the globe by adding a sheet of patterned paper from the 6' x 6' paper pad and then layered the Let It Snow acetate over the top. To create the scene I took pieces from the Odds and Ends ephemera pack and added the Snow Cute Doodle Pop also. I also added some small puffy stickers and some clouds too. On the white parts of the ephemera, I added some Kindyglitz for some extra sparkle. Once the backing was done, I tested how it looked and then added a lot of the Lily White shaker balls inside the globe.

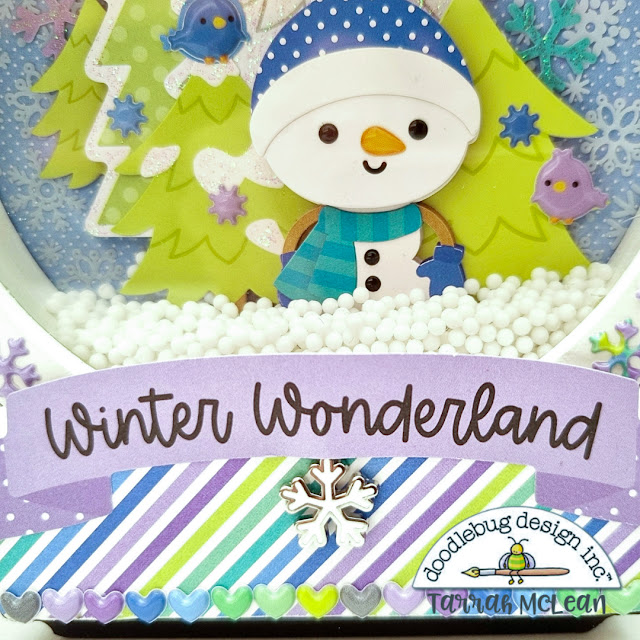
For the outside, I added the Winter Wonderland paper to the top of the globe and also one of the scalloped border stickers from the This and That sticker sheet. At the base of the globe, I covered the black in the striped paper from the 6' x 6' paper pad. I took one of the phrase banner ephemera pieces from the Chit Chat pack and added this over the top. I then took one of the Frosty Fun Little Charmers and tucked it under the banner title. At the very bottom I added the tiny puffy hearts along the edge.

Around the outer front edge, I took all of the snowflake puffy stickers and arranged them to fill the space. I did think about painting this part first however I decided not to and I am glad I just added the stickers. Once it was all dry, it was time to give a test and shake it up! It worked great and I love how it turned out.

Close up of the bottom section of the globe.
This was such a fun project to make! I hope you will give the shakers a go and create some cool projects with them! Thanks for stopping by today!


.jpg)
.jpg)

.jpg)

