Showing posts with label 8x8 Shadowbox Frame. Show all posts

Tuesday, September 3, 2024

HEY PUMPKIN PREVIEW WEEK - DAY 2 | with Tonya

We are back with Day 2 of our Hey Pumpkin Preview Week!  Today we are showcasing the fun new Hey Pumpkin Shadow Box Insert Kit.

Just like our other insert kits, this one comes with everything you need to design your own Doodlebug Hey Pumpkin collage!  Each kit comes with all of the stickers & sprinkles, a sheet of vellum to use as your base and a template that is easy to follow!

The template even tells you which icons to pop up!  Here is a close-up of all the cute little ghosts, spiders, pumpkins & kitties!


Pop your completed insert into one of our 8x8 Shadowbox Frames and you have the perfect Halloween decor piece!  

Be sure to stop by all this week for more fun sneak peeks of our Hey Pumpkin collection!  Have a great day!

DOODLEBUG PRODUCTS USED

Hey Pumpkin Shadow Box Insert Kit
Black 8x8 Shadowbox Frame


Monday, December 19, 2022

CANDY CANE LANE SHADOWBOX INSERT KIT | with Wanda

Hello my Doodlebug friends! Wanda here today to share another project with the super fun Candy Cane Lane Collection! Can you believe it's Christmas week? I hope you and your family have a wonderful holiday! My shadow box I am sharing today is up on the shelf in my craft room to bring some cheer. But it would also be great in the entry way or any room that needs fun and joy! I used the new Candy Cane Lane Shadow Box Kit and the brown frame to put this together. If you haven't made a Doodlebug Shadow Box yet, I really recommend it! I guarantee you will have some fun crafting! 

Here is my finished shadow box. I splattered on some white paint to make it look snowy and artsy! I used some stickers and embellishments to add a bit of extra interest to the bottom of the frame. I always like to add some matching decorations to my frame! It's hard to see, but I backed the vellum panel with blue snowflake 12x12 paper from the Candy Cane Lane Collection.

A

I just adore all the little houses in this kit!! I want to live in a pretty Christmas house! You can see that I also splattered white paint onto my finished panel. I used Diamond Stickles to add glittery accents to the rooftops and other areas. 

A

 So many pretty, sparkly gems in this kit - it makes it come alive and shimmer!

A


A

The color palette in this kit is just so cheery and sweet. I do love a pop of pink or aqua in with my Christmas colors! No one does it better than Doodlebug.

A


A

Wishing you a very Merry Christmas and a Happy New Year to come! Thank you for allowing me to come into your craft room all year and share my love of Doodlebug with you! See you soon!

Wanda SignatureBLOG | INSTAGRAM 


DOODLEBUG PRODUCTS USED

Candy Cane Lane Shadow Box Insert Kit
Candy Cane Lane Collection
Brown Shadow Box Frame

OTHER

White Paint
Stickles Diamond Glitter Glue
Foam Adhesive Squares

Monday, August 29, 2022

SEASIDE SUMMER SHADOWBOX INSERT KIT | with Wanda

Hi Doodlebug Friends! Wanda here with another super fun Seaside Summer project! Today I'm sharing my Shadow Box with the awesome ocean themed Seaside Summer insert! I jazzed up the shadow box by putting shells inside! And added a fun sentiment and a cutie pie toucan too!! I love these shadow boxes. I am already getting excited about making my Halloween one too! But, it's still August and hot summer days are still here - so let's keep summer crafting, right?! Happy Monday - hope you have a great week!

1

I used the Brown Doodlebug Shadow Box Frame along with the Seaside Summer Shadow Box Insert for this project. I also used Flower elements from other collections! One of the best things about Doodlebug is that everything mixes and matches so effortlessly across the collections. I added the "down by the seashore" sticker from the 12x12 Sticker Sheet from Seaside Summer. In this photo you can see the shells I put in the bottom of the box before I closed it up. It looks really cool!


1

 I used this cute Doodle Pop called Toucan Tango up on the top corner of my shadow box!

1

In case you're new to the Doodlebug Shadow Box Inserts: They come in a kit with the design page, a sheet of vellum, and everything you need to put it together! You simply line up the vellum on top of the design page, and add all your stickers and embellishments. The only thing you need is some foam tape or foam squares! In this photo is my finished piece before I put it into the box. I added a few jewels here and there on mine!

1


1

 I mean, seriously, how can you not smile, and pack up the car to head to the beach?! 

1

That's it for me for today! Take good care, and until I see you next time, happy crafting! 

1

MY BLOG | MY INSTAGRAM


DOODLEBUG SUPPLIES

Seaside Summer Collection
Seaside Summer Shadow Box Insert
Brown 8x8 Shadow Box Frame
12x12 Gingham Paper Pack
Mini Jewels

OTHER SUPPLIES

Foam Tape

Thursday, June 2, 2022

SHADOWBOX INSERT KITS LOTS OF LOVE | with Lisa

Have you seen the new Shadow Boxes and Shadow Box kits?  If you haven't, you really need to check them out. There are a bunch of new kits for different Doodlebug collections!  Of course, you don't necessarily need to use the shadow boxes to create something with the stickers and jewels in the kits, but I made my first project using them with the 8x8 black shadow box frame and I think they're really cute!  I altered mine a bit from the original kit to make a heart!


The idea is to fill in a space with as many embellishments as you can. The way I did it and I think that's the best way to do it, is to start with the big stickers and go smaller and smaller until you only have tiny spaces left where you can use the smallest jewels. 


As a background, I used a cupcake dotted patterned paper from the Petite Prints papers. I cut it to 8x8 and then traced a heart on it. I started with the large cardstock stickers and then went smaller and smaller, using small stickers, enamel shapes and then jewels and tiny stickers. 


I really love that you can do whichever shape you want and use the kit for many other things... I'm thinking about a cover for a mini album... :)


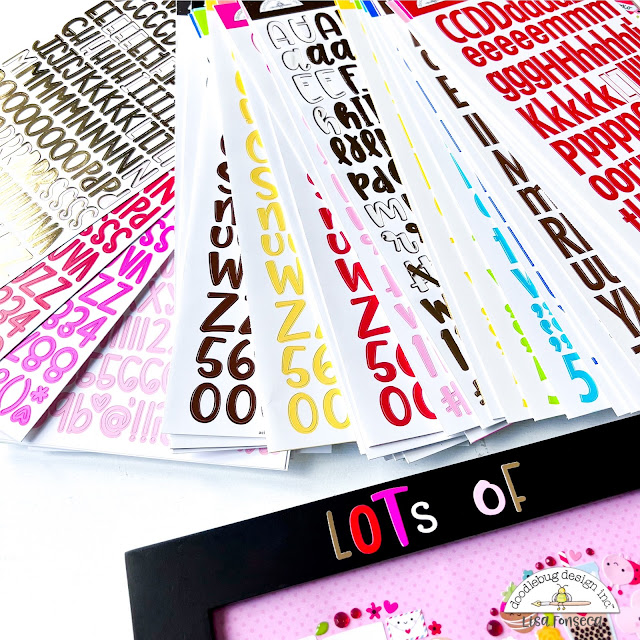
When I was done with the heart, I put the paper into the shadow box and then used some alpha stickers to write Lots of Love onto the frame.  I hope you are inspired to create something pretty with this new product. It's super easy and turns out so cute! HAVE FUN!


See you soon!


DOODLEBUG PRODUCTS USED


8x8 Shadow Box Frame in black

Lots of Love Shadowbox Insert Kit

My Type, Abigail, Skinny Alpha stickers

Dots/Stripes Petite Prints


Tuesday, May 31, 2022

SHADOWBOX INSERT KIT FAIRY GARDEN | with Nathalie

Who doesn't love a touch of cuteness in their home?!  Well, there is nothing cuter than the new Shadow Box Inserts from Doodlebug.  And to make it even cuter, I have chosen the new  Fairy Garden Insert to create a new décor piece for my dresser.


I followed the step-by-step instructions to create the vignette on top of the vellum piece from the kit


I chose different widths of foam adhesive when attaching some of the stickers to the vellum.  I love the play on dimension and different heights in the pieces.

I decided to cut the white cardstock into an circle to match the circumference of embellishments, then mounted it on a piece of Bubblegum petite prints.

To finish my piece, I am thinking about rotating the sentiment piece on the shadow box, so that it always feels new on my dresser. Make sure you check the new Shadow boxes and inserts from Doodlebug, you are going to love them!


.

Instagram | Blog | YouTube 


DOODLEBUG PRODUCTS USED

Fairy Garden Shadow Box Insert
8x8 Black Shadow Box Frame
Petite Print - Bubblegum
My Happy Place Chit Chat 


Monday, May 23, 2022

SHADOWBOX INSERT KITS CUTE & CRAFTY | with Wanda

Hello Doodlebug Friends and Fans! Wanda here today to share a super fun project with you! I am so excited to share my Cute and Crafty Shadowbox project today. Have you seen the awesome shadow boxes and inserts? What a cool concept! I knew right away I wanted to make one for my craft room. So of course I chose the Cute and Crafty Insert!! This came together so quickly and easily and it looks cute on the shelf in my room. I also think this would make an excellent gift. There are so many inserts - for a baby shower gift, or a Christmas gift, or for someone who loves Halloween! I also really think this could be a fun group project. Be sure to check out all of them!

I chose the brown frame for my project. I splattered on some white paint for a bit of an artistic look. You could also easily paint your frame any color - and I may paint mine - but I'll decide later! The frames come in white, black and brown. The insert pack comes with everything you need to put it together.

 I added some cute flowers and a sentiment from the Cute & Crafty Collection to the bottom corner of my frame! 

1

 These are all the items that come in your insert kit.

1

 The kit comes with a sheet of vellum and you place the pattern behind it and attach all the goodies!! I swapped out some of the stickers with glossy hearts and glossy flowers from other Sprinkles packs.

1

Once it's finished, replace the glass and put your choice of paper behind the design... it comes with a piece of white cardstock, but I chose pretty yellow 12x12 gingham! SO cheerful!

1


1

 How much fun is this??? SO FUN!!

1

Thanks for spending a bit of time here with me on the Doodlebug Blog! Wishing you oodles of creativity and happiness. I'll see you soon! 

Wanda Signature

MY BLOG | MY INSTAGRAM

DOODLEBUG PRODUCTS USED


Cute & Crafty Shadowbox Insert Kit
Doodlebug 8x8 Shadowbox Frame Brown
Cute & Crafty Bits & Pieces & Chit Chat Pieces
Gingham Linen Petite Prints 


Pin It button on image hover