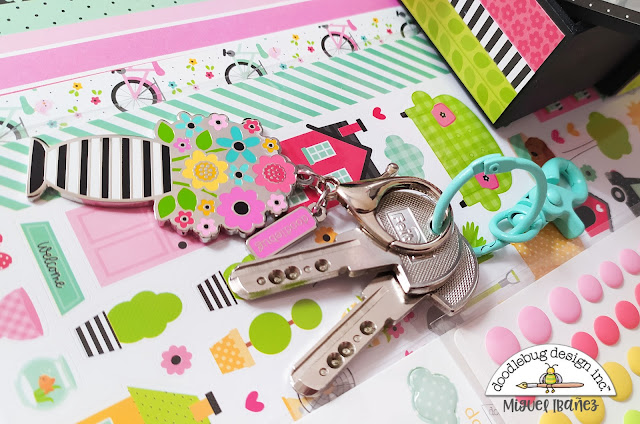
Altering pieces that resemble the beautiful Doodlebug collections is something I really enjoy doing. Today I decorated this coat rack with the Made with Love collection, which is all about cooking.
Wednesday, February 21, 2024
MADE WITH LOVE KITCHEN COAT RACK | with Miguel
Wednesday, June 29, 2022
MY HAPPY PLACE ORGANIZER BOX | with Miguel
I am a big fan of the houses in the My Happy Place Collection, so today I have a second wooden house that I altered using the collection. The steps are very easy, I started by painting a wooden house with black acrylic paint. Once painted, I selected the papers that we will use to give color and fun to my piece .
Wednesday, May 4, 2022
DOWN ON THE FARM PORTRAIT CUBE | with Miguel
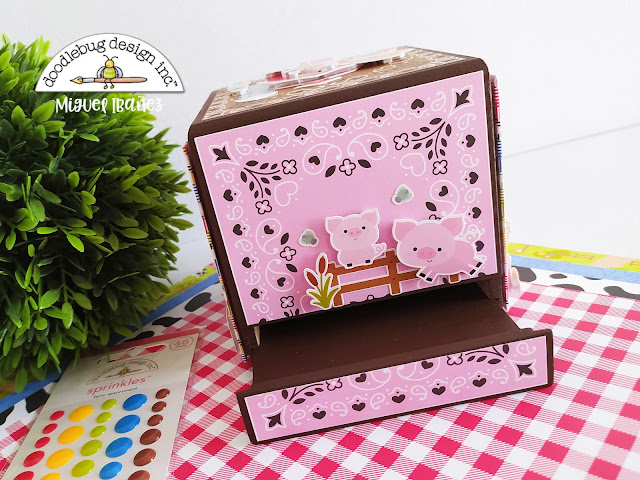
Do you have unused or undecorated pieces of wood in your craft stash? Well, today I show you a fun and useful way to decorate them . A few days ago, I found this wooden cube among my things, and I decided to paint and decorate it with doodlebug Down on the Farm collection. Since it was a cube shape, I decided to make a photo "frame" on each side of this piece.
I first cut slightly smaller cardboard frames for each side of the cube. I decorated the open "window: of the frame with some papers from the collection and also added a piece of acetate to protect the photo that will be placed there.
Wednesday, July 28, 2021
CUTE & CRAFTY CRAFTROOM DRAWERS | with Miguel
This week we are continuing projects with the beautiful Cute and Crafty Collection. This week I continue with some altered wood drawers to help brighten up the Doodlebug area of my craft space.
Do not miss more inspiration in my next posts, I will continue creating very nice things for my scrap room. See you soon and thanks for reading.
Thursday, July 8, 2021
CUTE & CRAFTY CRAFTROOM DECOR | with Wanda
Hi Doodlebug crafty friends! Do you ever feel like Doodlebug can read our minds? This new Cute and Crafty Collection feels like everything I would ever dream of in a paper collection! I'm so excited to see all the projects people are going to make with this adorable creativity themed collection. Something for every crafter, from stamping to sewing and scrapbooking. I love it! It was hard to decide what to make first. I decided to make a sign for my craft room! I used a chipboard sign shape that I got at Hobby Lobby, and went to town decorating it with paint, paper, stickers, Sprinkles and much more. It's already sitting on a shelf in my craft room next to my idea books!
I started by painting the sign with a few coats of white craft paint. I set it aside to dry and decided on my paper choices and stickers etc. I ended up using the pencils paper as my background paper. It has all the colors in it, and it's such a nice pattern. Next I used the Alex Alphabet Dies and die cut the letters from black cardstock. I mounted the letters onto a white strip of cardstock and lined it with Doodlebug Textured Cardstock. I knew I wanted to use that big Sticker as my main image!
I used a bunch of the mini icons stickers to add a row of happy crafting items across the top of the sign. I mean smiling ink pads and stamps?? C'mon!!
I used the Doodlebug Nesting Scallops Dies to add a design element on the lower right corner and added the pencils cup sticker. I affixed the patterned paper to the chipboard sign shape using clear glue. I traced the shape with a pencil and cut the corners out by hand.
This is what the sign looked like before I got started! It's so fun to decorate with Doodlebug!
I used a white gel pen to add 'highlights' to the black letters. I put a heart in the middle of the letters and added some pretty floral Sprinkles elements. I added the Live Love Create sticker underneath the words.
I'm so happy to share this project with you! I'm wishing you a very happy, cute and crafty day! I'll be back soon with some more projects. Take care!
MY BLOG | MY INSTAGRAM | MY FACEBOOK
DOODLEBUG SUPPLIES
Cute and Crafty Collection
Gingham 6x6 Paper Pad
Textured Cardstock
Nesting Scallops DoodleCuts
Alex Alphabet DoodleCuts
OTHER SUPPLIES
Chipboard Sign
White/Black Cardstock
White Gel Pen
Craft Paint
Clear Glue and Foam Tape
Friday, May 14, 2021
FAIRY GARDEN TIC TAC TOE GAME | with Shellye
A good game of tic-tac-toe is fun for all ages! Today I'm sharing a quick design using a premade wooden box, but any square shape will do.
Tuesday, May 11, 2021
FAIRY GARDEN HAIR CLIPS | with Miguel
Looking through my craft stash, I found some felt. I thought it would be a fun idea to create some cute hair clips for girls using the Fairy Garden Collection.
Wednesday, April 7, 2021
FAIRY GARDEN BIRDHOUSE | with Wanda
Hey there! I'm so excited today to share my first project made with the brand new Fairy Garden Collection! This collection is so colorful and fun! I knew I had to make a home décor piece with a garden theme - a Fairy Garden Birdhouse. I bought a plain wooden birdhouse from Hobby Lobby and used lots of Doodlebug supplies to decorate it for Spring. This was such a fun project - I hope you'll try it! You can cover just about anything with paper...let your imagination go crazy!
Here is the front of the birdhouse - covered in Fairy Garden Papers...
And here is the back of the birdhouse... Complete with a letter banner held up by the cutest tiny butterflies...
This is the top down view - I am obsessed with those Garden Flowers - I'll be making more of those for sure.
This is how it started out. I used Mod Podge to affix the papers to the birdhouse, for a nice, even, smooth finish. I did not put Mod Podge over the top of the paper, rather I just used it as the glue to hold it onto the birdhouse.
I used acrylic craft paint to paint the areas of the wood that would show - and not be covered with paper.
Here's a photo of the birdhouse before I decorated it with all the elements.
A few in-process photos! To make the roof shingles, I die cut one inch strips of gingham paper using the Borders and Edges Doodle Cuts. I used ten strips on each half of the roof. I layered them to look like a cozy cottage roof. This took a minute, but I love how it turned out. Once the roof was glued on, I gently used my fingers to lift up the scallops.
All snails, birdies and butterflies are welcome! The fence is a die that I had in my crafty stash. I added the word sticker that says 'hello sunshine' and lots of little bugs and critters...OH and those adorable mushrooms!
To make the crinkly shabby chic flowers I used the Garden Flowers pieces. I sprayed them with water and crinkled them in my hands and then set them aside to dry completely. I did this for the leaves too. Once they were all dry, I splattered white paint over them and then glued the layers together. Of course I finished off with some Glitter Sprinkles for flower centers.
It's always a pleasure to be here sharing a project with you - and my love of all things Doodlebug. Until I see you next time - happy crafting! Do something creative every day! XO


.jpg)

.jpg)
.jpg)


.jpg)


