Showing posts with label Altered Project. Show all posts

Wednesday, May 10, 2023

PRETTY KITTY PENCIL HOLDER | with Miguel

We continue this week with more Pretty Kitty projects! I altered a pen holder base using the collection to make a fun desk accessory, and I love the results!


I used the Pretty Kitty Doodle Cuts to create a sofa where a couple of kittens will rest!   I cut several layers of foam to give the 3D effect and create dimension in my project. Cool, don't you think?  I then covered the rest of the container with more patterned papers from the same collection.


The sides of the pencil container were decorated with pieces of gray cardboard that are covered in the patterned papers, as well as the base and the rest of the wooden piece.


And what is better than a Doodle Pop to add a sweet touch to my project!  I also decorated with Odds & Ends and Puffy Stickers.


Here I show you how my creations for the sweet Pretty Kitty Collection look together. It is an explosion of love and cuteness! 


Until next time!


DOODLEBUG PRODUCTS USED

Pretty Kitty Collection
Pretty Kitty Doodle Cut Dies
Doodle Pops

OTHER

Pen Holder
Chipboard

Tuesday, October 11, 2022

MONSTER MADNESS DOODLE POPS DISPLAY CUBE | with Karen

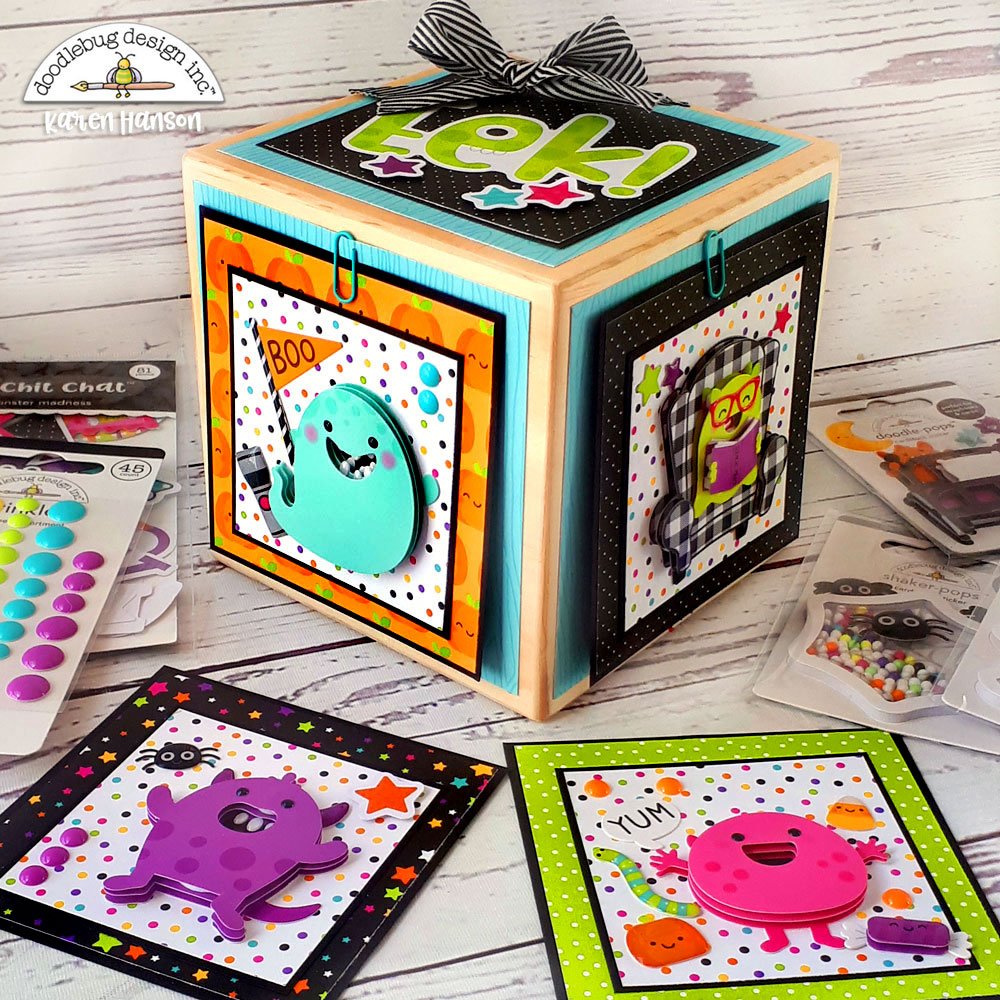
Monster Madness is one of the cutest collections to ever come out of the Doodlebug warehouse. I know I say that all the collections are all cute, but this collection is really something else! And you what tops the cuteness cake (Is there such a thing? There should be such a thing!) are the Doodle Pops in this collection. So I decided that I needed to find a way to showcase them in my house for the season!

Photo-2

I happened to be cleaning my crafting space the other day (it happens infrequently for sure) and I found an awesome little wooden photo cube that I had been saving for the right inspiration. So I decided to create a little 3D display for the Doodle Pops. I first covered each side with some Buffalo Check/Wood grain paper and attached a mini paper clip to the top. I created it this way so I can actually change out the Doodle Pops on the cube depending on the season!

Closeup

I then grabbed some of the 12 x12 paper from the Monster Madness collection and created some layers of pattern fun. Finally, I topped each section off with a Doodle Pop and a few Sprinkle embellishments.

Photo-1

Then I slid each one into place and, voila! A cute little display for all my Doodle Pops. And, if I have crafters remorse for using them, I can just pop them onto another project (or right back into my treasure box full of them! Either way, I love that I have a little display that I can use for any season! I hope you love it as much as I do! Thanks for stopping by!  Hugs,


BLOG | INSTAGRAM

DOODLEBUG DESIGN PRODUCTS
Monster Madness collection
Mini paper clips
Buffalo Check - Wood Grain Petite Prints

OTHER
Adhesive
Black cardstock

Saturday, February 18, 2017

Easter Express Collection: Amazing Door Decor by Jennifer Beason

Hello, Doodlebug friends. Jennifer here and today I'll be sharing a project featuring the new Easter Express collection. I love to create fun and whimsical scenes using Doodlebug stickers and die-cuts. So that's just what I did with this Spring project.
After drawing a pattern for the shape of the wall hanging, I cut it out of 1/4" birch plywood. (If you want to make something similar, but don't feel comfortable using a saw, you can always use layers of thick chipboard or foam board, instead.)
The windmill was drawn, then cut out of chipboard, by hand. I created the windows, door, and blades, using my Silhouette software.  The pieces were then cut out of thin chipboard using my Silhouette. (I layered each piece to get the thickness I wanted.)
After I had my base and windmill pieces cut, I began covering them with patterned paper and cardstock.  As you can see I had fun using shaped sprinkles, doodle pop stickers and die cuts throughout the project. I did cheat a little, by using a few embellishments from the Spring Things collection as well.
To achieve a layered look on some of the die-cuts, like the egg tree and fence I mounted them to chipboard.
A title sticker was used to create a small sign. Again, it was mounted to chipboard then was hung from a wood peg that was attached to the main piece.  Jellybean sprinkles were applied to the sign and I also added some egg die-cuts to the bottom.
Thanks so much for stopping by, everyone. Happy Crafting! Jennifer

Wednesday, March 27, 2013

Take Note Altered Inspiration

Homework Binder
by Tiffany Hood

The Take Note collection has so many images that are perfect for school. I love the ruler patterned paper, and all the cute clipboards.  The colors in this collection are so vibrant and fun!  I used the new Doodle Pops stickers as my inspiration, and adhered them to my project exactly the way they looked in the packaging.  Who wouldn't want a cute bright binder like this to carry to school?


Office Organization Center
by Tya Smith


Take Note Clipboard

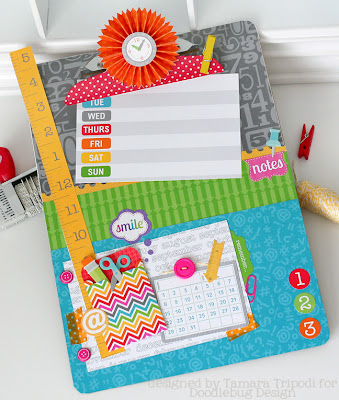
I absolutely LOVE the Take Note collection! As soon as I saw it I started dreaming up all the adorable projects I could make. So, to start it off I have a fun altered clipboard! I REALLY enjoyed making this. The colors and overall design are just so fun!

Take Note Clipboard  by Tamara Tripodi


Frosting Container Pencil Jar

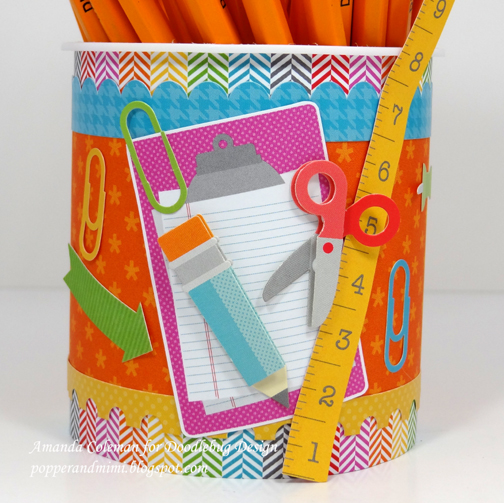
Here's another easy storage solution. I made a cake a while back and thought the frosting container would make a perfect pencil cup. I wrapped the frosting container with a variety of patterned papers and border stickers. Wouldn't this make a delightful teacher gift?


Frosting Container Pencil Jar  by Amanda Coleman
I love the school supply theme of the Take Note collection.  I pulled all sorts of bright school supply elements to embellish the front of the pencil cup. 


I love me some dimensional Doodle-Pops stickers!  Aren't those little scissors the cutest?  Now you have the perfect excuse to go make a cake!  

Thursday, February 21, 2013

Monique is Rockin with the Beatles

Hello Doodlebug fans! Today it's my turn - Monique's - to show you my Beatles (Love) Song Lyrics Project! I've chosen for their song "From Me, To You":

If there's anything that you want,
If there's anything i can do,
Just call on me and I'll send it along
With love from me to you.

I just love that song and knew straight away that this was the song I was going to use! 

Here's the project I made using Doodlebug's Lovebirds collection: 


If you want to see how I created this bouquet, please visit my blog CREATING {NON}SENSE for a step-by-step tutorial. 

Supplies: Doodlebug Lovebirds: Patterned Paper, This& That Cardstock Stickers, Cupcake Doodle Twine, Mini Love Notes, Washi Tape, Mini Doodle-Pops (roses are red); Boutique Brads (love assortment); Braddies (cinnamon hearts and sugar coated hearts). Other: ribbon.

Thank you so much for visiting Doodlebug's blog today and I hope I've inspired you to do some scrapping today!

{ Monique }
Pin It button on image hover