Showing posts with label Box Cards. Show all posts

Monday, October 28, 2024

HEY PUMPKIN KITTY BOX CARDS | with Kathy

My favorite icon in the Hey Pumpkin Collection is of course the adorable black cat!  He looks just like my boy Jax!  So, when I saw the adorable Hey Pumpkin SVG files, I decided to create a couple of box cards featuring that sweet kitty!  Take a peek...

I started with the Hey Pumpkin October Garden Kitty 2 SVG.  The little kitty popping up from behind the pumpkin made me smile!  I cut the pieces from the Hey Pumpkin Coordinating Textured Cardstock and added some Bits & Pieces and Puffy Icons for the florals.  I love that the coordinating cardstock packs have the perfect colors!

I added the hello speech bubble from the Chit Chat pieces using a piece of heavyweight acetate so it looks like it's floating.

My next card features the Hey Pumpkin Pumpkin Kitty SVG.  The little fella in the pumpkin candy pail was too cute to resist!


I added some candy pieces from the Odds & Ends Pack and candy corn from the Puffy Icons.  The sentiment speech bubble is from the Chit Chat pieces.


I created a tutorial a few years ago showing how I convert flat cut files to 3D cards.  You can find that here on the Doodlebug blog. It will give you a general idea on how to create your own box cards featuring Doodlebug's cut files!  That's it for me today, I hope you all have a fun and safe Halloween!


DOODLEBUG PRODUCTS USED

Hey Pumpkin Collection
Hey Pumpkin Coordinating Textured Cardstock

OTHER

Silhouette Cameo

Monday, January 8, 2024

SNOW MUCH FUN BOX CARDS | with Kathy

I always love Doodlebug's winter collections, and Snow Much Fun does not disappoint!  The colors, the critters, and of course... the yeti, all of it is adorable!  And when I saw the coordinating Snow Cute Doodle Cuts, I knew I had to make some fun cards.  Take a peek....


When I saw the "it was love at frost sight" chit chat piece, I thought it would make a cute Valentine's sentiment.  I created 2 bears using the Snow Cute Doodle Cuts and put them in a snowy scene, along with the cute little birdie from the set.


I created a floating heart using a strip of acetate and one of the I Love Snow Shaped Sprinkles.  A fun tip when using the Doodle Cuts... if you want a "mirrored" image like my second bear, all you have to do is cut the bear pieces from the "wrong side" of your paper.


I finished the card with some Puffy Icon Snowflakes and some more Sprinkle hearts.  The bow on the bear's ear is from the Christmas Cocoa Doodle Cuts.

For my next card, I decided I wanted to use all of the other adorable critters in the Snow Cute  Doodle Cuts Set.  I looked through the Chit Chat pieces and found the "hello there" banner and thought it would be fun to create a just because card.

I created another fun snow scene, this time with some water for the adorable seal.  I cut all of the critters from the Snow Much Fun Coordinating Textured Cardstock pack.  I love Doodlebug cardstock, not only does it cut like a dream, but the colors coordinate perfectly with the collections!  I'm not sure which critter is my favorite, but it just might be that waving yeti!  How about you??  What is your favorite?


I can already tell that I'm going to be using these dies again and again! Be sure to stop by all this month for more Snow Much Fun inspiration from the Design Team.  And if you create any projects using the collection, be sure to tag Doodlebug on socials, we love to see your work!  That's it for me today, thanks for stopping by to peek.


DOODLEBUG PRODUCTS USED

Snow Much Fun Collection
Snow Cute Doodle Cuts
Christmas Cocoa Doodle Cuts
Snow Much Fun Coordinating Textured Cardstock

OTHER

Box Card Dies
Acetate


Monday, April 24, 2023

PRETTY KITTY COZY KITTIES BOX CARD TUTORIAL | with Kathy

I am so excited for the Pretty Kitty Collection!  I have always had kitties... and currently I'm cat mom to two fuzzbutts... Rosie & Jax.  I fell in love with the new Cozy Kitties Doodle Cuts and decided to make a 3D Box card using them well because kitties and I love making 3D cards!.  Take a peek...


How cute are those kitties!!!!  I used papers from the Pretty Kitty collection to make the chairs, along with some of the new Candy Stripe - Sprinkles Petite Prints for my kitties.  The sentiments were made with my Silhouette, I created a print and cut file for the word bubbles. I wanted customized sayings, but there are also lots of fun speech bubbles and sentiments in the Chit Chat pieces!  Here are some close ups....


Who can resist a punny sentiment... not me! The cute little mouse toy is from the Icon stickers sheet.  These cards also fold flat for mailing...


And for all those cat-moms out there... the purrfect Mother's Day Card!  These really were fun to make!  I've outlined the steps I used below....

I started by cutting three of the big chair pieces, eight of the chair leg pieces, the cushion piece, and the arms of the chair.  I also cut two strips... one measuring 7/8" x 7" and the second 7/8" x 3.25"

Next I created the chair legs.  For each let, I glued 2 of the legs together, right sides out.  I did this to give them a little more strength.

Glue two of the doubled chair legs to the wrong side of one of the chairs.  I aligned the top of the chair leg with the center of the chair bottom.  Then glue another of the chair pieces to this, right sides together.  This gives the card a stronger base and a more finished look.

Next, take the last chair piece and cut it as shown.  I measured approximately 1 1/4" from the bottom of the chair.  You can discard the topmost part of the chair.


Glue the remaining legs to the "wrong" side of the chair, aligning them as you did on the other side.  Let them dry.
Turn that piece over, and add the chair cushion, centered, and aligned with the top side.  I used pop dots for this to give it a bit more dimension.
Add the chair arms as shown.  Again, I used pop dots to add these.
Next, I worked on the "box" part of the card.  First, score the longer strip of paper at 2 1/4", 3 1/4", 5 1/2", and 6 1/2".  Fold along the score lines (all in the same direction and create a little box.  Glue in place using the tab.
Score the 3 1/4" piece at 1/2" and at 2 3/4"

Insert the smaller piece into the box you created, gluing the tabs of the insert to the inside walls of the box.  
Glue the front of the chair you created to the longer side of the box, aligning the top of the box with the chair cushion.
Finally glue the back of the chair to the opposite side, making sure that everything is straight.  

Now all that is left is to choose which kitties you want to piece together, and to glue them to the insert inside the box!

If you make any of these, please tag both Doodlebug Design and me (@kathy_skou) I would love to see your creations!!  That's it for me today, thanks for stopping by to peek!


DOODLEBUG PRODUCTS USED

Pretty Kitty Collection
Cozy Kitties Doodle Cuts
Candy Stripe - Sprinkles Petite Prints 6x6 Pad
Buffalo Check Woodgrain Petite Prints

OTHER

Sizzix Big Shot
Silhouette Cameo
Adhesive
Pop-Dots


Monday, November 28, 2022

FARMERS MARKET BOX CARDS | with Kathy

I hope all of our followers had a wonderful Thanksgiving break!  Personally, I ate too much and spent too much on my holiday shopping, but it was wonderful to have family home!  I also got some time in the craft room to play some more with the Farmers Market Collection.  I was picking through the adorable Odds & Ends and found the cutest little paper bag full of veggies, and I thought it would make a cute 3D Box Card.  I came up with two different versions... take a peek...


For my first card, I used the floral pieces from the Bits & Pieces pack to fill my bag.  For the base of my card, I altered this file from Lori Whitlock.  I added handles and my own inserts, and lots and lots of flowers!  I layered many and added some foam dots for more dimension. 


To finish it, I added a Chit Chat sentiment and some of the Honey Bees and Fall Flowers Shaped Sprinkles.  


My next card was made to resemble the cute paper bag of veggies from the Odds & Ends pack.  I used the same base file for the bag, and then chose the cutest of the veggies to add to my card. 


To complete, I added the Hello sign from the Chit Chat pieces.  How fun are those little smiles?


That's it for me today, thanks for stopping by to peek!


DOODLEBUG PRODUCTS USED
Farmers Market Collection
Linen Gingham Petite Prints

OTHER
Box Card Shopping Bag SVG
Silhouette Cameo
Pop Dots
Adhesive


Monday, August 8, 2022

SEASIDE SUMMER STAMPED BOX CARDS | with Kathy

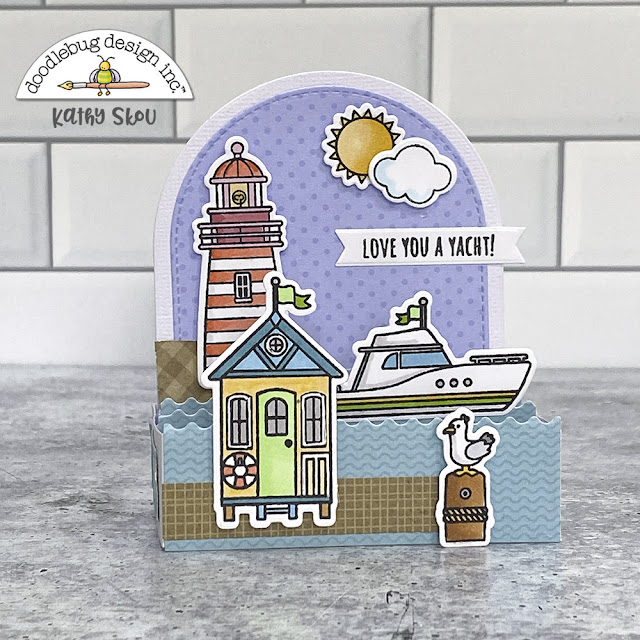
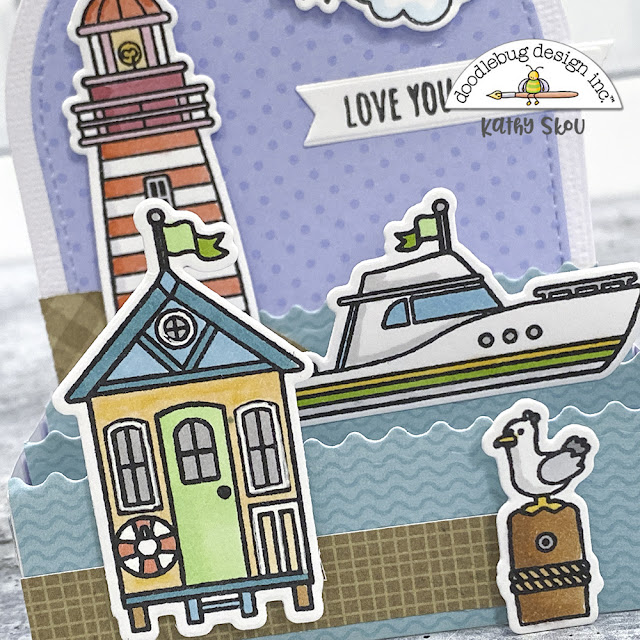
Ok, I know I've said this before, but this time I really mean it.  The new Seaside Summer Collection is my all time favorite Doodlebug Collection!  The colors, the sea critters, the houses and light houses... everything is simply adorable!  I decided to play with the new Seaside Summer and Sea life Doodle Stamps and made a couple of fun box cards.  Take a peek...

My first card uses mostly the Seaside Summer Stamps.  We just purchased a new boat so these stamps were perfect!  The light house, the cute little beach house.. and of course a design team favorite Steven Seagull... all remind me of our marina!


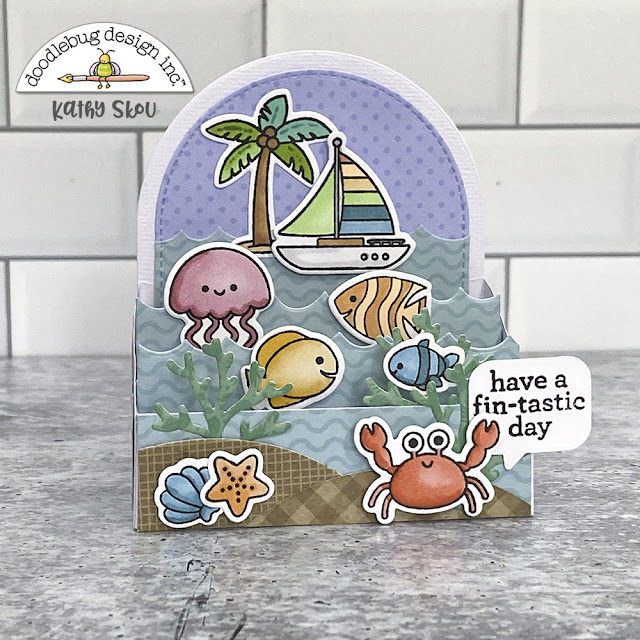
My next card used the new Sea Life Stamps.  I love the sea critters!  And the coordinating Doodle Cuts also come with a bonus seaweed die which is great for scene-making.


That crab... I'm dying.  He's so stinking cute!  Have you made any cards or projects using the new Seaside summer collection?    Make sure to tag Doodlebug Design on Facebook & Instagram, we always love to see what you create.  That's it for me to today, thanks for stopping by to peek.


DOODLEBUG PRODUCTS USED

Seaside Summer Collection
Seaside Summer Doodle Stamps & Doodle Cuts
Sea Life Doodle Stamps & Doodle Cuts
Dot Stripe Petite Prints
Gingham Linen Petite Prints

OTHER

Copic Markers
Box Card Dies
Banner Die
Speech Bubble die


Monday, January 10, 2022

LET IT SNOW ARCTIC FRIEND BOX CARDS | with Kathy

Winter is here in the Northeast!  I have a couple of friends celebrating birthdays this month, so I thought I'd use the Let it Snow Collection along with the Arctic Friends Doodle Stamps to make some fun box cards!


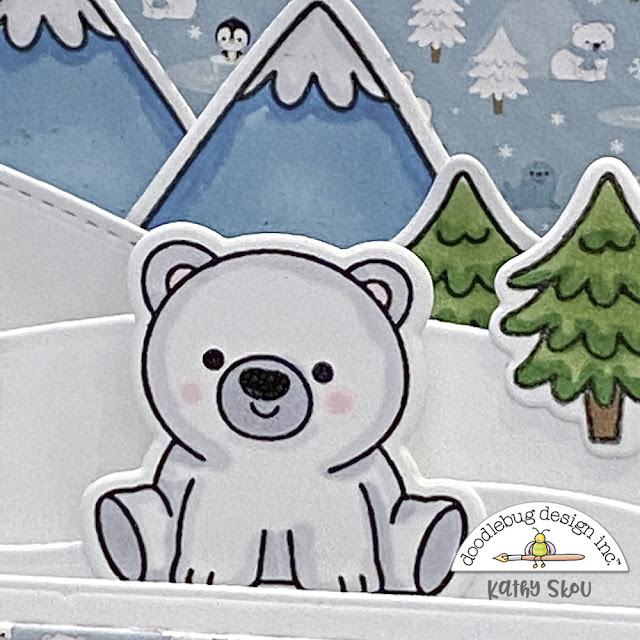
I love making dimensional scenes in my box cards.  For my first card, I created the card base using dies from my stash.  I then added adorable little polar bear from the Arctic Friends Doodle Stamps, a few trees from the Winter Wonderland Doodle Stamps and the mountains from the Great Outdoors Set.  The sentiment is from the Arctic Friends set, and is perfect for my friend's birthday!


For my next card, I stamped and colored the cute little sea creatures in the Arctic Friends Set.  They are all so cute, but I do think that little Narwhal is my favorite!  I added them to some snow mounds and waves along with the fishies!


These stamps are just perfect for winter cardmaking, and I love that the Let it Snow Collection can be used for more than just the holidays!  Have you made any projects using the Let it Snow Collection, or the new Arctic Friends Stamps?  Be sure to tag Doodlebug Design on Facebook and Instagram, we always love to see what you create!  That's it for me today, thanks for stopping by to peek!


DOODLEBUG PRODUCTS USED
Let it Snow Collection
Arctic Friends Doodle Stamps & Doodle Cuts
Winter Wonderland Doodle Stamps & Doodle Cuts
Great Outdoors Doodle Stamps & Doodle Cuts

OTHER PRODUCTS

Mini Slimline Outside the Box Level Up Die
Copic Markers
Sizzix Big Shot


Monday, October 4, 2021

HAPPY HAUNTING BOX CARDS | with Kathy

I have always loved Halloween... the costumes, the decorations... and let's face it... the candy!  Doodlebug's Halloween Collections have always been among my favorites... and Happy Haunting does not disappoint!  As soon as I saw all the fun patterns and icons, I knew I wanted to make some box cards with scenes featuring all the cute characters!  Take a peek...


One of my favorite things in Happy Haunting is the new Bits & Pieces Pack.  Not only does it have some fun tabs and tags, but it also has a lot of spooky trees and tombstones.  I made these the focus of my first card.  I created a creepy cemetery and of course I could not resist the skeleton hand from the Odds & Ends pack!  I finished it off with a cute owl from the Icon Minis.


My next card features my favorite icon... the little black kitty from the Odds & Ends Pack.  He's hanging out in the pumpkin patch.  There are so many cute jack-o-lanterns in the Odds & Ends pack it was hard to choose!


My last card features on of the many haunted houses in the Odds & Ends pack along with a cute ghost and a spooky tree from the Bits & Pieces.  The acetate fence is from the Odds & Ends pack.  There's a bunch of acetate pieces, they are fun to use!


Have you made anything with the Happy Haunting Collection?  Be sure to tag Doodlebug Design on Facebook & Instagram.  We always love to see your creations.  Be sure to stop by the blog all month long for more Happy Haunting!  That's it for me today, thanks for stopping by to peek!

DOODLEBUG PRODUCTS USED
Happy Haunting Collection
Petite Prints

OTHER
Box Card Dies
Sizzix

Monday, April 5, 2021

FAIRY GARDEN BOX CARDS | with Kathy

I am so excited to be kicking off a few weeks of Fairy Garden inspiration!  As soon as I saw this collection, I fell in love with all of the adorable little icons... the fairies, the mushrooms... and all of those cute little bugs!!  I've always said... only Doodlebug can make a cute bug!  Along with some of the papers in the collection, I decided to use the new Fairy Garden and Bugs & Kisses Doodle Stamps to make some fun box cards. Take a peek...


As I mentioned... I just love the little bugs in the Bugs & Kisses Doodle Stamps!  I decided to make a card featuring them in a meadow.  The flower and mushroom stamps made it easy to create a sweet little scene!  I used some Gingham Linen Petite Prints for the grass and the clouds side of the Glow Bugs Paper for my background.  I will be stocking up on this paper... it's perfect for creating scenes and making backgrounds!


Here's a close up of those cute little critters!


Just as the bugs love hanging in the meadow, I though those adorable little Fairies from the Fairy Garden Doodle Stamps would love hanging out in the clouds!  I created this fun card featuring them floating about.  The sun stamp is from the Hippity Hoppity Doodle Stamps.


How cute are those fairies??!!  I already have more cards planned using both of these Doodle Stamp Sets... they are absolutely adorable!  Have you created any projects using the Fairy Garden Collection and Doodle Stamps? Be sure to tag Doodlebug Design on Facebook and Instagram, we love to see your projects!  Also, be sure to stop by the blog over the next couple of weeks for more Fairy Garden inspiration.  That's it for me today, thanks for stopping by to peek!


DOODLEBUG PRODUCTS USED
Fairy Garden Collection
Fairy Garden Doodle Stamps/Doodle Cuts
Bugs & Kisses Doodle Stamps/Doodle Cuts
Hippity Hoppity Doodle Stamps/Cuts

OTHER
Copic Markers
Sizzix Big Shot
Outside the Box Level Up Dies
Tumbled Glass Distress Ink
White Cardstock


Pin It button on image hover