Showing posts with label Christmas Magic. Show all posts

Sunday, December 22, 2019

CHRISTMAS MAGIC MUG BOX CARD | with Kathy

I was very excited to see that the new Christmas Magic Cut Files were available in the Lori Whitlock SVG Shop!  Of course I had to play right away... I designed this box card using one of the files... take a peek...


I just love that little gingerbread man!  Now for the fun part!  This card is available exclusively in the Lori Whitlock SVG Shop here!  Following is the tutorial to assemble the card.
1)  These are the pieces that come with the file.
2)  First assemble the goodies... glue the stripes on the candy canes, the tops on the pink candies and piece the gingerbread man together.
3)  Add the candies to the center insert.  The outlines are there to guide placement.
4)  A little note on adding tiny pieces... and pieces that need particular placement.  When I cut the stripes for the candy cane, I left them in "order."  I then used the negative to help with the stripe placement.  Another helpful hint... I use a "pick-me-up" tool to help place small pieces.  It has a slightly sticky end that holds on the piece so you can more easily place it.
5)  Add the strips to the tops of both mugs to make the "lip" of the mug.
6)  Fold the 2 side pieces along the score lines.
7)  Attach the sides to one of the mug pieces.  They should be flush with the top of the mug.
8)  Glue the other side of the mug to the other tabs on the sides.

9)  Fold the tabs on the center insert so they go backward.  Add some adhesive to just the tabs.
10)  Slide the insert piece into the mug.  The bottom of the insert should be level with the bottom of the mug front and back,  and the tabs should just touch the back of the back mug.  Press the tabs to the side pieces to keep in place.
11)  The complete mug!

I embellished my mug a bit more using some shaped sprinkles and a sentiment from the Christmas Magic Chit Chat pieces.  The mug folds flat for mailing too!  If you make one, be sure to tag Doodlebug Design on Facebook and Instagram!  We would love to see what you make!  That's it for me today, thanks for stopping by to peek!


Doodlebug Products Used:
Christmas Magic Collection
Dot Stripe Petite Prints Collection
Other:  Electronic Cutting Machine

Sunday, December 15, 2019

CHRISTMAS MAGIC MICRO NOTES | with Jomelle

I can't seem to stay away from Micro Notes. You can't go wrong with anything mini. They are just so adorable. Mini Notes are also perfect for gifts this coming Holiday. I'm sure whoever receives this kind of present will be thrilled.
Micro Notes can be use for anything you want. It can be used for memory keeping, journal, diary, December Daily, jotting notes or even grocery shopping list. The Micro Notes is so small that it can be your every day carry and easy to put inside your purse.
 I started to fill my Micro Notes with embellishments and decorations. I can add photos, journals and memorabilia later on.
 I am obsessed with the tags that I cut out from the 12x12 card stock. They are so fun and so easy to use. I added twines and just stick them inside for journal in the back side of it.
 I created this flip page to add dimension to my notes. I added holes so that it can be folded and have it close. All I did to create this was I cut out the card stock which is double the size of the micro insert so that it can be folded in half. 
 More pages with tags on one side.
 I used this adhesive square label pockets that I bought from Target Dollar Spot. I cut it in half and added them to my Micro Notes to hold the tags. 
 I just love how the back side of these tags have plenty of room for photos and or journal. I'm going to need to stock up on these adhesive labels because they can be used on any memory keeping albums.

I can't wait to make this super chunky by adding more pages, photos, and journals. Thank you for stopping by and I hope you were inspired to create one.

Saturday, December 14, 2019

CHRISTMAS MAGIC | with Guest Designer Sophie Delorme


"I'm Sophie Delorme, a French Canadian girl living in Quebec!
I work as an endocrinologist in Montreal and am the mother of two beautiful kids, Sabrina and Gabriel. Oh, and we also have a sweet dog named Fiona, which is very often on my photos!
I started scrapbooking nearly 15 years ago and have been hooked since day one! I  mostly do 12x12 layouts and LOVE to play with patterned papers, punches, cut files, mixed media products and embellishments! 
I feel so honored to be guest designing this month for Doodlebug! Their bright colored collections and oh so cute embellishments are absolute delights to play with!"

MAGICAL CHRISTMAS TRADITIONS | LAYOUT
By Sophie Delorme

This is the first layout I created with the gorgeous Christmas Magic collection.

I started by cutting triangles in different sizes from the patterned papers and built a Christmas tree as the major focus on the left side of my page. I added plenty of little notes that came from the die cut cardstock pieces and put them on the Christmas tree in a tone-on-tone manner. My title comes from the die cuts and beautiful presents from the cardstock stickers and one Doodle-Pop Dimensional Sticker.

I applied watercolor paint behind and around my photo and a few splatters on white cardstock as my base. Then, I embellished with some other Christmas tree die cuts and beautiful presents from the Cardstock stickers and one Doodle-pop Dimensional sticker.

Finally, I cut a stripe of my white background to show a little bit of the "Deck-The-Halls" patterned paper, machine-stitched on two sides of my page with pink thread and teared a part of my white cardstock to bring out a few other embellishments.
SEASONS GREETINGS | LAYOUT
By Sophie Delorme

My second layout shows some funny selfies of me and my daughter Sabrina, laughing together next to our Christmas tree. I started by tearing a big chunk of the beautiful Christmas Magic Visions Of Sugarplums patterned paper for the upper side of my page, and did a little bit of mixed media on my white cardstock under it. I used a cut file called “Awning” from the Cream & Sugar Doodlebug Collection on red and white cardstock, slightly curled up the edges and hand-stitched between the cut file and a stripe of the Berry Merry patterned paper on top of my page.


I used a cut file called “Awning” from the Cream & Sugar Doodlebug Collection on red and white cardstock, slightly curled up the edges and hand-stitched between the cut file and a stripe of the Berry Merry patterned paper on top of my page. I cut out three tags from the Christmas Tag paper and tucked them behind my photos, adding a red bow to each of them. My title comes from the Chit Chat Die cut cardstock pieces. I added a few hearts around my photos and three Christmas ornaments from the Doodle-Pops Deck the Hall Cardstock Stickers. I totally love the result of those tags and the striped awning on my page!

I also did a little cluster on embellishments on the right lower side of my page where I put the Candy Stripe Washi tape and plenty of beautiful cardstock stickers and die cut pieces.

I'VE BEEN GOOD, I'VE BEEN NAUGHY | LAYOUT
By Sophie Delorme

My third layout is clean and simple, although so cute, with my daughter and our dog playing in the snow! I started with a white background (which I usually do, as you can see !) as my base.

I cut a vertical stripe of the Jolly St. Nick patterned paper for the left side of my page. I stuck a blue scalloped border (This and That 12 x 12 Cardstock stickers) on it, as well as a stripe of the Candy Stripe Washi tape. I also punched a bow from that beautiful washi tape that I first stuck on white cardstock. My goodness, how cute is this??!? Then, I painted a part of my background with blue, green and pink watercolor, mimicking a small snow bank, and added white splatters with acrylic paint.

I used a cut file called “A Tree With Snow” from the Christmas Town Doodlebug collection (so gorgeous again !) and put some other cute Christmas trees around my photo from the Die Cut Cardstock Pieces.

I stuck speech bubbles on my photo and attached a beautiful banner from the Chit Chat Die Cut Cardstock pieces on the top of the layout. I also glued the die cut “A Christmas to remember” on a sticker wreath and stamped the year 2019 on it.

Finally, I wrote my journaling and added plenty of enamel shapes from the Shape Sprinkles Holly and Pine here and there on my page.

MERRY CHRISTMAS | LAYOUT
By Sophie Delorme

And now, here is my fourth layout playing with this magical collection ! It features Sabrina baking cookies, a precious Christmas tradition in our family! I cut out about half an inch of my white cardstock and framed it on the yellow Christmas Magic patterned paper and on brown cardstock, stitching around it with white thread.


I punched big hearts with my heart punch in the various patterned papers and arranged them in three rows. I stitched around each heart with matching color thread and slightly distressed the edges. I added a bit of watercolor under each heart in the same color scheme and backed all the hearts with foam adhesive to give my layout more dimension. I had to use the cute gingerbread cookies for that cookie-themed layout! They are from the Odds and Ends Die Cut Cardstock pieces. I created a little banner with them on the top right side of my page.

My title and the speech bubbles are from the Chit Chat Die Cut Cardstock Pieces. I finished my layout by adding a cluster of embellishments on the bottom of my page and a few scattered candies and enamel shapes around my page.


I truly love the end-result of those pages. I hope you do too and that it will inspire you to get crafty with all the cuteness included in the Doodlebug collections!

Thank you so much to Doodlebug for inviting me to be guest designing this month and giving me the privilege to share my layouts with you! -Sophie

Friday, December 13, 2019

CHRISTMAS MAGIC EMERY BOARD SLEEVES | with Shellye

Need a last minute teacher or co-worker gift? Or just something to have on hand for those unexpected Christmastime visitors? These adorable emery board sleeves are a breeze to create and everyone loves receiving them!

To begin I started with various double-sided patterned paper strips that measured 1.25" X 12".  Before scoring, think about how the print will be facing when the bottom flap is turned up.  Next I scored each of the short sides approximately 1/8" from the edge.  Depending on the width of your emery board, you may need to may adjustments; I always create a template first before cutting "good" paper LOL!
Next I turned the paper and scored at 7 3/8" and 7.5" and then folded along all of the score lines.  The shortest end will be the part that flips up to make the front cover.


Once the bottom flap was folded up, I used it as a guide to trim away the excess side pieces for the back (see above).  Finally, all of the sides were assembled as you would create a box...this is where 1/8" tape comes in handy!
Finally I stamped, colored and cut images from the Doodle Stamp Sets and layered them onto die-cut circles and scalloped shapes.  A few "sprinkles" and ribbon and they're ready for gifting!


I wanted something cute to deliver my gifts in, so I whipped up this quick little clear bag using a dollar store envelope file that I cut in half.  I machine-stitched around the perimeter, crafted a quick tag and then attached a couple of paper handles with brads!  Now I'm ready to HO HO HO :)
Thank you for joining me today!

DOODLEBUG PRODUCTS USED:
Christmas Magic Collection Kit
Christmas Magic 6X6 Paper Pad
Doodle Pops
Doodle Twine
Ladybug Chunky Brads
Here Comes Santa Labels & Tags
Ladybug Sugar Coated Cardstock
Leapfrog Sugar Coated Cardstock
Rainbow Hearts Shaped Sprinkles
Jolly Holidays Sprinkles
Doodle Stamps & Dies

Thursday, December 12, 2019

CHRISTMAS MAGIC LAYOUT | with Tegan

I couldn't wait to play with the Doodlebug Design Christmas Magic Present Cut File when I first saw it. And of course I paired it with the Christmas Magic collection, which was perfect for documenting a couple photos from our Christmastime trip to Disney World. I had so much fun creating this colorful page! 
I started by using one of my favorite papers from this collection, Plaidsome Tidings, for my background. I used the adorable Boughs of Holly Washi Tape to make a festive border around my white background. I then used the cute Doodlebug Design Christmas Magic Present Cut File and Doodlebug cardstock to cut out presents in coordinating colors. 
I embellished the presents with Odds & Ends pieces, This & That Stickers, Chit Chat pieces, and epoxy stickers. ​


I embellished these other presents with Mini Icons Stickers, epoxy stickers, and Odds & Ends die cut shapes. I then used a die cut from the Chit Chat pack for a quick page title and embellished it with Teensy Type alphabet stickers and an epoxy candy cane sticker. 

​I love how well the Doodlebug Design cardstock works with my electronic die cut machine. It cuts so smoothly and doesn't tear or rip like some other cardstocks do! And I just love the rainbow of Christmas presents on this page! I can't decide which one is my favorite, can you?! 
​ Thanks for joining me today! I hope I have inspired you to grab some of the Christmas Magic collection and (if you have a die cut machine) the Christmas Present Cut File and create your own rainbow of presents!

​​BLOG | INSTAGRAM | FACEBOOK​​​

Doodlebug Design Product Used
​ Christmas Magic Collection
​ Cardstock: Raspberry, Ruby, Bumblebee, Limeade, Sea Glass, Bon Bon
​ Alphabet Sticker: Teensy Type in Swimming Pool
​ Doodle Twine in Swimming Pool

Wednesday, December 11, 2019

CHRISTMAS MAGIC TAGS | with Karen

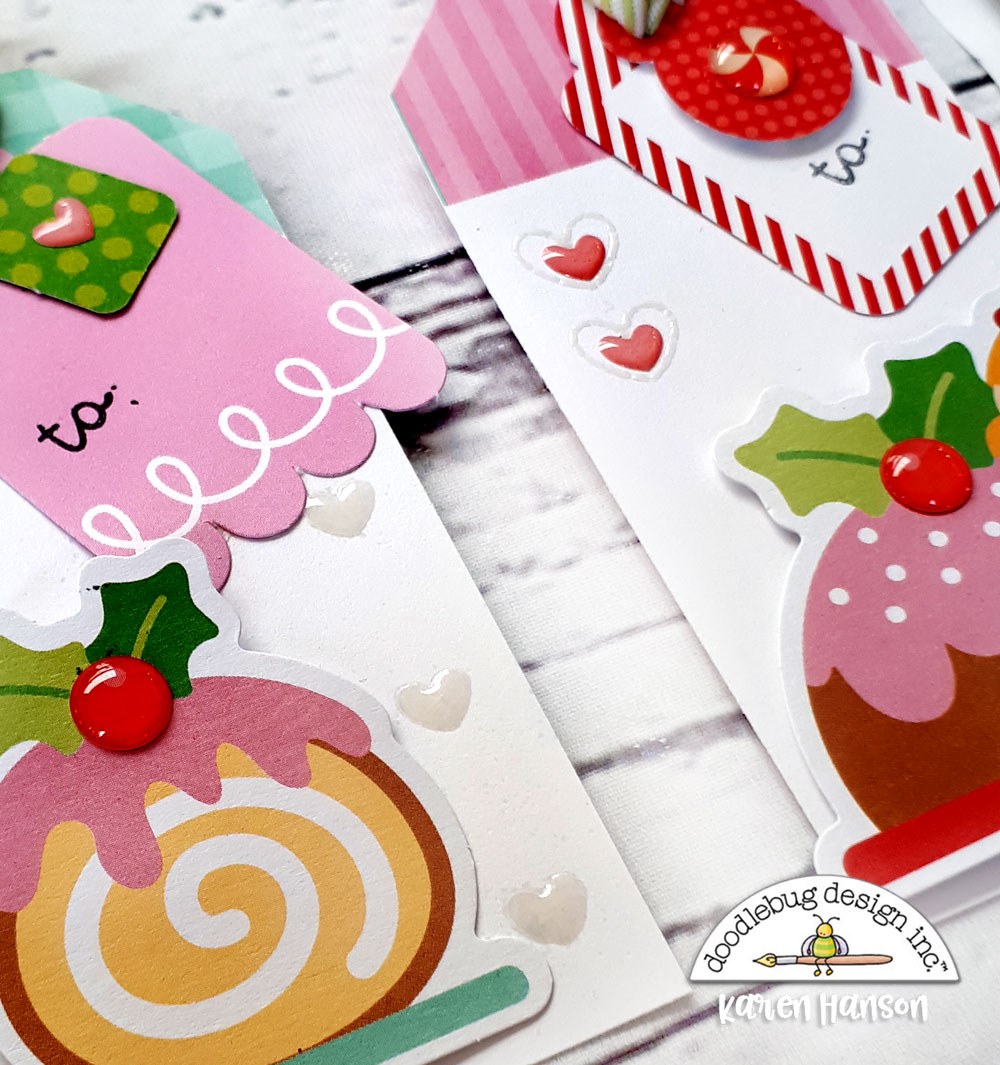
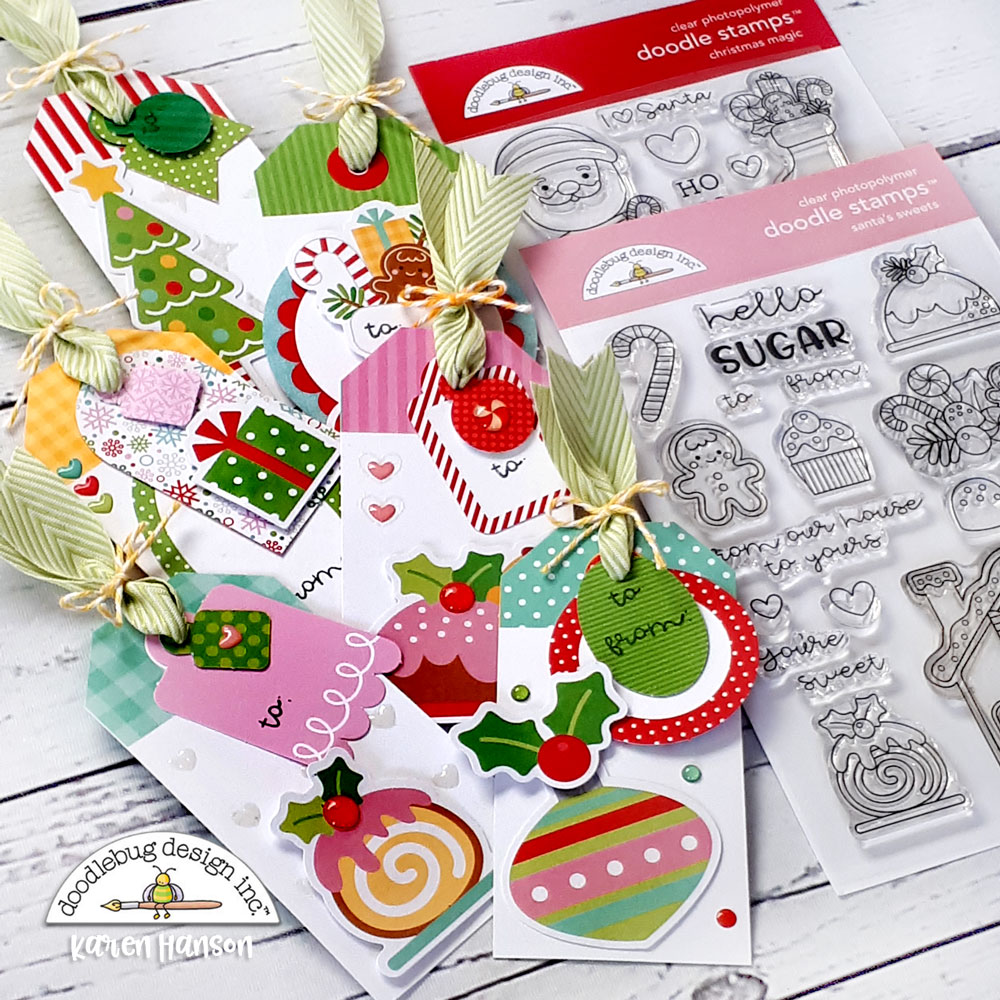
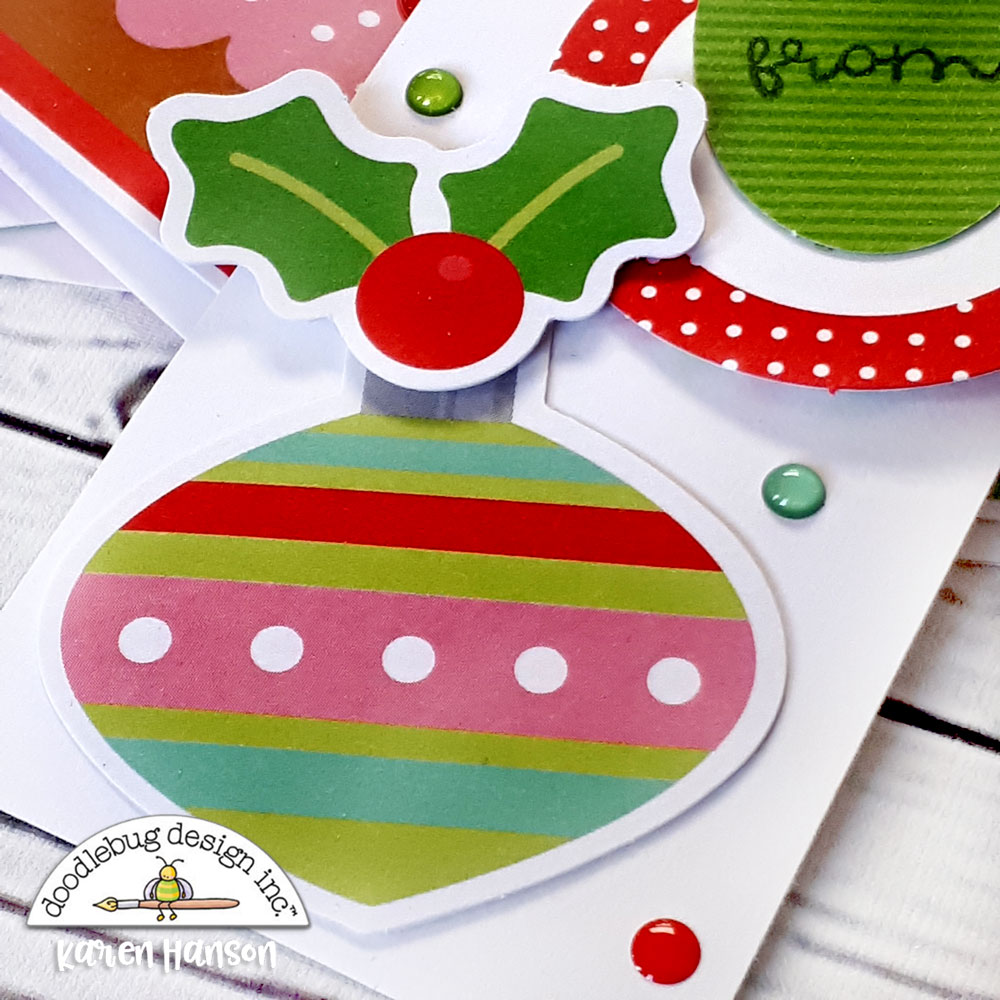
One of my very favourite Doodlebug products has always been the Odds and Ends packs of die cuts. Whenever I need a hit of Doodlebug cuteness but don't have a lot of time to pull together a project, the Odds and Ends packs are my "go to" product. So, when I decided to pull a set of gift tags together inspired by one of the 12x12 sheets of paper in the collection and the adorable package of tags that coordinate with the collection, I knew that the Odds and Ends die cuts were going to take centre stage! This Christmas Magic packs is filled will all sorts of adorable shapes and characters that mix and match like a charm. The perfect size for these tags, they layer like a dream and you can create all sorts of fun dimension on your projects. For this little ornament, I simply placed the holly die cut on the top, adhering with an adhesive dot to lift it up off the ornament.
And will all sorts of coordinating products like the adorable Mini Heart Sprinkles, adding dimension in other ways is as fun as adding sprinkles to cupcakes!
And let's be real - if you follow my love of Doodlebug, you will know that I am obsessed with Doodle Stamps, so this project just wouldn't feel complete for me without a bit of stamping magic! I simply used the small heart shape stamps together with some white ink and embossing powder to add a bit of dimension to the background of some of the tags and to frame some of the Heart Sprinkles. It's a hint of Doodle stamping without the pressure of coluring! And with fun little sentiments in both the Christmas magic and Santa's Sweets sets, your will have a set of adorable tags in no time at all! So, with so many amazing Doodlebug products, don't forget about the Odds and Ends packs! They really are a Doodlebug treasure!
Thanks for stopping by!
Hugs,

Doodlebug Products Used:Christmas Magic collection
Christmas Magic Doodle Stamps & Cuts
Santa's Sweets Doodle Stamps & Cuts
Doodle Twine
Other products:
Adhesive, Ribbon
Pin It button on image hover