Showing posts with label Hey Cupcake. Show all posts

Monday, January 29, 2024

INTRODUCING NEW KITS | Win It Before You Can Buy It

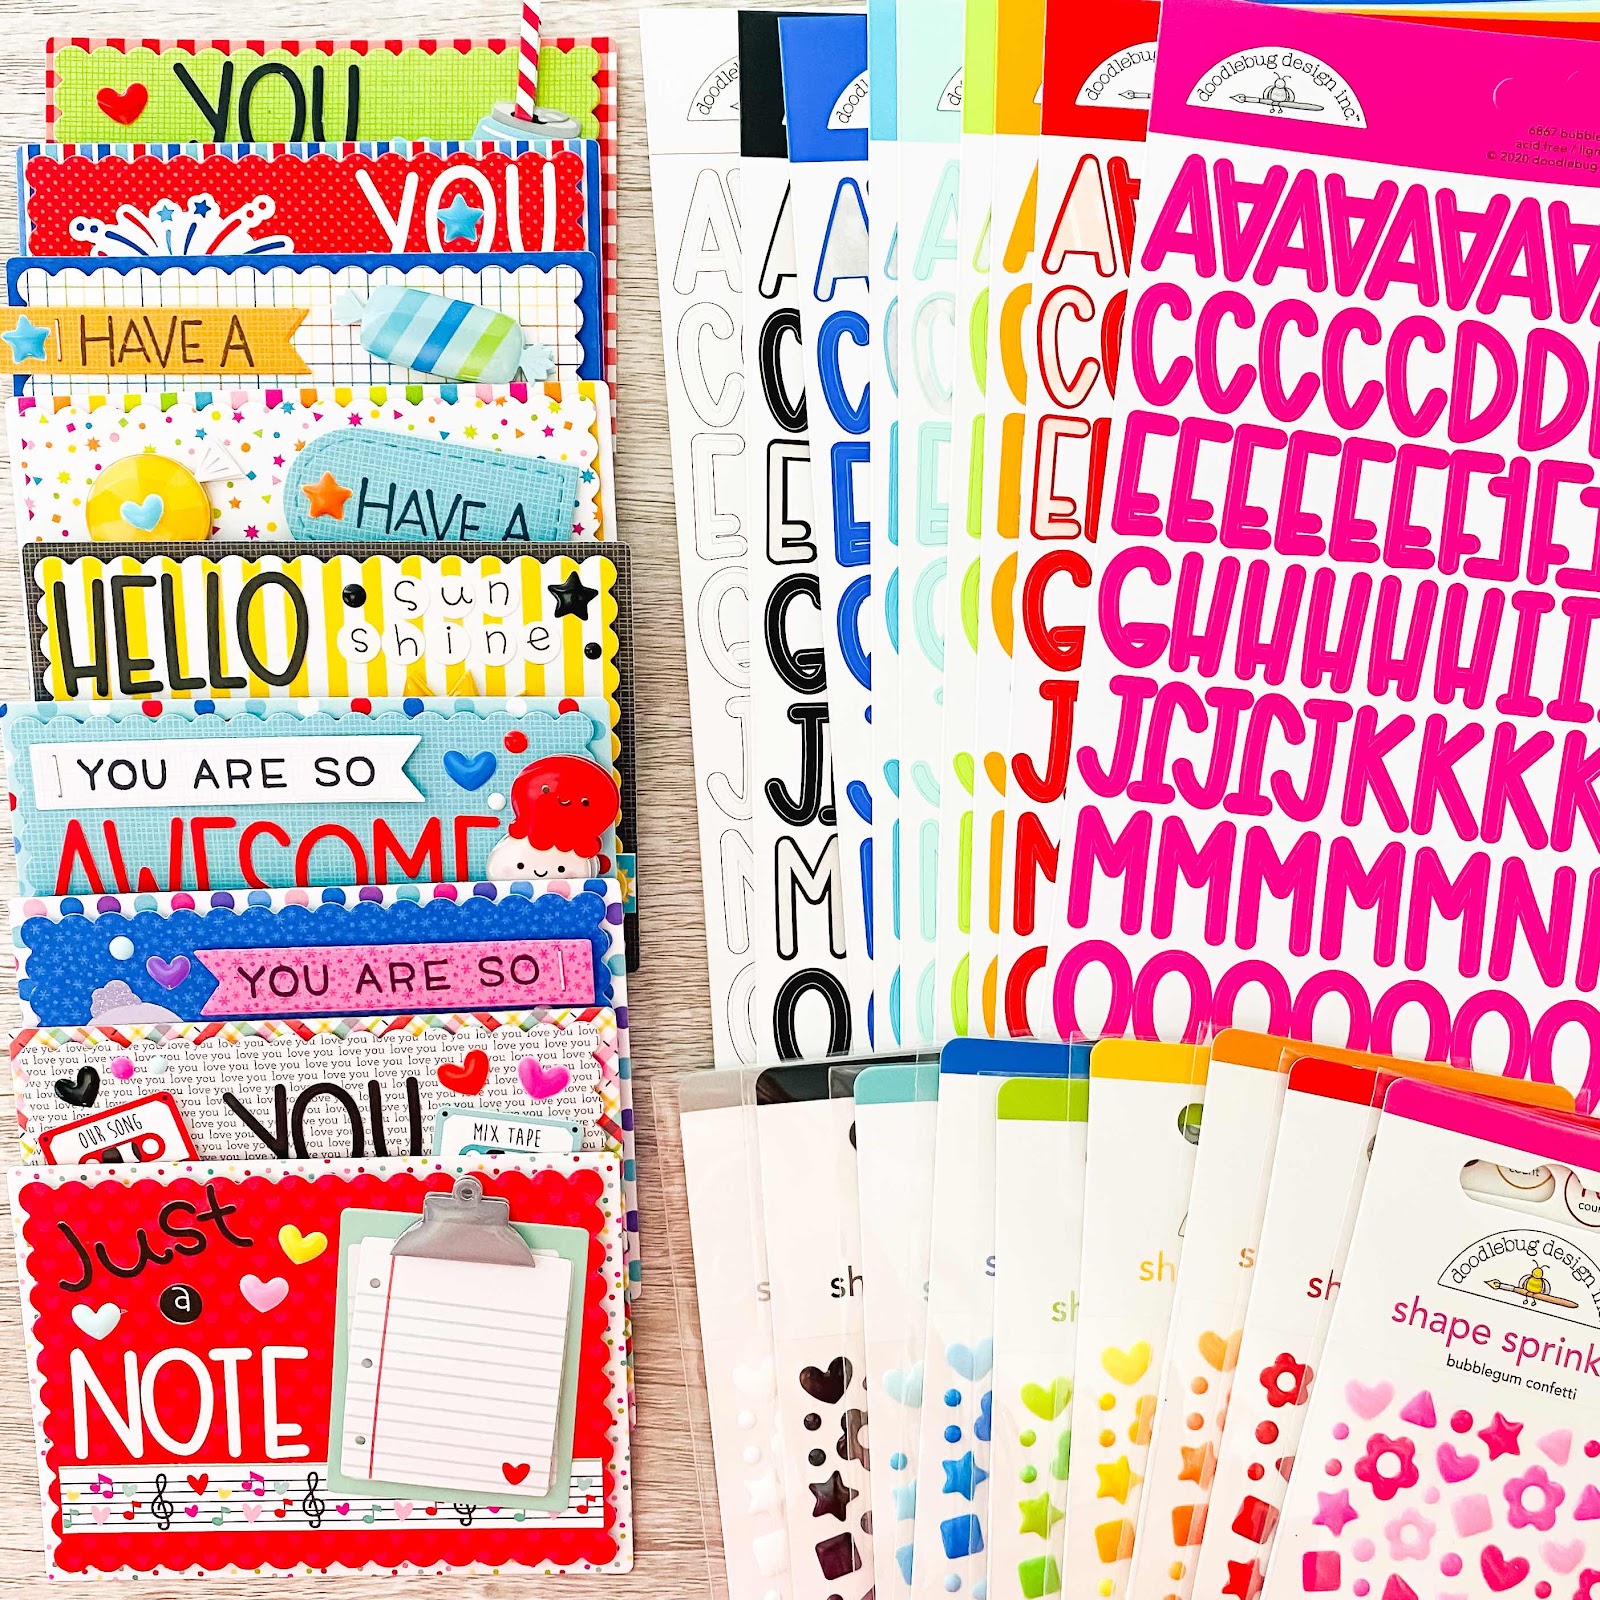
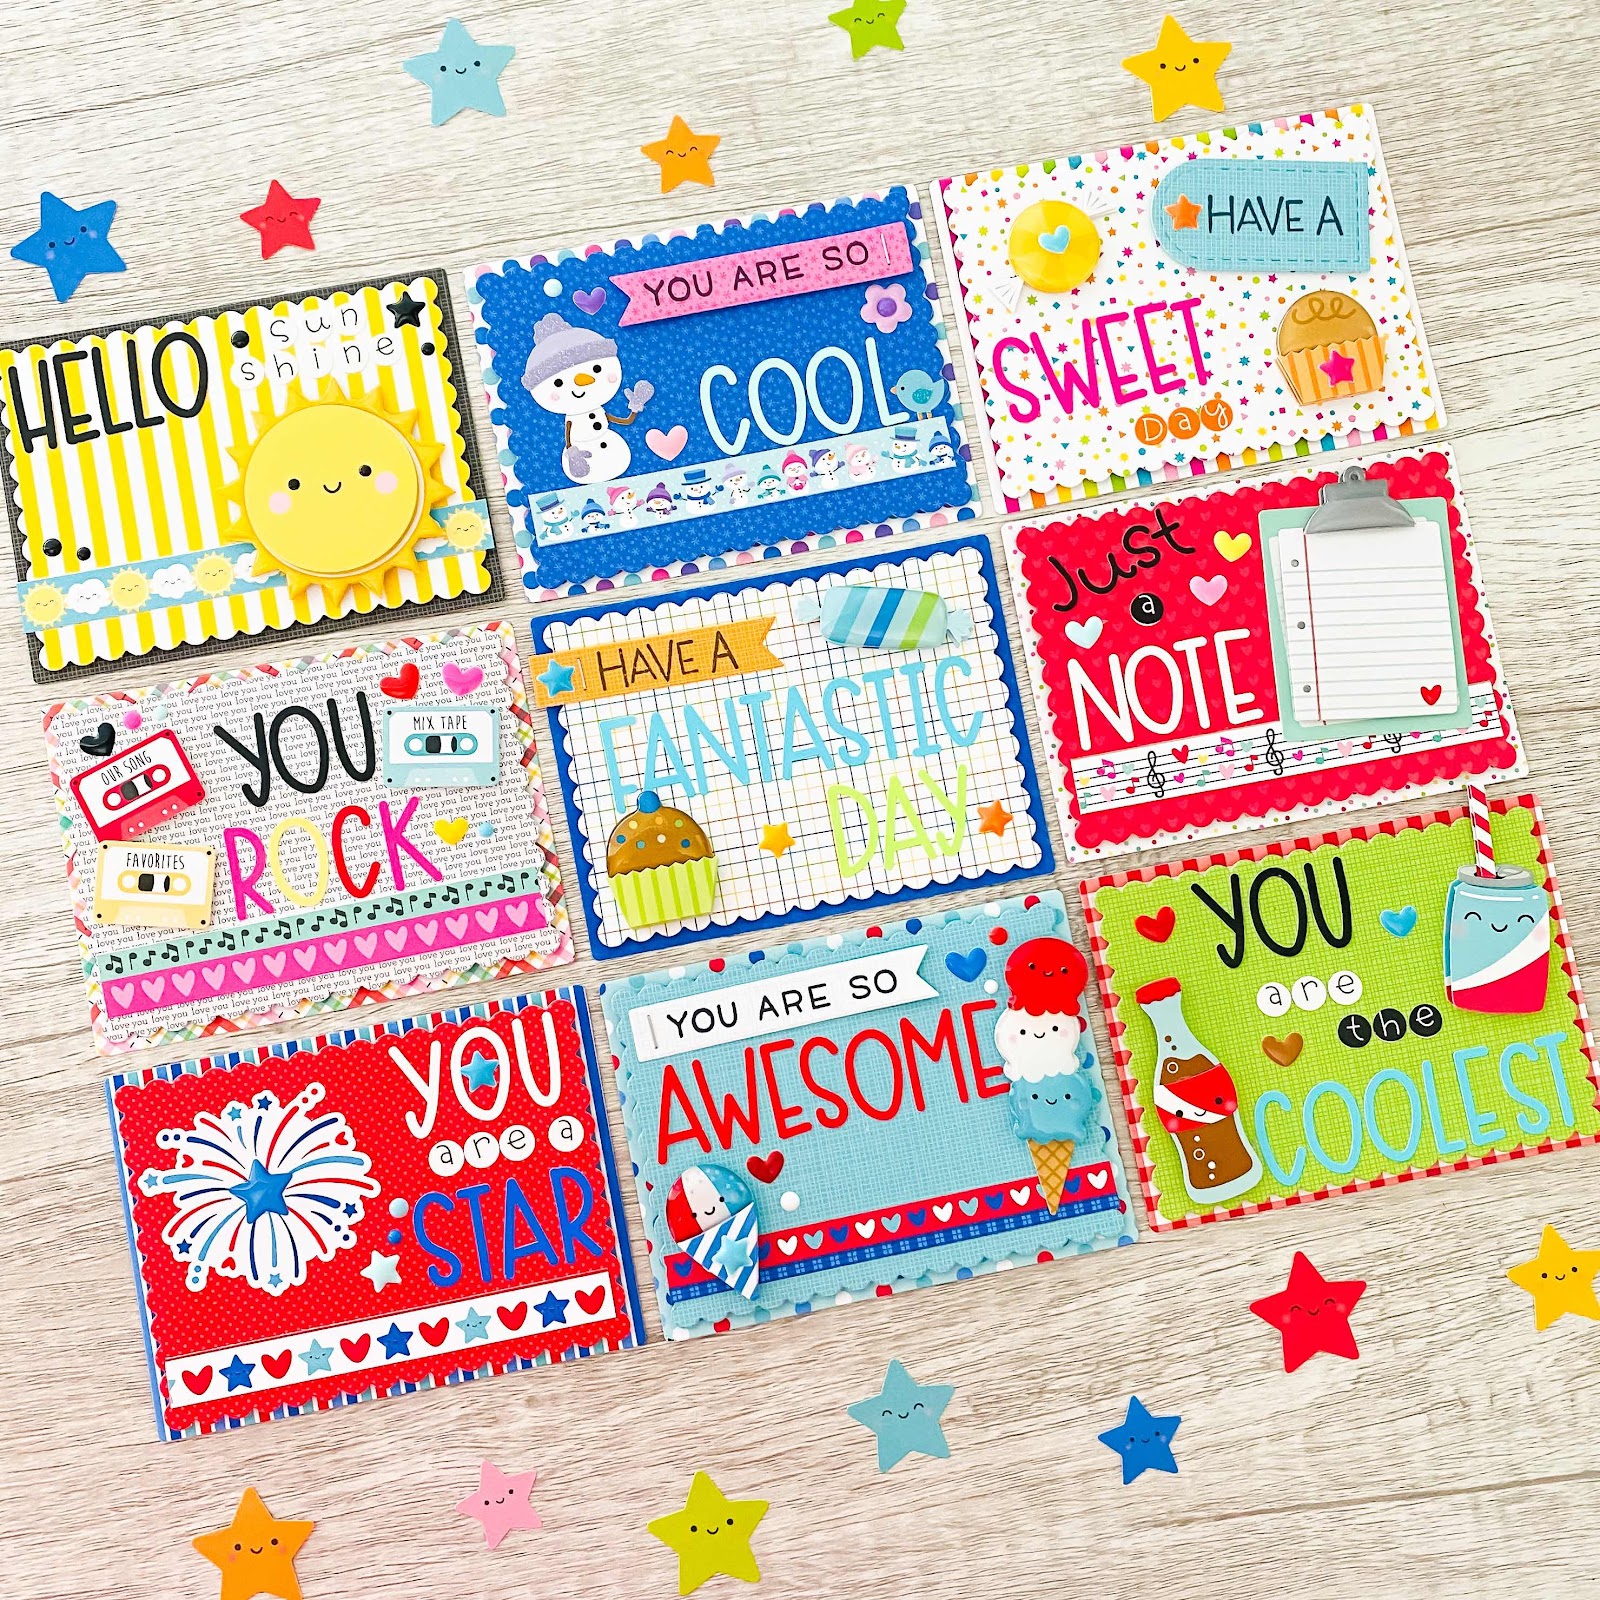
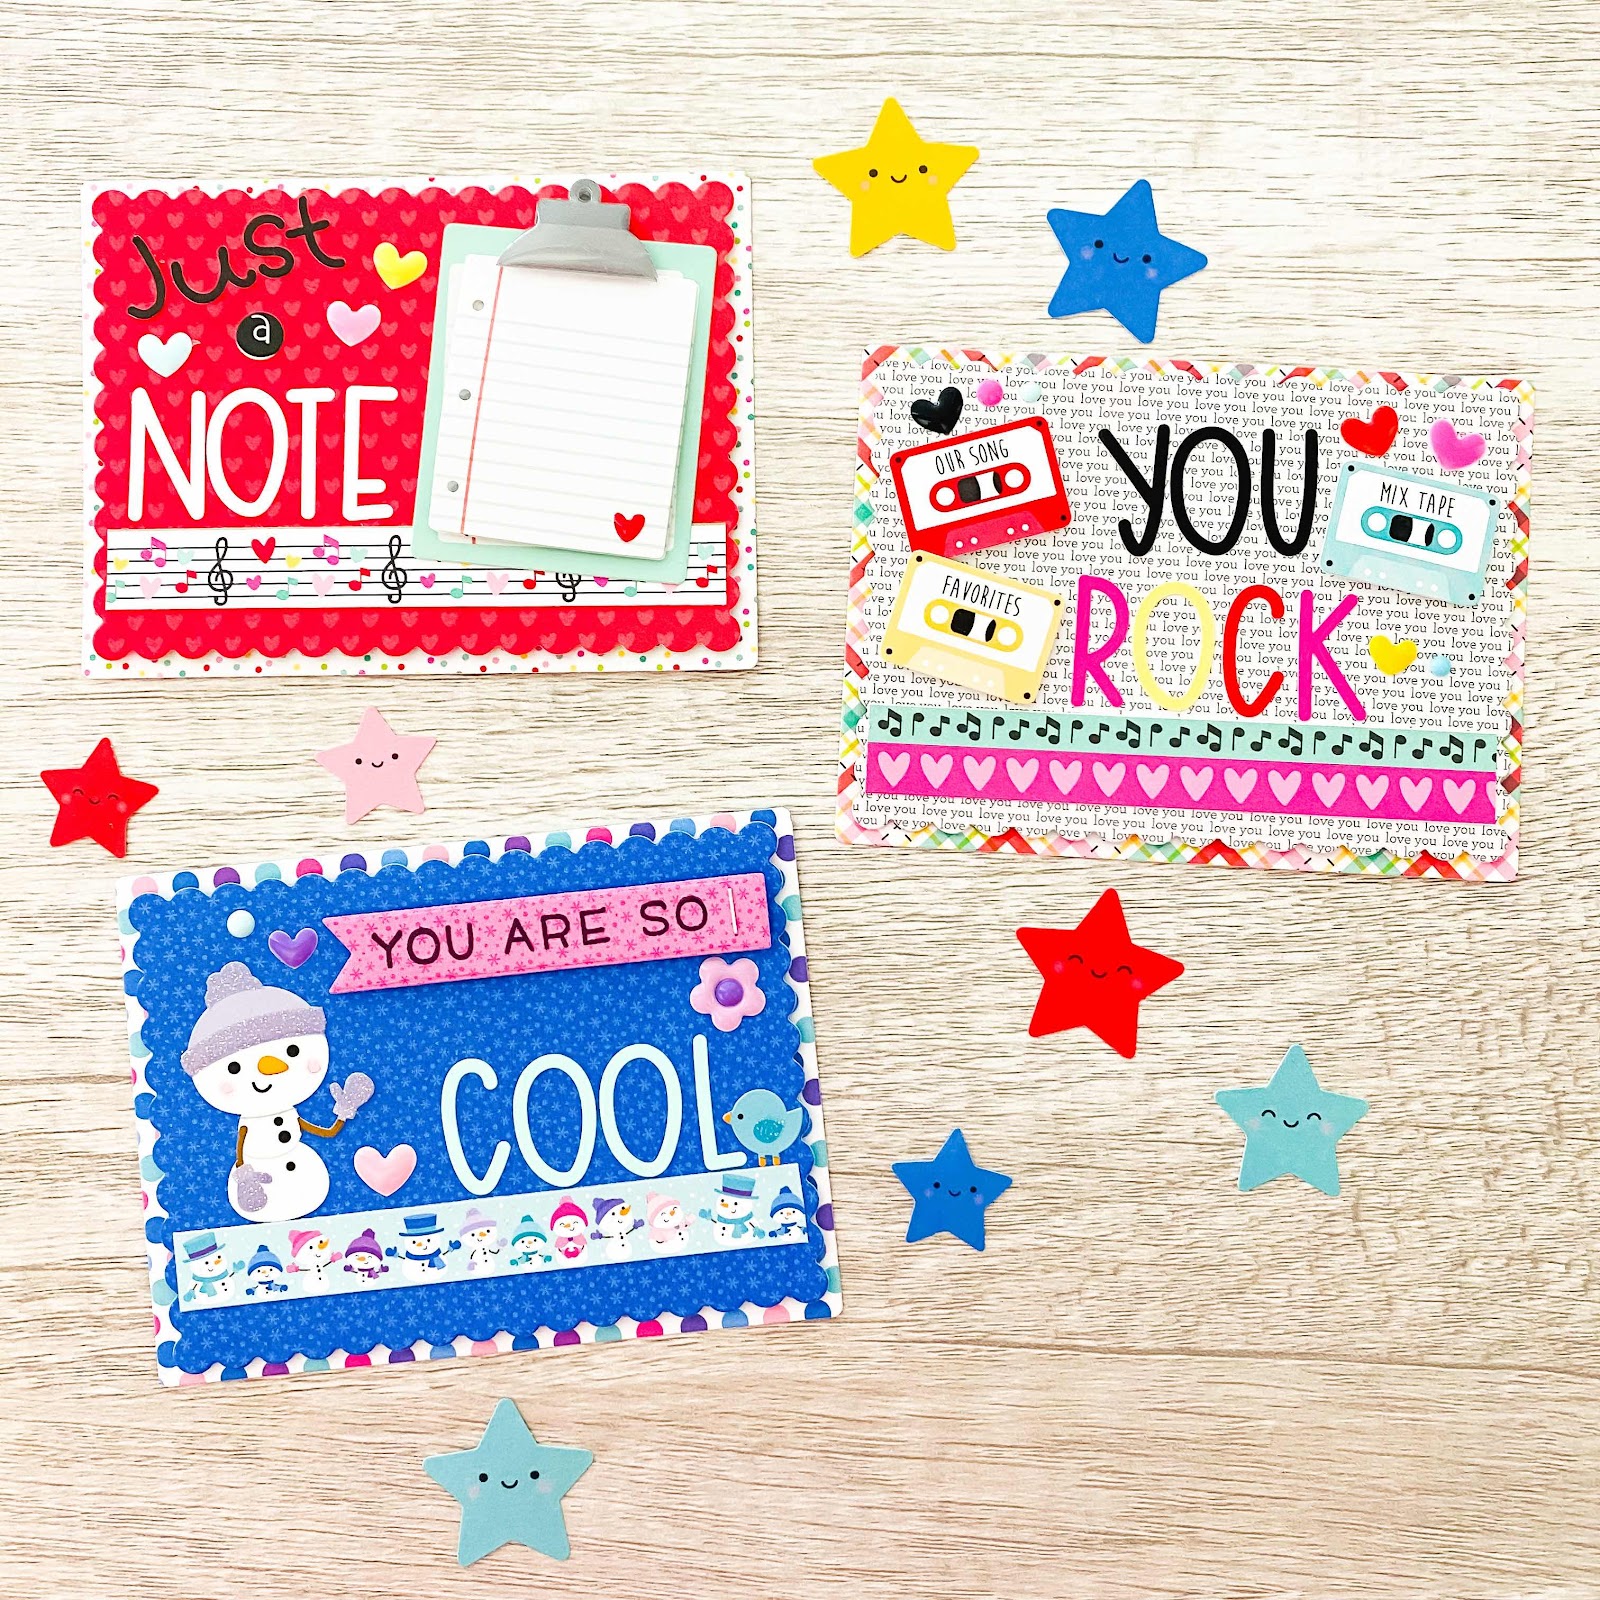
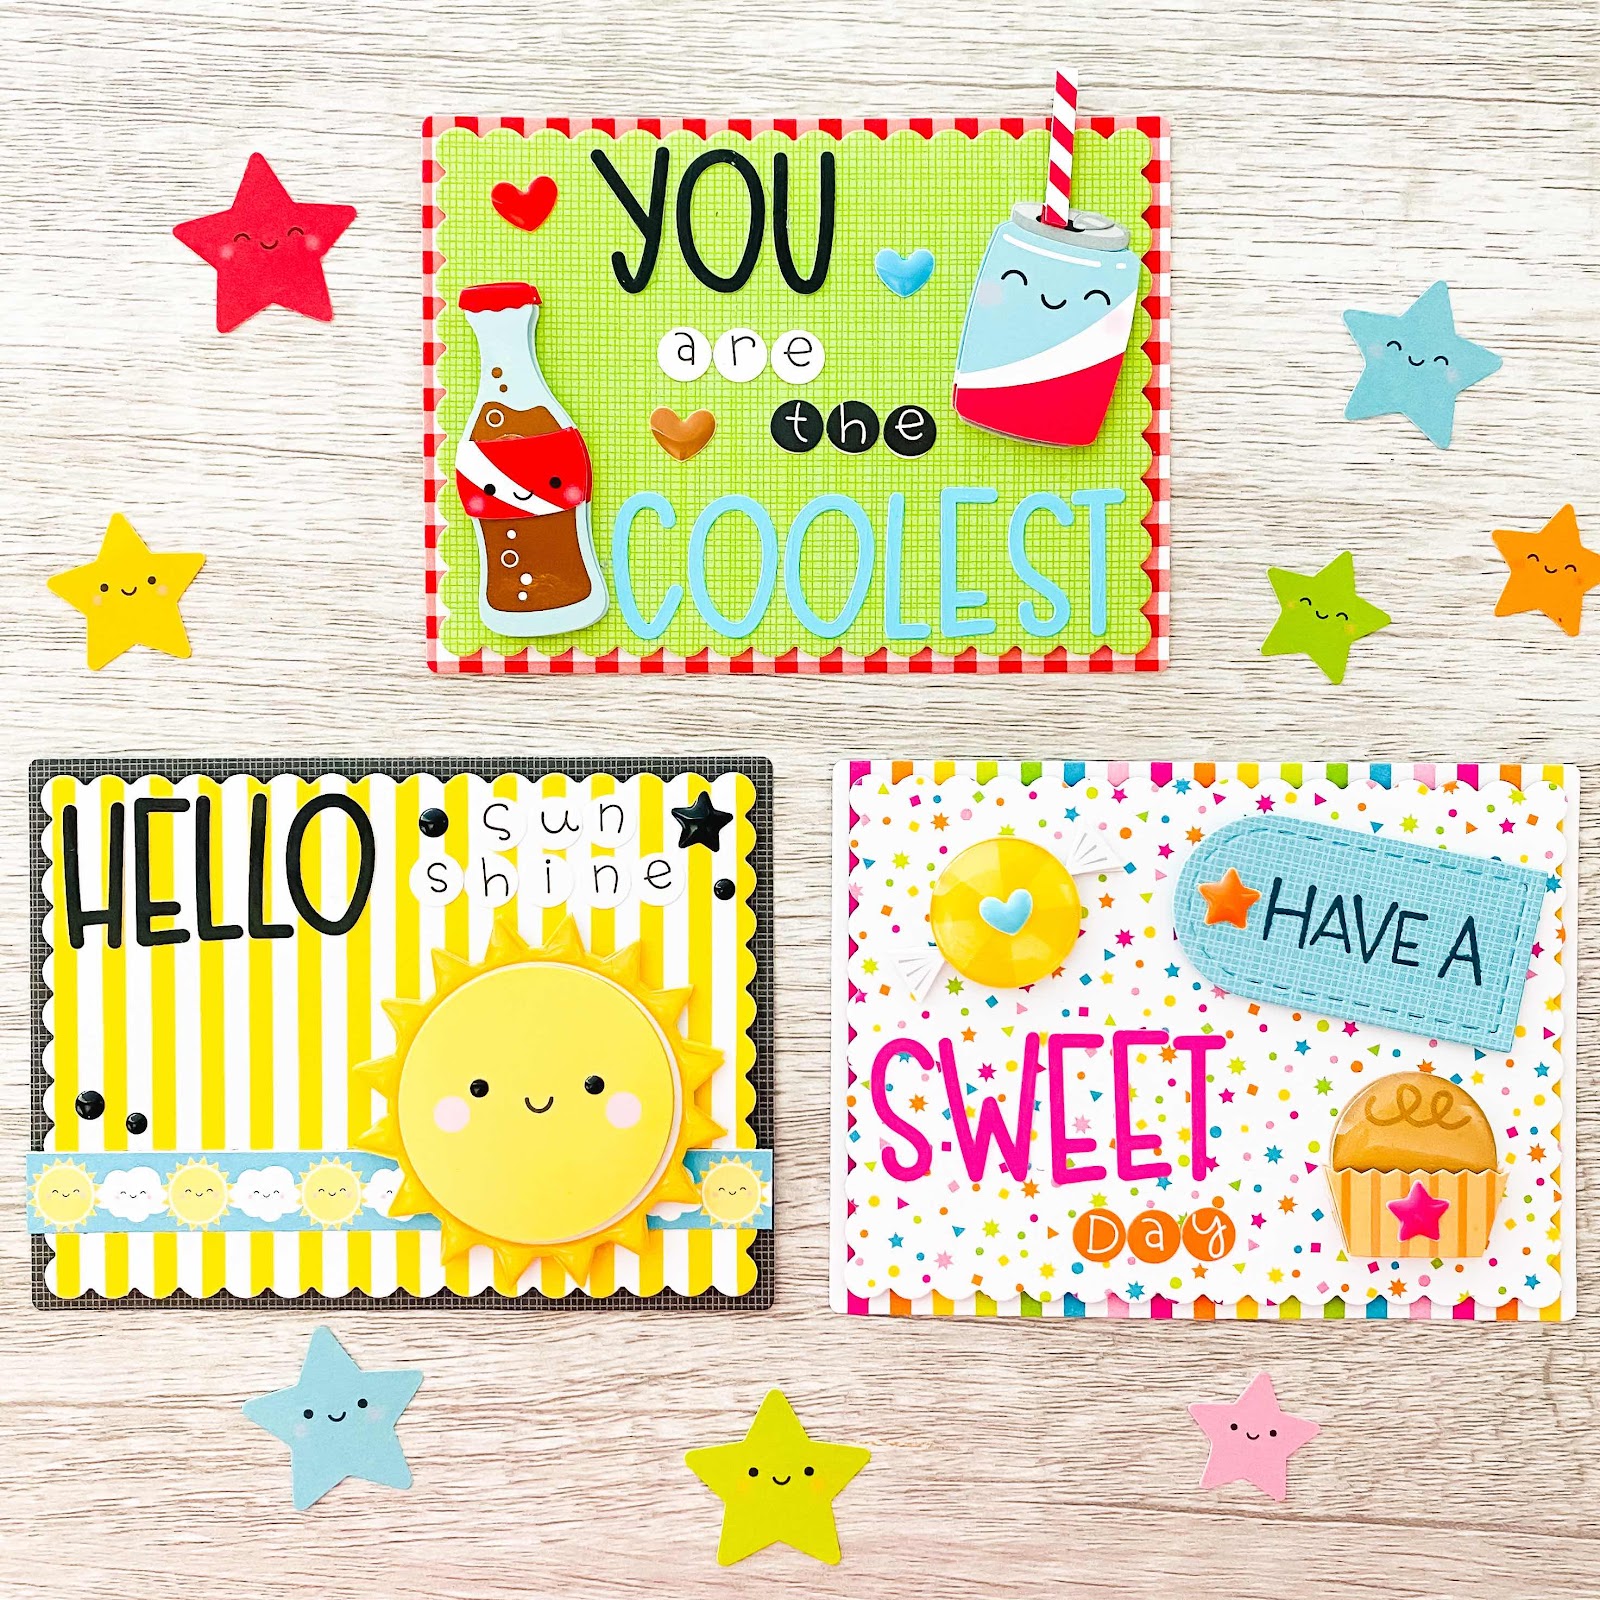
We are so excited to introduce our newest kits! There are 2  New Card Kits, Party Time and Hey Cupcake.  Each kit contains everything you need (including envelopes) to make 8 different cards!  Check them out...

Party Time Card Kit

Hey Cupcake Card Kit

And check out our latest 8x8 album kit, My Happy Place. Whether you just purchased a new home, or just want to scrap your everyday life, this kit is the perfect solution! It comes with product and instructions to make 10 embellish-filled pages. Simply purchase the album color of your choice (album sold separately), and gather your basic crafting supplies and you’re all set. You’ll also have tons of product left over! So don’t miss our extension kit to maximize your leftover product (along with lots of new product) to make an additional 16 pages!


 My Happy Place Album Kit
My Happy Place Album Kit Pages


My Happy Place Album Extension Kit


My Happy Place Album Extension Kit Pages


Now for the exciting part!  Comment below to win a card kit of your choice!  These products will be shipping to stores in early February!  And be sure to check back later today for another exciting announcement!

Saturday, September 26, 2020

HAPPY BIRTHDAY LAYOUT | with Maryám

Sunshine and Sprinkles! Does it sound like fun already?! Well, that's because for today's project we are going to be using the new Sunshine Alphabet Stickers and also the awesome Confetti Shape Sprinkles, both available and all of our favorite Doodlebug colors.


To create my layout, I started by cutting some strips from the 12 x 12 Party Plaid Girl Paper. Then, I selected my favorite ones, arranged them in a way they look nice to the eye, and adhere them to the page starting from bottom to top. 


Next, to embellish my page, I decided to incorporate some Confetti Shape Sprinkles and add them on to some of the elements of the stripes to add some extra detail and texture. For example, in the strip with cupcakes, I added little circle-shaped confetti sprinkles as toppings.

To add some more fun, I added some cute Odd & Ends Pieces around the page, as well as some cardstock stickers from the same Hey Cupcake collection.


Last, but not least, for my title, I used the gorgeous Sunshine Alphabet Stickers in- Swimming Pool, Limeade, Bumblebee, Tangerine, Bubblegum, and Cupcake to spell out the word "birthday" and also Happy Birthday - Doodle Cuts for the word "Happy".


Now, let's take a look at the finished layout!


That is it for today. I hope you guys enjoyed this post and liked the ideas I shared. If you have any questions just leave a comment below or send me an email. I'll be happy to help you.

Have a great day!


Doodlebug Products Used: 
Hey Cupcake Collection
Sunshine Cardstock Stickers - Bubblegum
Sunshine Cardstock Stickers - Cupcake
Sunshine Cardstock Stickers - Tangerine
Sunshine Cardstock Stickers - Bumblebee
Sunshine Cardstock Stickers - Limeade
Sunshine Cardstock Stickers - Swimming Pool
Shape Sprinkles - Cupcake Confetti
Shape Sprinkles - Bubblegum Confetti
Shape Sprinkles - Tangerine Confetti
Shape Sprinkles - Bumblebee Confetti
Shape Sprinkles - Limeade Confetti
Shape Sprinkles - Swimming Pool Confetti
Doodle Cuts - Happy Birthday
Dot-Stripe Rainbow Petite Prints 6 x 6 Paper Pack

Other Products Used:
Vellum Paper
Manual Die-Cutting Machine
Foam Adhesive

Thursday, September 24, 2020

SWEET BIRTHDAY CARDS | with Maryám

I love my doodle stamps! In case you didn't know, in every new collection Doodlebug releases, we usually get 1 or 2 new sets of clear photopolymer stamps, plus coordinating dies to help us cut all the little images. For today's project, I'm going to be mainly using the stamp sets from the Hey Cupcake and Party Time collections to create two adorable cards.


To create my cards, I started by stamping some images from the Doodle Stamps - Birthday Boy, Doodle Stamps - Birthday Girl, and Doodle Stamps - Party Animal - Girl onto smooth white cardstock. Next, I grabbed my box of Polychromos Colored Pencils and started to color my images trying to follow the same color palette from the collections I mentioned earlier.

Once I finished coloring my images, I grabbed the coordinating dies for each one of the stamps sets I used before, positioned all the dies in place, taped them with a little bit of washi tape to secure them in place, and run them through my die-cutting machine.


Now that I had all elements I needed, I played with some different compositions until I decided on one. For the first, I decided to do go with a girl-themed card and used some pattern paper from the Hey Cupcake collection to make it more fun and colorful. For the sentiment, I used "It's Your Birthday" from the Doodle Stamps - Happy Birthday which I white heat embossed on black cardstock.


For my second card, I used the two remaining images I colored- a cook boy and a cake- and created a fun composition in which it looks like the little boy just made a delicious cake. For the sentiment, I used "happy birthday" that I white heat embossed on black cardstock, and finished up my project by adding sequins, sprinkles, and of course, the brand-new mini jewels that are an absolute favorite of mine!


That is it for today. I hope you guys enjoyed this post and liked the ideas I shared. If you have any questions just leave a comment below or send me an email. I'll be happy to help you.

Have an awesome day!


Doodlebug Products Used: 
Hey Cupcake 6 x 6 Paper Pack
Gingham-Linen Rainbow Petite Prints 6 x 6 Paper Pack
Sugar Coated Cardstock - Swimming Pool
Doodle Stamps - Birthday Boy
Doodle Stamps- Happy Birthday
Doodle Stamps - Birthday Girl
Doodle Stamps - Party Animal - Girl
Doodle Cuts - Birthday Boy
Doodle Cuts - Birthday Girl
Doodle Cuts - Party Animal - Girl
Doodle Cuts - Large Tags
Doodle Cuts - Borders & Edges
Mini Jewels - Party Time Assortment
Sprinkles - Limeade Glitter Assortment

Other Products Used:
Polychromos Colored Pencils
Smooth White Cardstock
Smooth Black Cardstock
Embossing Ink
Embossing Powder
Fine Detailed Black Pigment Ink
Die Cutting Machine

Monday, September 21, 2020

BIRTHDAY SHAPED BOX CARDS | with Kathy

 There is not much that makes me happier than puppies and kitties!  So when I saw the new Hey Cupcake, and Party time Collections in the Lori Whitlock SVG Shop, I had to make some fun birthday cards!  Take a peek...


I think a puppy or kitty popping out of a present would absolutely make someone's day, don't you??


For the kitty card, I started with the Hey Cupcake Cat in Present SVG.  I used the Cupcake Sprinkles paper to make my present box and the Swimming Pool striped side of the Party Purrfect paper for my bow.  To complete, I added a purr-fect sentiment from the Hey Cupcake Chit Chat pieces.


I am a crazy cat lady, but I couldn't leave out the doggie lovers!  I used the Party Time Dog in Present file as the start for this card.  I love all Doodlebug plaid papers, so I used the plaid side of the Party Time Party Boy paper for my present and tied it up with a bow made from the Hats off paper.  I finished it off with the fun green Happy Birthday Chit chat sentiment.

Have you made any projects using the Hey Cupcake or Party Time Collections or Cut files?  Be sure to tag Doodlebug Design on Facebook and Instagram, we always love to see your creations!  That's it for me today, thanks for stopping by to peek!


Doodlebug Products Used
Hey Cupcake Colleciton
Party Time Collection
Petite Prints Collection

Other
Silhouette Cameo


Tuesday, September 15, 2020

FIRST DAY OF SCHOOL LAYOUT | with Tegan

I am in love with the new Doodlebug Design Sunshine Alphabet and Sprinkles Shape Stickers! I used both along with the School Days collection to create my main design on this layout and I am really happy with how it turned out. Come take a look! 


I embellished the top of the page with a strip of the rainbow striped School Days Very Primary patterned paper, ephemera piece, and Mini Icons Stickers. I also added a couple of the Bubblegum Shape Sprinkles Stickers.

I started by using the Doodlebug Sun - Happy Camper Cut File and the Party Time Sprinkle Me Happy patterned paper to create the large sun background. I then cut out the inner sun piece using the Hey Cupcake Hip Hip Hooray patterned paper. Here I embellished around the sun with the awesome Sunshine Alphabet Stickers in Black, Bubblegum, and Blue Jean. I then filled the spaces in between the words with Confetti Shape Sprinkles Stickers in Blue Jean, Bon Bon, and Bubblegum. 

Here I used the Sunshine Alphabet Stickers in Ladybug, Blue Jean, Bon Bon, and Swimming Pool. I then embellished the spaces between the words with Shape Sprinkles Stickers in Bubblegum, White Lily, and Cupcake. I love the little three dimensional detail the Shape Sprinkles add! I embellished my photos with Odds & Ends die cut pieces.

I love that the Sunshine Alphabet Stickers and the Confetti Shape Sprinkles Stickers come in ALL of the fun Doodlebug Design colors. This makes it so easy to mix and match colors and add color to a project! Which is your favorite Doodlebug color?!


Thanks for stopping in today! I hope I have inspired you to grab some of the awesome Sunshine Alphabet Stickers and Sprinkles Shapes Stickers for your next project. Have a great day!


Doodlebug Design Products Used:

Sunshine Alphabet Stickers
Confetti Shaped Sprinkles Stickers
School Days Collection
Hey Cupcake Collection
Party Time Collection

Wednesday, September 9, 2020

LUNCH BOX NOTES | with Stephanie

Hello Doodlebug Friends! I have a fun project to share today featuring new Sunshine Alphabet Stickers and Confetti Shape Sprinkles.  I was actually searching Pinterest for 'Back to School' project inspiration and tons of Lunch Box Note printables came up and I thought, hey I could make up my own little cards using tons of Doodlebug goodies.  

I made a total of nine cards, using products from many of the collections Doodlebug has released this year.  

I die cut two layers for each card, popping the scalloped layer up with foam tape.  I chose a short and simple sentiment for each card and used the Sunshine Alphabet stickers for the words I wanted to stand out and emphasize.


 I used lots of stickers around my phrases and Confetti Sprinkles for added color and shine. 


The possibilities for these little cards are endless, you could use whatever collections you have. The cards are approximately 3x4” so these are great if you have smaller pieces of paper left over from your 6x6 paper pads.


I have to admit once I got going on these, I had a lot of fun coming up with the phrases and creating each new card!  And they don’t necessarily have to go in lunches either, add them to a candy bar or other treat to give to a loved one or friend letting them know you are thinking of them.  I hope you have fun making some of your own little cards, and if you do, be sure to share them with us on social media using #doodlebugdesign. Have a wonderful day!
 
 Doodlebug Products Used:
Sunshine Alphabet Stickers
Confetti Sprinkles Stickers
Bar B Cute Collection
Land that I Love Collection
Hey Cupcake Collection
Party Time Collection
Love Notes Collection
Winter Wonderland Collection
  
Other Products Used: 
Foam Tape, Liquid Adhesive
Square Card and Scallop Card Metal Dies

Monday, September 7, 2020

FLOATING CARDS | with Kathy

I can't tell you how many hours I spend on Pinterest.  I'm sure the number would be embarrassing!  It does help me discover new types of cards and paper projects though!  I had never heard of a floating card... but as soon as I saw them, I knew I would be making some soon!  When the Doodlebug Design Team was challenged to create projects featuring the new Confetti Shaped Sprinkles and the Sunshine Alphabet stickers I knew this type of card would be perfect!  Take a peek...


These cards were so fun to make.  For the card base you want to cut a piece of cardstock 4.25" x 7".  Score this piece at 1.5" at the top.  Cut a piece of transparency film 4.25" x 5.5.  Tuck the transparency sheet under the 1.5" flap of the card base and glue to the flap.  This gives you your basic card.  I then cut another piece of the card base paper 1.5" x 4.25" and glued it along the bottom of the transparency sheet.  Then I decorated with some of the patterned papers from Hey Cupcake Collection.


On the transparency portion of the card, I added my sentiments using the new Sunshine Alphabet Stickers and sprinkled some confetti sprinkles.  I finished off with some adorable icons from the Hey Cupcake Odds & Ends.  Here are some close ups...


I love how the transparency sheet makes the alphas and confetti pieces really pop!  If you use the Confetti Sprinkles or Sunshine Alphas in your projects, be sure to tag Doodlebug Design on Facebook and Instagram.  We love to see your projects!  That's it for me today, thanks for stopping by to peek!


DOODLEBUG PRODUCTS USED
Confetti Shaped Sprinkles
Sunshine Alphabet Stickers
Hey Cupcake Collection
Petite Prints Collection

OTHER PRODUCTS
Transparency Sheets

Wednesday, September 2, 2020

SPRINKLED WITH FUN LAYOUT | with Tegan

Have you seen the amazing new Doodlebug Design Sunshine Alphabet and the Shape Sprinkles Stickers?! I featured both of them on today's layout and I love all of the cuteness they added to my page. I also used the adorable Hey Cupcake collection because I just can't get enough of the super fun color palette and cute party llamas! 


I love that the brand new Shape Sprinkles Confetti packs contain so many cutesy shapes! Can you find them all on my layout?


I used the largest scallops circle die from the awesome Doodle Cuts Nesting Scallops Die set to create a fun background design. I cut out a number of different scalloped circles, adhered them together on the back, and then cut them in half. I embellished this half circle with Sunshine Alphabet Stickers in Limeade, Shape Sprinkles Confetti in Swimming Pool, and Mini Icons Stickers! 


Here I embellished the half circles with the Sunshine Alphabet Stickers in Bon Bon and Tangerine. I used Bubblegum Shape Sprinkles Confetti Stickers to add some fun dimension. How cute is that llama Mini Icons Sticker?! 


The Odds & Ends Pieces are some of my favorite Doodlebug Embellishments too! Here I used a fun banner and cute little girl die cut pieces to embellish around my photo. I used more Bubblegum Shape Sprinkles to embellish the balloon as well. 


I love that the Sunshine Alphabet Stickers come in so many amazing Doodlebug colors! Here I used the Bumblebee and Limeade stickers on my scalloped circle cut outs. The Mini Icons Stickers are the perfect size to embellish the half circles. Can you find where I used the Bon Bon Shape Sprinkles Stickers?


Thanks for joining me today! I hope I have inspired you to grab some of the amazing new Sunshine Alphabet and Shape Sprinkles Confetti Stickers for your next project!


Doodlebug Design Products Used
Hey Cupcake Collection
Bar-B-Cute Slice of Summer Patterned Paper
Shape Sprinkles Stickers: Swimming Pool, Bubblegum, Bon Bon, Limeade
Sunshine Alphabet Stickers: Tangerine, Limeade, Bumblebee, Bon Bon
Doodle Cuts Nesting Scallops Die Set

Thursday, June 11, 2020

HEY CUPCAKE BIRTHDAY LAYOUT | with Erica

Hey friends! Do you want an easy way to create a page with lots of color and pattern! Try cutting out some letters to create a large title! You can do this by typing out the text you want in Silhouette Studio or drawing and cutting out your own letters. One other way to get letters like this is to check out your local dollar shops. They have cut out letters and stencils that can be used over and over again to create all kinds of titles. Just trace the letters onto your favorite pattern paper. Super simple and it will give you that cut file look without the machine! I used the new; Doodlebug Design Hey Cupcake collection to create my page of our sweet Alyssa Danielle. I used my Silhouette Studio to type out the word Happy and adjusted the size to fit my page. I was able to position the letters on the page so I could cut a bunch of different papers at one time. Sometimes when I create pages with paint splatters they do not always go the way I want or they just don't vibe with the page I am trying to create. I do not toss them away I just save them in case I can use them on a different page. I found this background in my stash of saved pages and it was perfect! It did have a little more black splatters than I wanted but I was able to cover them up with the letters and some tiny stickers! I love how the colorful splatter looks in the background. I cut my photo into the letter A shape and matted it on some of the pattern paper. I think it helps to make the photo stand out a little more. I used the Hey Cupcake chit chat piece Birthday to finish off my title. I just had to use the super cute llama stickers on this layout too. I placed one towards the top right and one in the bottom left of my page. To finish off my page I trimmed a little bit off each side of the white cardstock and distressed the edges. I matted the whole page onto the beautiful Sundae Stripe paper from the Hey Cupcake collection! Here is a look at my completed layout! Thanks so much for stopping by today. I hope you will try this out on an upcoming layout! Please tag us if you create a page using the Doodlebug Design products! Have a wonderful day!
Doodlebug Design Products Hey Cupcake Collection
Pin It button on image hover