Showing posts with label Hippity Hoppity. Show all posts

Tuesday, April 19, 2022

HIPPITY HOPPITY EASTER GRATITUDE JOURNAL | with Nathalie

 Who is ready to host Easter celebrations in their homes? Well, we are! And it will be the first major celebration in two years (i.e.post COVID); this means I will be a tad busy with cleaning, cooking, and entertaining.  So, what better way to speed my memory documenting than to prep my layout for the day.

Most of my daily documenting is held in notebooks, and layouts.  So, today I want to give you a glimpse at my Gratitude journal entry for the day ( and all I have to do is add photos and  my story!!!)

I started with strips of Petite Print in as an anchor for the layout.  Then added small strips of Cute & Crafty paper helps to bring all the colors of the embellishments in to the page.  I added a cluster of embellishments to the top left corner of the page, plus added a few photo maps and extra embellishments to the page.  

To balance the page, I am using more Hippity Hoppity Odds and Ends, and Doodle pops to create a large embellishment cluster at the bottom right of the page... I just love those cute little bunnies!

To finish the page, I am using My Type Alpha Stickers ( and when "E" is out, then backwards "3" do the trick) and more embellishments from Hippity Hoppity to complete my title.


Now all that is left is to enjoy the day, print the photos and voila! done!   I hope this gives you an idea or two for your Easter memory documenting!  I hope you had a blessed Easter!


.

Instagram | Blog | YouTube 


SUPPLIES:

Lots of Love 6x6 paper pad
Cute & Crafty Patterned Paper
Fairy Garden 6x6 paper pad
Hippity Hoppity Odds and Ends, Doodle Pop
Petite Prints
My TYPE Alpha Stickers - Beetle Black


Wednesday, April 13, 2022

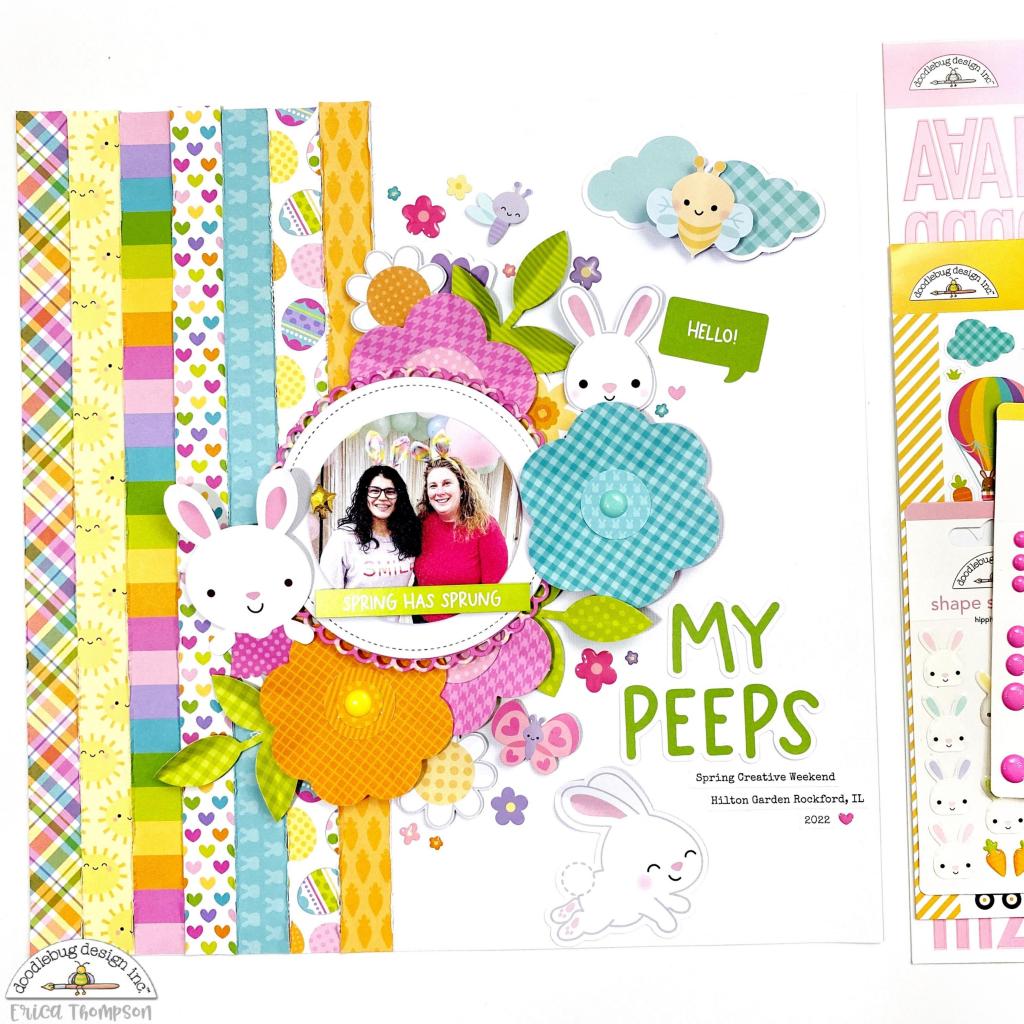
HIPPITY HOPPITY & FAIRY GARDEN SPRING LAYOUT | with Erica

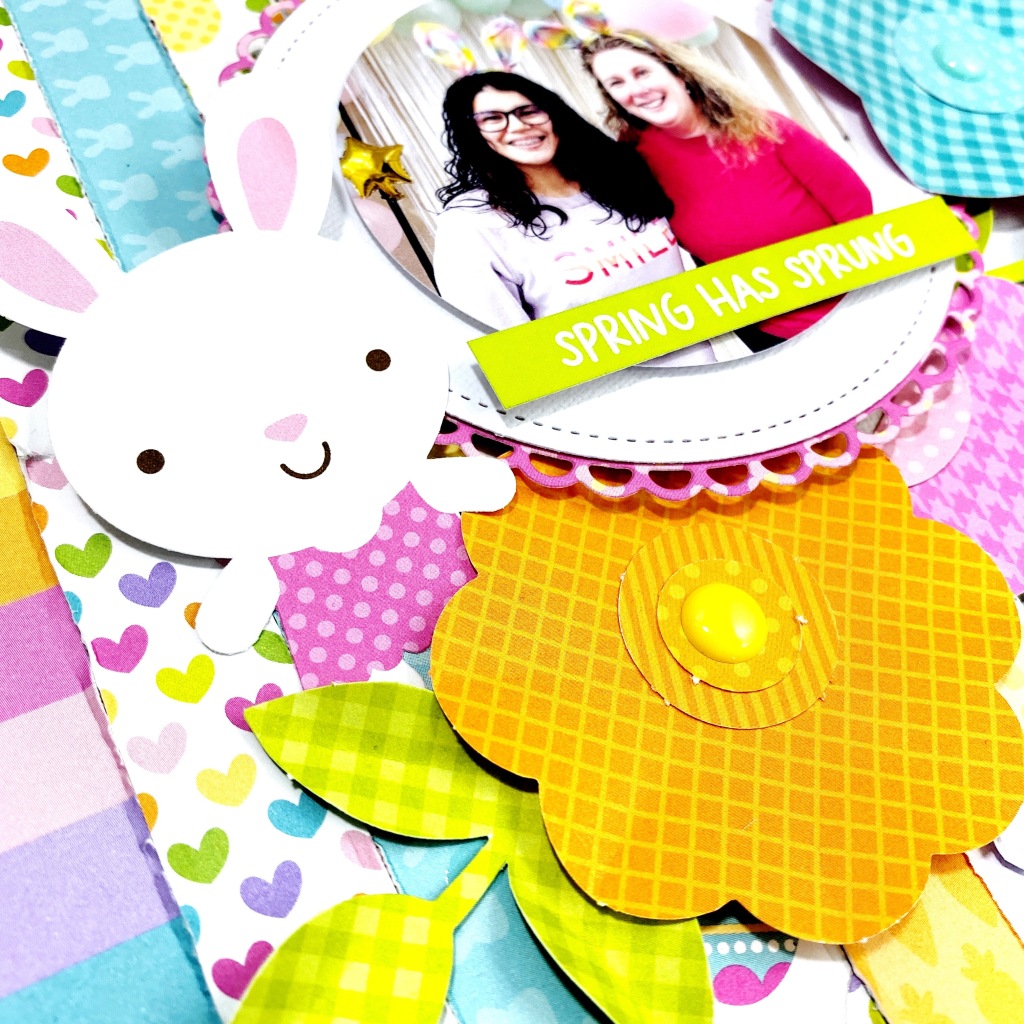
Hi friends! Erica here with you today sharing a 12x12 scrapbook layout using a mix of Fairy Garden and the Hippity Hoppity collection.

I started by cutting out some thin strips of pattern paper and adhered to the left side of my page. I punched my photo out using a large circle punch and matted it on some die cut circles from my stash.

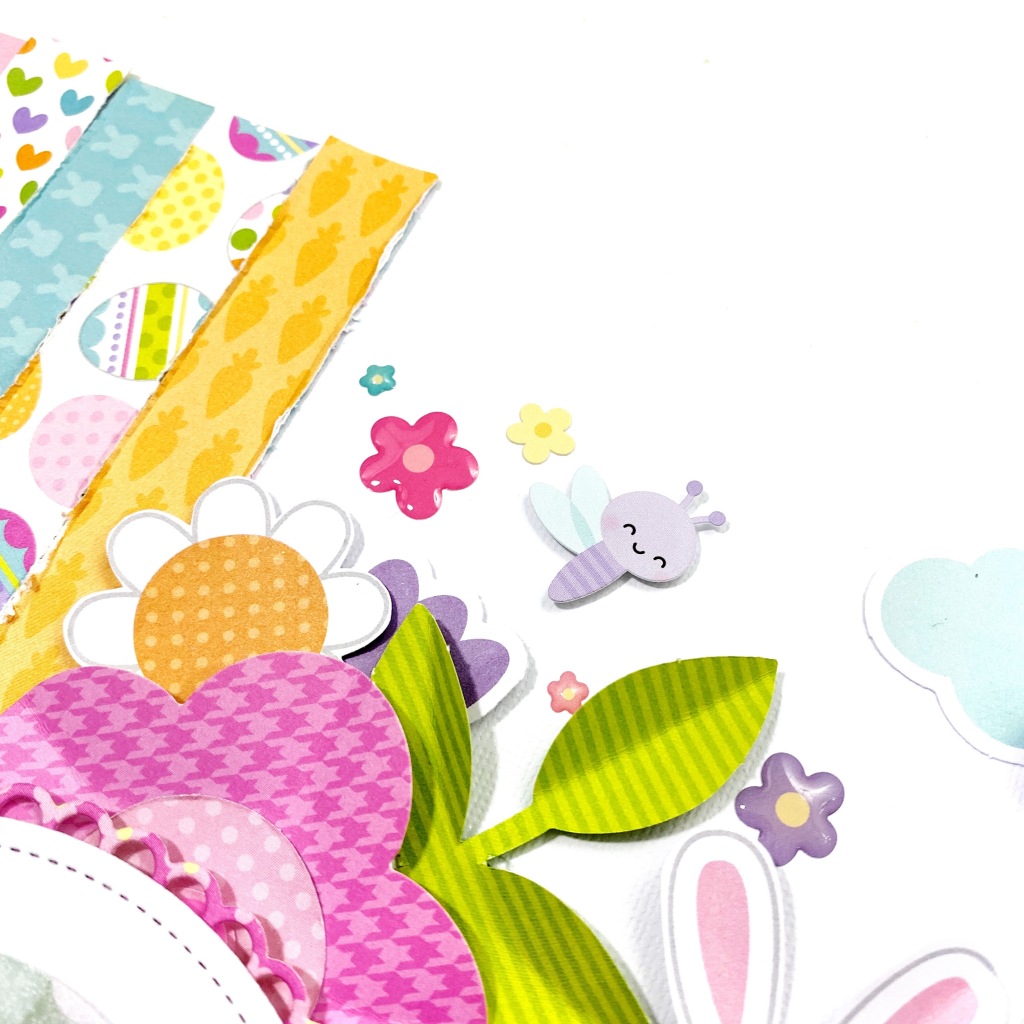
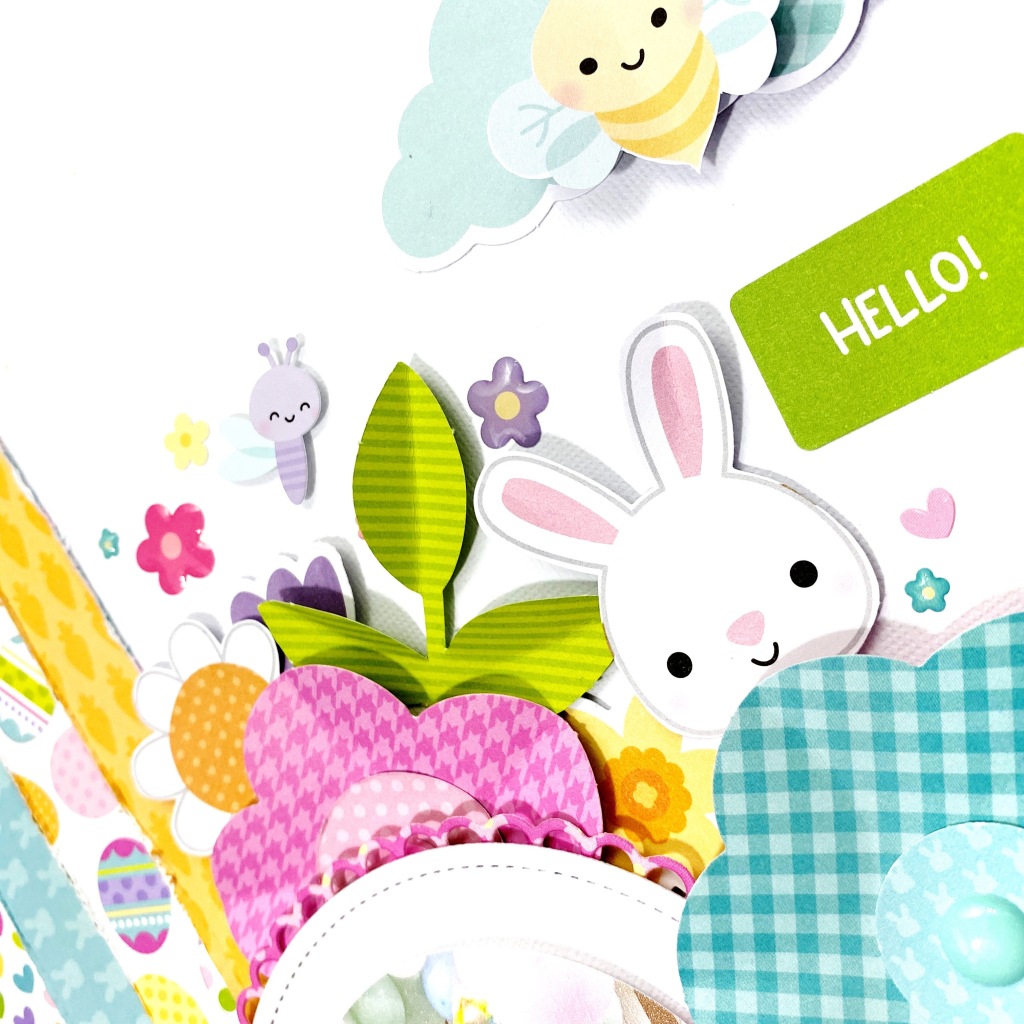
I added some foam adhesive to the back of my photo and placed it in the center of the page and started to embellish around it. I used some large garden flowers and filled in some of the spaces with smaller die cuts from Hippity Hoppity and the Fairy Garden collections.

To bring in some other textures I added some shape sprinkles and popped up some winged friends from both collections!

The bunnies in the Hippity Hoppity collection are so darn cute so I added a couple of them to my page since we are wearing bunny ears in the photo.

For my title I used one of the Hippity Hoppity Chit Chat pieces and added some typed journaling towards the bottom right corner.

Thanks so much for stopping by the Doodlebug Blog today! I hope you enjoyed my layout mixing up Fairy Garden and the Hippity Hoppity collections!

YouTube | Instagram | Facebook | Blog

Doodlebug Products Used

Hippity Hoppity Collection
Fairy Garden Collection

Tuesday, April 12, 2022

HIPPITY HOPPITY BUNNY TREAT CUPS | with Karen

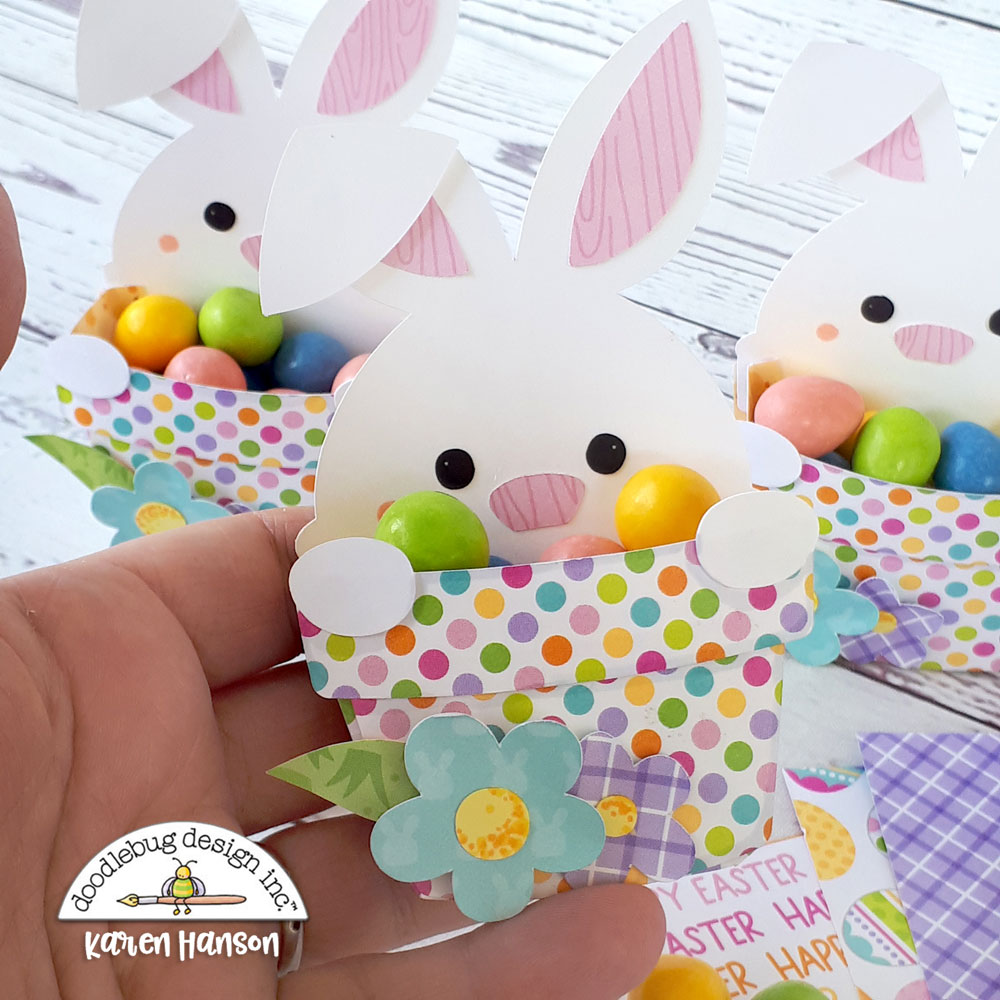
Easter is this week and it is a small miracle that there are still Easter chocolate treats in my house. Usually by now I have restocked at least once! I blame Doodlebug completely - their Easter collections are always so darn cute that I find myself using them this time of year to make all kinds of cute treat containers. And if you are making treat containers, one must take out the treats to make sure they work in the creations. And then one must sample the goods to make sure they are worthy of the cute treat containers. I know you know what I am talking about!

Hand-photo

db-hoppy-easter-bunny-3__22064.1551761357

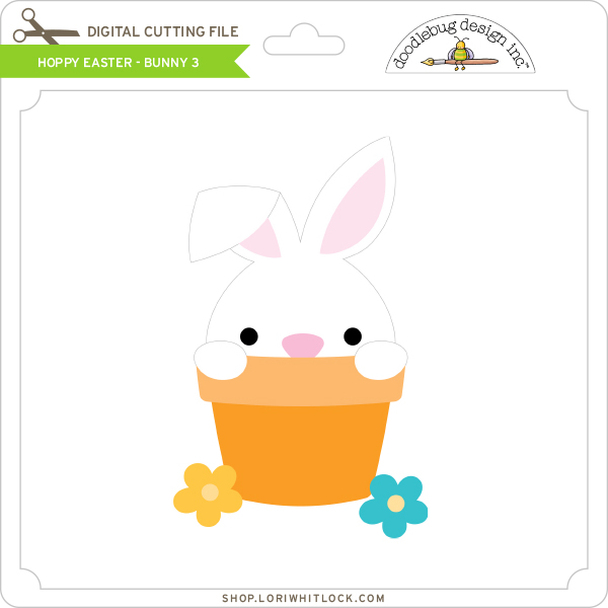
So for this week's project, I actually grabbed the Hippity Hoppity 12x12 papers and teamed them up with a darling Doodlebug cut file you can find at the Lori Whitlock store (Hoppy Easter - Bunny 3- link below).

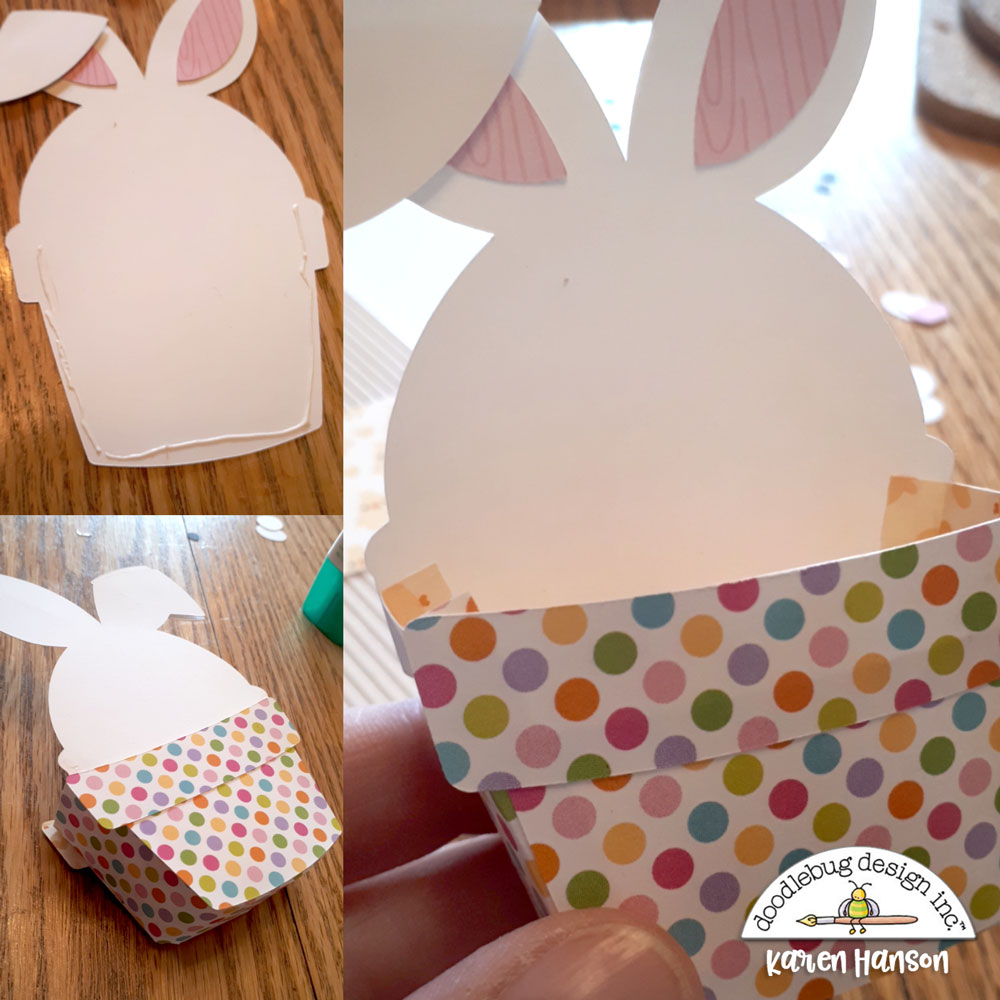
While this is a flat file, I figured I could turn it into a cute 3d treat box with just a little effort. Here are some tips if you would like to try it too:

Tutorial-1

When you cut the file, cut an extra copy of the pot shapes. One will create the front of the treat box and the other will go on the back to make the treat container look a little more finished from the back. I also only glue around the edge of the back pot so I can add a little note into it as well.

Cut a strip of paper 1.5" wide and the length of your 12x12 paper. Score 1/4" from each long edge. This will create the side panel for your pot - the piece you need to create to turn this from a flat cut file to a 3D shape. Cut up along the long edge of the paper to the score line. Then use these tabs to secure the side panel to the front pot first...

Tutorial-2

...and then onto the large white cutout of the rabbit to close the shape. Trim off the excess. I printed the cut file at about 5.5" wide and needed about the same in length for the side panels. Add the second cutout of the pot to the back and then add the details.

All-3-1

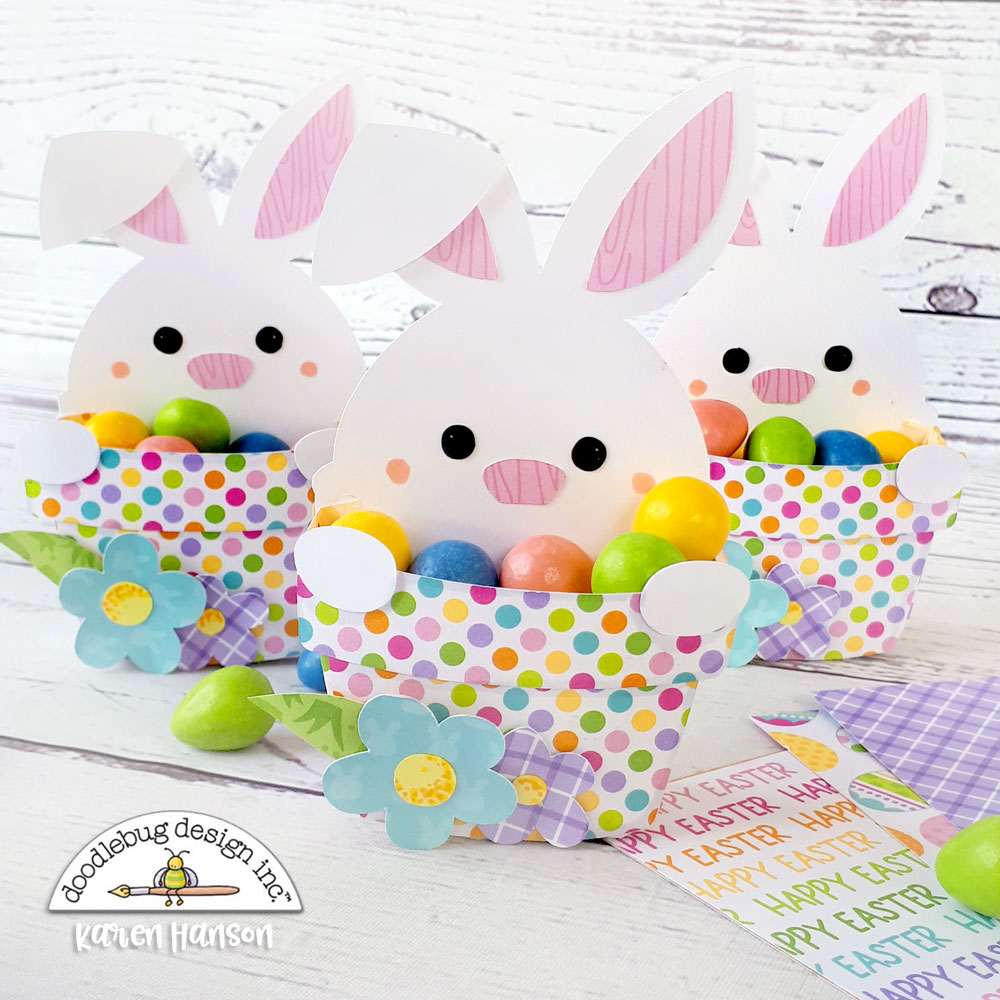
I also modified the size of the flowers in the cut fil by making one larger just for a bit of a different look. Fill up your treat containers and you are all set to go.

Side-view

Here's a side view so you can see the 1.5" side panel in action.

Closeup

I really love how these turned out! I think I need to go check out the other Doodlebug cut files to see if I can modify them in this way as well - if the treats last that long, that is!  Thanks for stopping by!


BLOG | INSTAGRAM

Doodlebug Design Product:
Hippity Hoppity Collection
Petite Prints

Other Products:
Hoppy Easter - Bunny 3 SVG
Adhesive
White cardstock

Monday, April 11, 2022

HIPPITY HOPPITY CARROT TREAT HOLDERS | with Wanda

Hi Doodlebug friends! Wanda here on the blog today to share some cute Easter carrots I made with the Hippity Hoppity Collection! Just in time for some Spring and Easter crafting. These fun paper carrots would be great at each place setting for your table, or little gifts for friends and co-workers. They are super easy to make and fun too! I filled my treat carrots with chocolate eggs and can't wait to give them away! CLICK HERE for the simple directions to make the shape/template. This would also be a really fun project to do with the kids!

I used orange and green papers from the Doodlebug Floral Graph 6x6 Paper Pad and the Swiss Dot 6x6 Paper Pad. I used a carrot die cut from another company to make the greens on top. I glued the greens inside before I sealed up the top end of the carrots. 

50

I used pieces from the Hippity Hoppity Collection Chit Chat pack to decorate the front of the carrots. I used some Chunky Twine, Bunny Sprinkles, and small green clothespins to add at the top for more decorations. 

50

 I added stickers to the front and a few mini jewels too, for a little bit of shine!

50

I used my paper crimper to crimp the top and bottom of the carrots and add a decorative element. Crimping also secures the tape holding them together. Here is the carrot in my hand to show you the size and scale. I used the full 6x6 sheet of paper for each one. 

50

 Here's a close up of the top portion!

50


50

If you don't want to put them at each place on the table, I think they would be cute in a basket with some Easter grass as a cute decoration.

50

Wishing you a happy Spring and a happy Easter! I will see you back here soon, but until then, happy crafting! 


50MY BLOG | MY INSTAGRAM

 DOODLEBUG SUPPLIES:

Hippity Hoppity Collection Chit Chat
Swiss Dot 6x6 Paper Pad
Floral Graph 6x6 Paper Pad
Chunky Twine
Mini Jewels
Mini Clothespins
Hippity Hoppity Sprinkles

 OTHER SUPPLIES:

Scallop Circles Dies
Carrot Tops Dies
Paper Crimper
Adhesives


Thursday, April 7, 2022

HIPPITY HOPPITY BUNNY MINI ALBUM | with Lisa

Ohhhh, how I love to make Easter projects!!! Heheeeee, always so cute and fun! This week, I decided to make a bunny-mini-album in rainbow colors... :)


Before deciding what I was going to do, I checked out all my Doodlebug cut files. I saw this fun little bunny and first thought of making a layout... but then I changed my mind and decided to make a mini album. Since I have a lot of 12x12 patterned papers from Doodlebug, with cool patterns and in all of the rainbow colors (called Petite Prints), I wanted to use rainbow colors for my pages. 


I chose all of my papers and then used them with my Silhouette Cameo to cut out the shapes. The cover is made from the bunny cut file with all of the tiny pieces to make the bunny. For the pages, I only cut out the outline of the bunny. To give a bit of interest to the pages, I created little pockets out of vellum, I also machine-stitched around all of the pages and I distressed the edges a bit.


On the cover, I hand-stitched all around the bunny, I love how that looks. :) I also added enamel sprinkles to the carrot, flower stickers to the bunny's head and a flower sticker to its belly. The flowers are from the Lots of Love collection. 

Then came the fun part of going from page to page and adhering photos and all kinds of embellishments. I used stickers, enamel shapes, Doodle pops and Chit Chat die cuts from last year's Easter collection called Hippity Hoppity. 

Take a look at the pages.


I put die cuts in my little vellum pockets, but of course, you can also put photos in there or hide little notes behind the die cuts. :)  I also needed a charm tassel... I created this one in my last workshop with my girls... :) love the pink chicken...:)

This project was great to showcase the amazingly beautiful patterned papers of the Petite Prints collections. The colors are so vibrant and the patterns so fun. LOOOOOVE! :) 
Oh, I almost forgot... did you see that I also used the paper to put a bit of color in all of the bunnies ears? Heheee, cute right?  Hope you like my little mini and I wish everyone a wonderful Easter!
 

FACEBOOK | INSTAGRAM | YOUTUBE


Doodlebug Products Used

Hippity Hoppity collection

Floral stickers from Lots of Love

Petite Prints

 Ladybug Floral-Graph

Mandarin Swiss Dot

Lemon Dot-Stripe

Citrus Gingham-Linen

Limeade Floral-Graph

Pistachio Swiss-Dot

Bubble Blue Dot-Stripe

Blue Jean Gingham-Linen

Orchid Floral-Graph

Bubblegum Swiss Dot

Cupcake Dot-Stripe

Hippity Hoppity Bunny With Carrot SVG


Other products used:

Charm tassel

Embroidery thread in teal

Binder ring in teal

Vellum


Wednesday, March 30, 2022

HIPPITY HOPPITY HAPPY EASTER LAYOUT | with Erica

Want an easy and fun way to create some texture on your layout? Use fringe scissors on some paper strips to create a fun pop of color and texture to your project!

If you do not have fringe scissors you can definitely use regular scissors to create the fringe! I cut 12 strips of pattern paper about 1.75" thick and used my fringe scissors to create fun strips to add to the bottom of a piece of 12x12 lily white Doodlebug Design Cardstock. The fringe adds so much interest and texture to the page and I think it goes perfect with this layout!

I used the super adorable Hippity Hoppity collection and backed a cut file using the 6x6 paper pad. I placed the cut file right above the fringe and embellished around the cut file! I added some die cut florals to the center of some of the letters and put a Spring Assortment Sprinkles in the center!

I also pulled out the Bunny & Friends Easter Die-Cuts and adhered this cute chick to the bottom left corner of my layout! The Bunny & Friends Die-Cuts also come with these colorful Easter eggs!

I tucked in some flowers around the cut file and added in some tiny sprinkles! So many little details in this layout and I love how it turned out!

The next time you are looking for a way to add some texture to your page try some fringe! Thanks so much for stopping by today! I hope you enjoyed my layout and I would love to see some fringe on your project! Tag me @ericarosecreates and Doodlebug so we can have a look! Have a great day!

Doodlebug Products Used

Hippity Hoppity Collection
Bunny & Friends Craft Kit

Tuesday, March 29, 2022

HIPPITY HOPPITY EASTER TREAT HOLDERS | with Karen

Big news everyone! I was out walking the dog today and I saw green grass! Now I know that may not be a big deal for many of you who live in warm places but up here in Calgary, green grass is the signal of a turning point! Cue Easter and all that wonderfully bright and fun spring time goodness!

Full-set-1

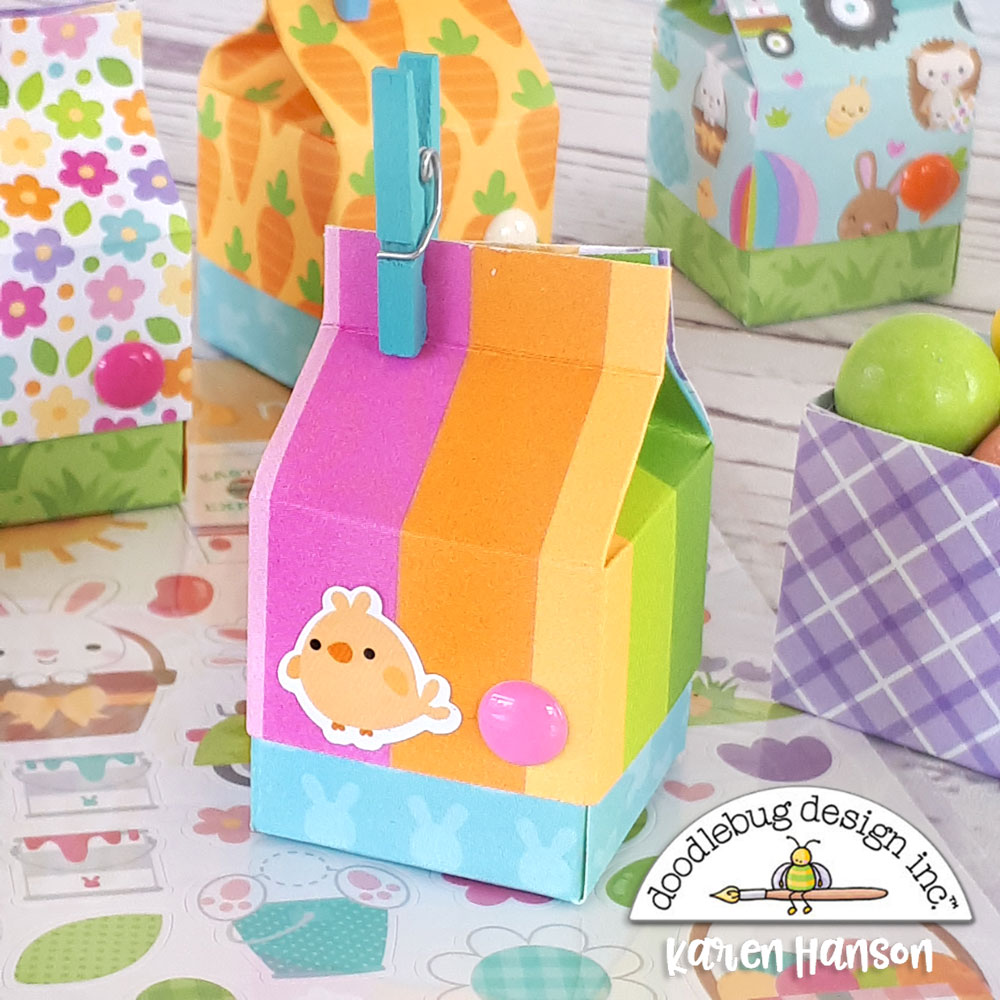
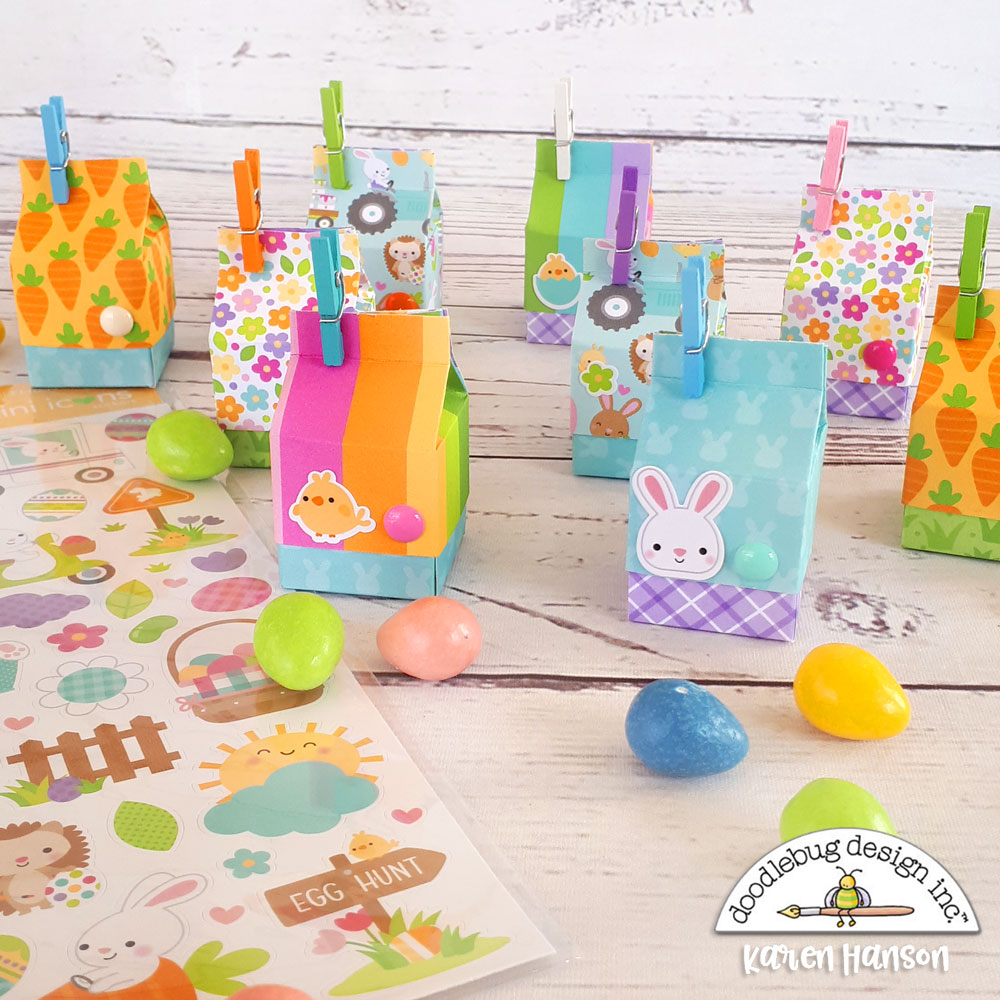
So out onto the crafty table came one of the most adorable Easter themed collections that was released last year - Hippity Hoppity. It was time to make some little treat containers for our upcoming hunt. I know, I know, that is what the plastic eggs are for. But come on. Does it get cutter than these little mini milk cartons?

Stickers-2

Set-open

Now, if I am being honest, the patterns in this collection speak for themselves. There are so many great colours and patterns that you really don't even need to embellish them.

Stickers-1

But the Mini Icon Stickers, Mini clothes pins and Sprinkles are the perfect size to embellish the patterns that are a little simpler in design or tone on tone. As for the rest, let the paper do the talking, because the recipients of these little containers will be squealing with joy just like I was when I saw the grass this morning!

Full-Set-2

I'll take these over plastic eggs any day! Thanks for stopping by!

BLOG | INSTAGRAM

Doodlebug Design Product:
Hippity Hoppity Collection
Sprinkles
Mini clothes pins

Other Products:
Adhesive

Pin It button on image hover