Showing posts with label Pocket Letter. Show all posts

Tuesday, January 25, 2022

LOTS OF LOVE POCKET LETTER | with Ashley

Hi All! Today I am sharing a pocket letter I made using the new Lots of Love collection. This pocket letter is perfect for happy mail, where the front of the sheet is fully decorated and you can tuck in a note in the back or leave it blank for photos. 

I started with one of the cut apart sheets from the collection and trimmed down some of the images to 2.5 x 3.5". I alternated these sections with one of the striped 12 x 12 patterned papers. 

For the striped patterned papers, I embellished the sections using the odds & ends ephemera pack and the 12 x 12 sticker sheets. 

I added the Odds & Ends ephemera above the pockets as well. I used the Shape sprinkles to add some dimension and extra details. 

I finished off the pocket letter with red ribbon that has a couple rainbow shape sprinkles at the edges. 

Thanks for stopping by. Happy Crafting! 


DOODLEBUG PRODUCTS USED

Lots of Love Collection
Shape Sprinkles Love is in the Air
Shape Sprinkles Happy Hearts 

Saturday, August 31, 2019

SCHOOL DAYS TEACHER POCKET LETTER | with Nathalie

We all know a special teacher who just started or is about to start a new school year so I thought of making a pocket letter with the new School Days collection to show my appreciation to one of them. Hopefully it will make them smile and encourage them during those first few days!
As always with my pocket letters, I treated each pocket like a separate mini project. My favorite might be the 4x6 title pocket where I paired die-cuts from the Chit Chat pack with a little student sticker. I also created a tiny Back to School banner (a wink to the project I shared two weeks ago) which makes it fun and festive:
Notice the fun background paper from the 6x6 paper pad!
Right below I filled a glassine bag with die-cuts from the Odds & Ends pack and wrapped it with twine. I love to add small little packages to unwrap in my pockets. I also created and decorated a slanted pocket to include a washi tape sampler with Back to school themed tapes of course!
I haven't used rub-ons in ages but found that the Expressions rub-ons "It's never too late..." phrase would make a great quote card. I broke it down into small pieces to fit into a 3x4 card (from the Color Me Happy paper).
Finally, I have included a few more crafty gifts in the forms of star shape Sprinkles and Doodle-pops:
I had so much fun with all the elements of the School Days collection! The students and the smiling icons are adorable. And if you are a teacher reading this: thank you for all your hard work, especially at this time of year! I appreciate what you do and I wish I could send one of these to each of you!

INSTAGRAM/BLOG

Doodlebug Supplies Used:
School Days - Sprinkles - Self Adhesive Enamel Shapes - School Supplies
School Days - Chit Chat - Die Cut Cardstock Pieces
School Days - Sprinkles - Self Adhesive Enamel Shapes - You're A Star
School Days - Odds & Ends - Die Cut Cardstock Pieces
School Days - Cardstock Stickers - Icons - Mini
School Days - 12 x 12 Double Sided Paper - Color Me Happy
School Days - Cardstock Stickers - Icons
School Days - 12 x 12 Cardstock Stickers - This & That
Back to School Collection - Washi Tape - Apple a Day
School Days - Washi Tape - Super Star
School Days - Washi Tape - Tape Measure
School Days - 6 x 6 Paper Pad
Back to School Collection:
 -Doodle-Pops - 3 Dimensional Cardstock Stickers - Mini - Colorful Crayons
Alphabet Cardstock Stickers - Teensy Type - Beetle Black
Sequins - Rainbow Pack
Doodle Twine - Ladybug


Saturday, May 11, 2019

THE CUTEST POCKET LETTER E.V.E.R! | with Nathalie

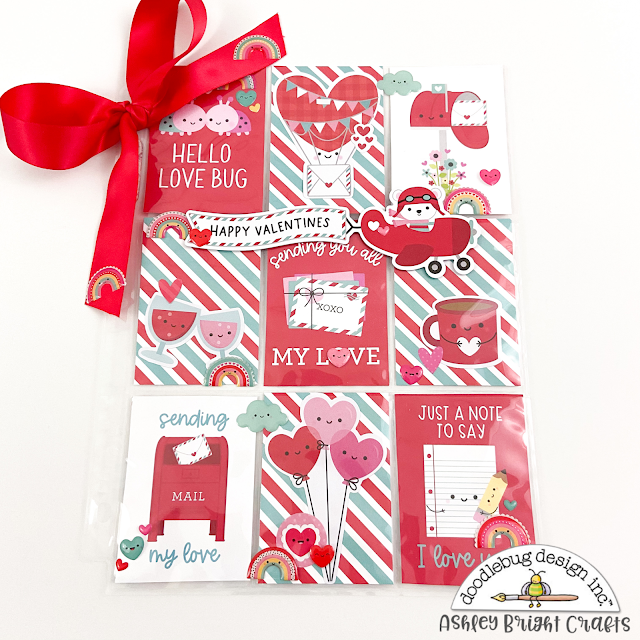
I have some happy mail to share with you today. I was inspired by the Simply Spring collection to create a garden themed pocket letter and I hope it will inspire you to get crafty as well. Beware making pocket letters can become addictive!
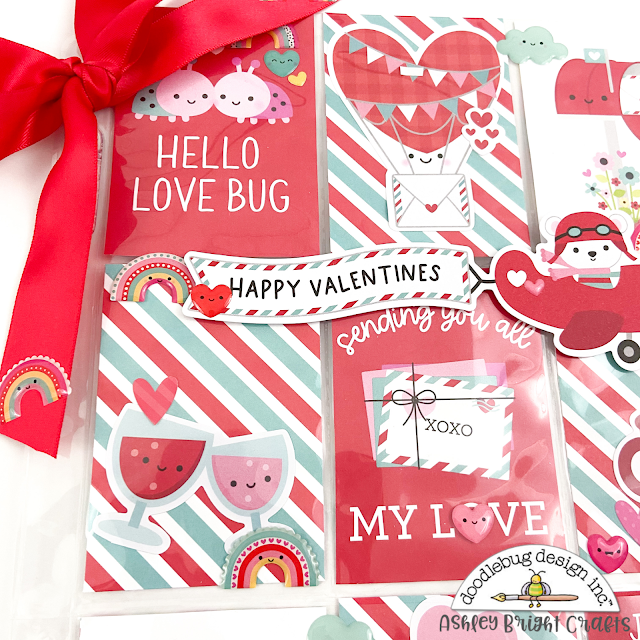
The die-cuts from the Odds & Ends and Chit Chat packs take center stage and that's because they are usually the first things I reach for. They are perfectly scaled for this project. I paired them with various papers from the 6x6 paper pack.


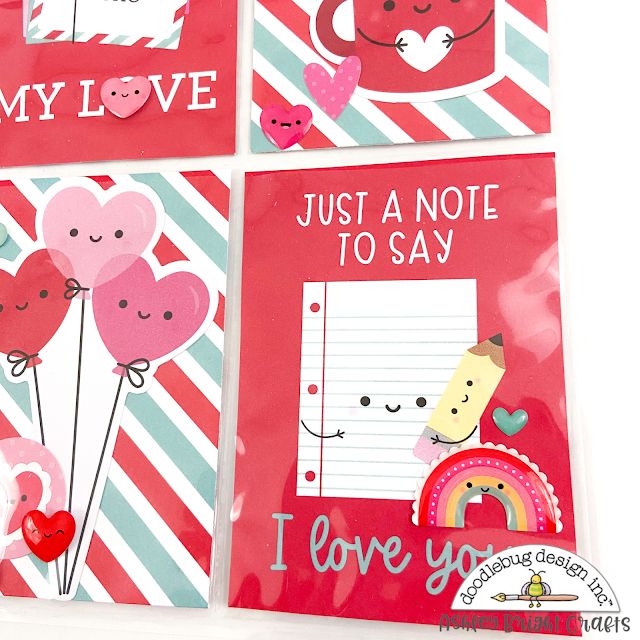
I have included a pack of Doodle-pops on which I created a topper and a pack of enamel ladybugs into a sewn pocket. In the middle, I made a shaker pocket with a combination of sequins and small die-cuts.
This little bee card might be my favorite. I used strips of paper, a sticker and a speech bubble along with a jelly clip for my recipient. Which one is your favorite?
Tips for creating pocket letters:
1/ Treat each pocket like a little layout or a present
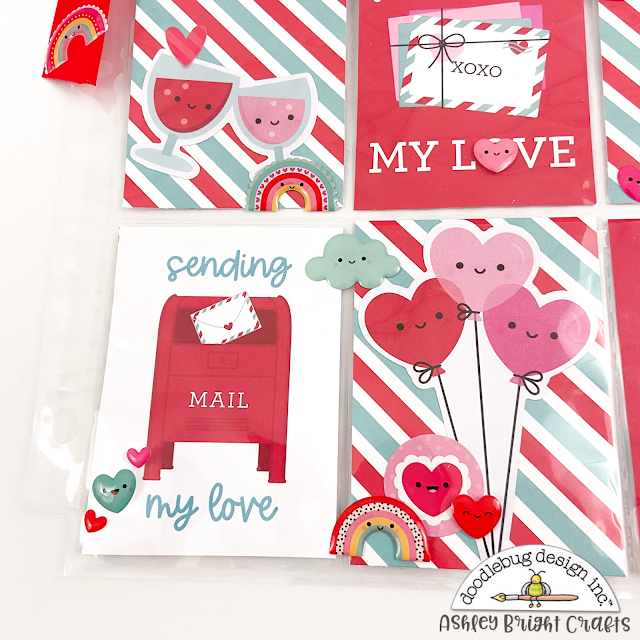
2/ Small embellishments make it fun for your recipient to look around and maybe find surprises not visible at first (also don't forget to add goodies behind the pockets)
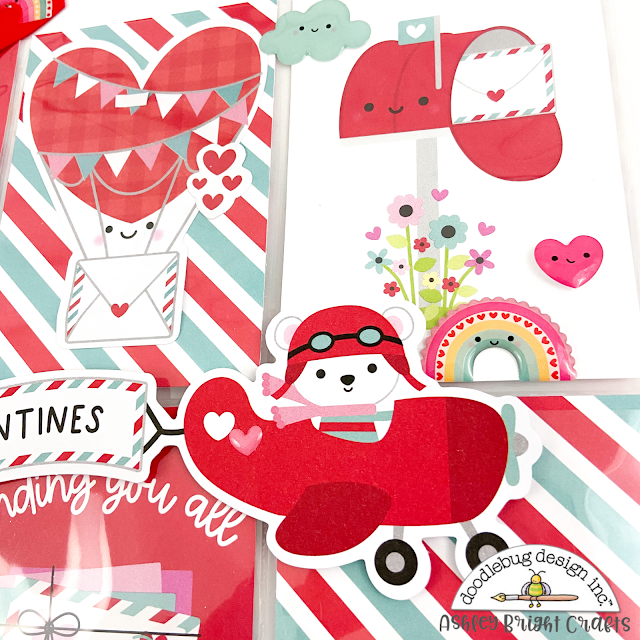
3/You can also decorate on the outside of the pockets like I did above. Larger items can span over a couple of pockets for a different look or just stick out (like the doily and sticker above) 
I hope you give them a try!

Doodleubg Supplies Used:
6272: simply spring 6x6 paper pad 
6251: simply spring chit chat
6250: simply spring odds & ends
4551: green grass washi tape
4951: ladybugs shape sprinkles
5482: sunny skies cute clips
5347: flowers cute clips
6226: little critters shape sprinkles
6227: may flowers shape sprinkles
6237: green thumb doodle-pops
6245: simply spring jelly clips
6264: simply spring icons sticker
6308: bloomin' bugs double-sided cardstock
4268: sequins assortment pack
4605: lily white mini doilies
6134: floral-graph rainbow petite prints 6x6 paper pad
6338: pill better doodle cuts
3209: doodle twine - lilac
6223: rainbow hearts shape sprinkles
3419: limeade fancy frills CS Sticker


INSTAGRAM/BLOG

Wednesday, December 12, 2018

Christmas Town Advent Calendar Pocket Letter | with Nathalie

Advent pocket letters combine the excitement of counting down the days til Christmas and the joy brought on by happy mail. What could be better? Well, maybe making them is almost better than receiving them, especially when you get to play with the Christmas Town collection! I spent an afternoon immersed in this project and loved every second!
The base of my pocket letter is made of coin page protectors. They come with 20 pockets so I cut and taped an extra row in order to get 24 pockets. The next step was to cut twenty-four 2x2inches pieces of textured card-stock in four different colors. Then the fun began!
I worked on each square by selecting papers from the 6x6 Christmas Town pad (and sometimes the 6x6 Floral-Graph Petite Prints pad), stickers from the Icon and Mini icon sticker sheets but also die-cuts from the Chit Chat and the Odds & Ends packs. For the numbers, I used Teensy Type sheets in various colors. I made sure each square had some dimension by using foam dots and/or with embellishments like Sprinkles (dots and shaped) and sequins. I have also included a couple Doodle-Pops.
I covered the side of the letter (where the binder holes are) with a border sticker from the This & That sheet and made a tassel in matching colors with some Doodle Twine.
I went the crafty route and filled the pockets with small die-cuts and stickers, washi samples and other embellishments but they can also be filled with small chocolates or fun Holiday activities/prompts. And even if you are not into making pocket letters, why not use each of these squares as a starting point for gift tags? Either way, I am sure it will delight the recipient!
Thank you for stopping by! I wish you all a wonderful Holiday Season!

Wednesday, August 22, 2018

So Much Pun Pocket Letter | with Nathalie

I am loving the new So Much Pun collection because you can have so much fun with it, no pun intended! I know I did while creating this Dino-Mite pocket letter!
As with many of my projects, it started with the Odds & Ends pack from which I selected all the dinosaur related diecuts, and a few more.  I also included a Doodle Pop because it fits perfectly into the pocket of this trading card page protector.
Using some Doodlebug twine and a mini paperclip, I created a fun mini tassel clip that can be used in a planner.  Also, I like to have a see-thru element in my pocket letters so, right in the middle, I inserted a pack of Dino-mite Sprinkles out of its packaging. Again, they fit perfectly!
In the bottom pockets, I have included samples of matching washi tapes (above) and a small bag of paperclips which I decorated with star stickers from the This & That sticker sheet and a banner from the Chit Chat pack (below).

All the patterned papers are from the So Much Pun 6x6 paper pad, including the ones I used to make a slanted pocket and a mini envelope for my note:
Finally, I created a sequin pocket with a mix of colors matching the rest of the project and added a few diecuts from the Chit Chat pack right on top of the page protectors.

I am willing to bet that you had never seen a dinosaur themed pocket letter before! But you have to admit that is one super cute piece of happy mail and I can't wait to send to its intended recipient!


Wednesday, January 10, 2018

Cream & Sugar: Pocket Letter with Nathalie

I am very excited to be sharing my first project on the blog today! I played with the Cream & Sugar collection to create a tea themed pocket letter. You see, I don't drink coffee but I love a good cup of tea!
I started with the 6x6 Cream & Sugar paper pack to create the backdrops then I selected and placed several die-cuts from the odds&ends pack (which I love!). I filled a pocket with more die-cuts and another with shape sprinkles from the Cake Shoppe collection. Everybody knows that you need cute little cakes with your tea, right?
For the top pocket above, I used some bon bon teensy type stickers and put a Hello cardstock sticker from the 12x12 Cream & Sugar sticker sheet on pop dots for extra dimension. I like to put things inside but also on top of the page protector.
For this pocket, I have included two cute clips from the coffee shop pack and added word stickers from the already mentioned 12x12 sheet. Pretty matte enamel dots and machine stitching add the finishing touches.
The idea with pocket letters is to send someone goodies and I have included quite a bit here, visible and not visible. I have written a note and placed it into my homemade envelope and I will add a variety of tea bags behind a couple of cards like this last one above.

Now, for a little surprise of my own, I would love to send this letter to a Doodlebug fan who likes tea! Enter the giveaway on my Instagram account: anounceofcreativity by Saturday, January 13th and go put on the kettle :)
Pin It button on image hover