Showing posts with label Punches. Show all posts

Monday, March 20, 2023

OVER THE RAINBOW LUCKY RAINBOW LAYOUT | with Brianna

Hey friends! Brianna Lepper here today sharing another layout using the adorable Over The Rainbow collection. When we were stationed in Hawaii a few years ago, we saw rainbows multiple times a day! Once we moved back to Louisiana for the second time, we didn't see them quite as often so when we finally got one, I just HAD to snap a photo of it! This collection is perfect to document such a gorgeous photo. Not only are there rainbow elements, but it also has a lot of "lucky" elements. So why not use both?! Here's my page:


I am loving all of the four leaf clovers in this collection and my crafty friend suggested I create my own using a heart punch. So I took a heart punch from my stash and punched a bunch of hearts using the green patterned papers in the 6x6 paper pad. Next, I punched out a small circle so that I could adhere the hearts to them. To finish them off, I cut out little stems and popped each one up on foam tape. They were so easy to make and turned out so cute!!


I used textured white cardstock as my base and matted it on the 12x12 Spring Garden patterned paper for some extra pops of color. For my title, I used a phrase from the Chit Chat packed and added onto it using the super cute Alphabet Soup stickers in Limeade, Cupcake, Bumble Bee and Swimming Pool. I adhered the second half of my title onto a couple of clouds that I drew and cut out by hand. I even added some ink to the edges along with some silver glitter for some sparkle!


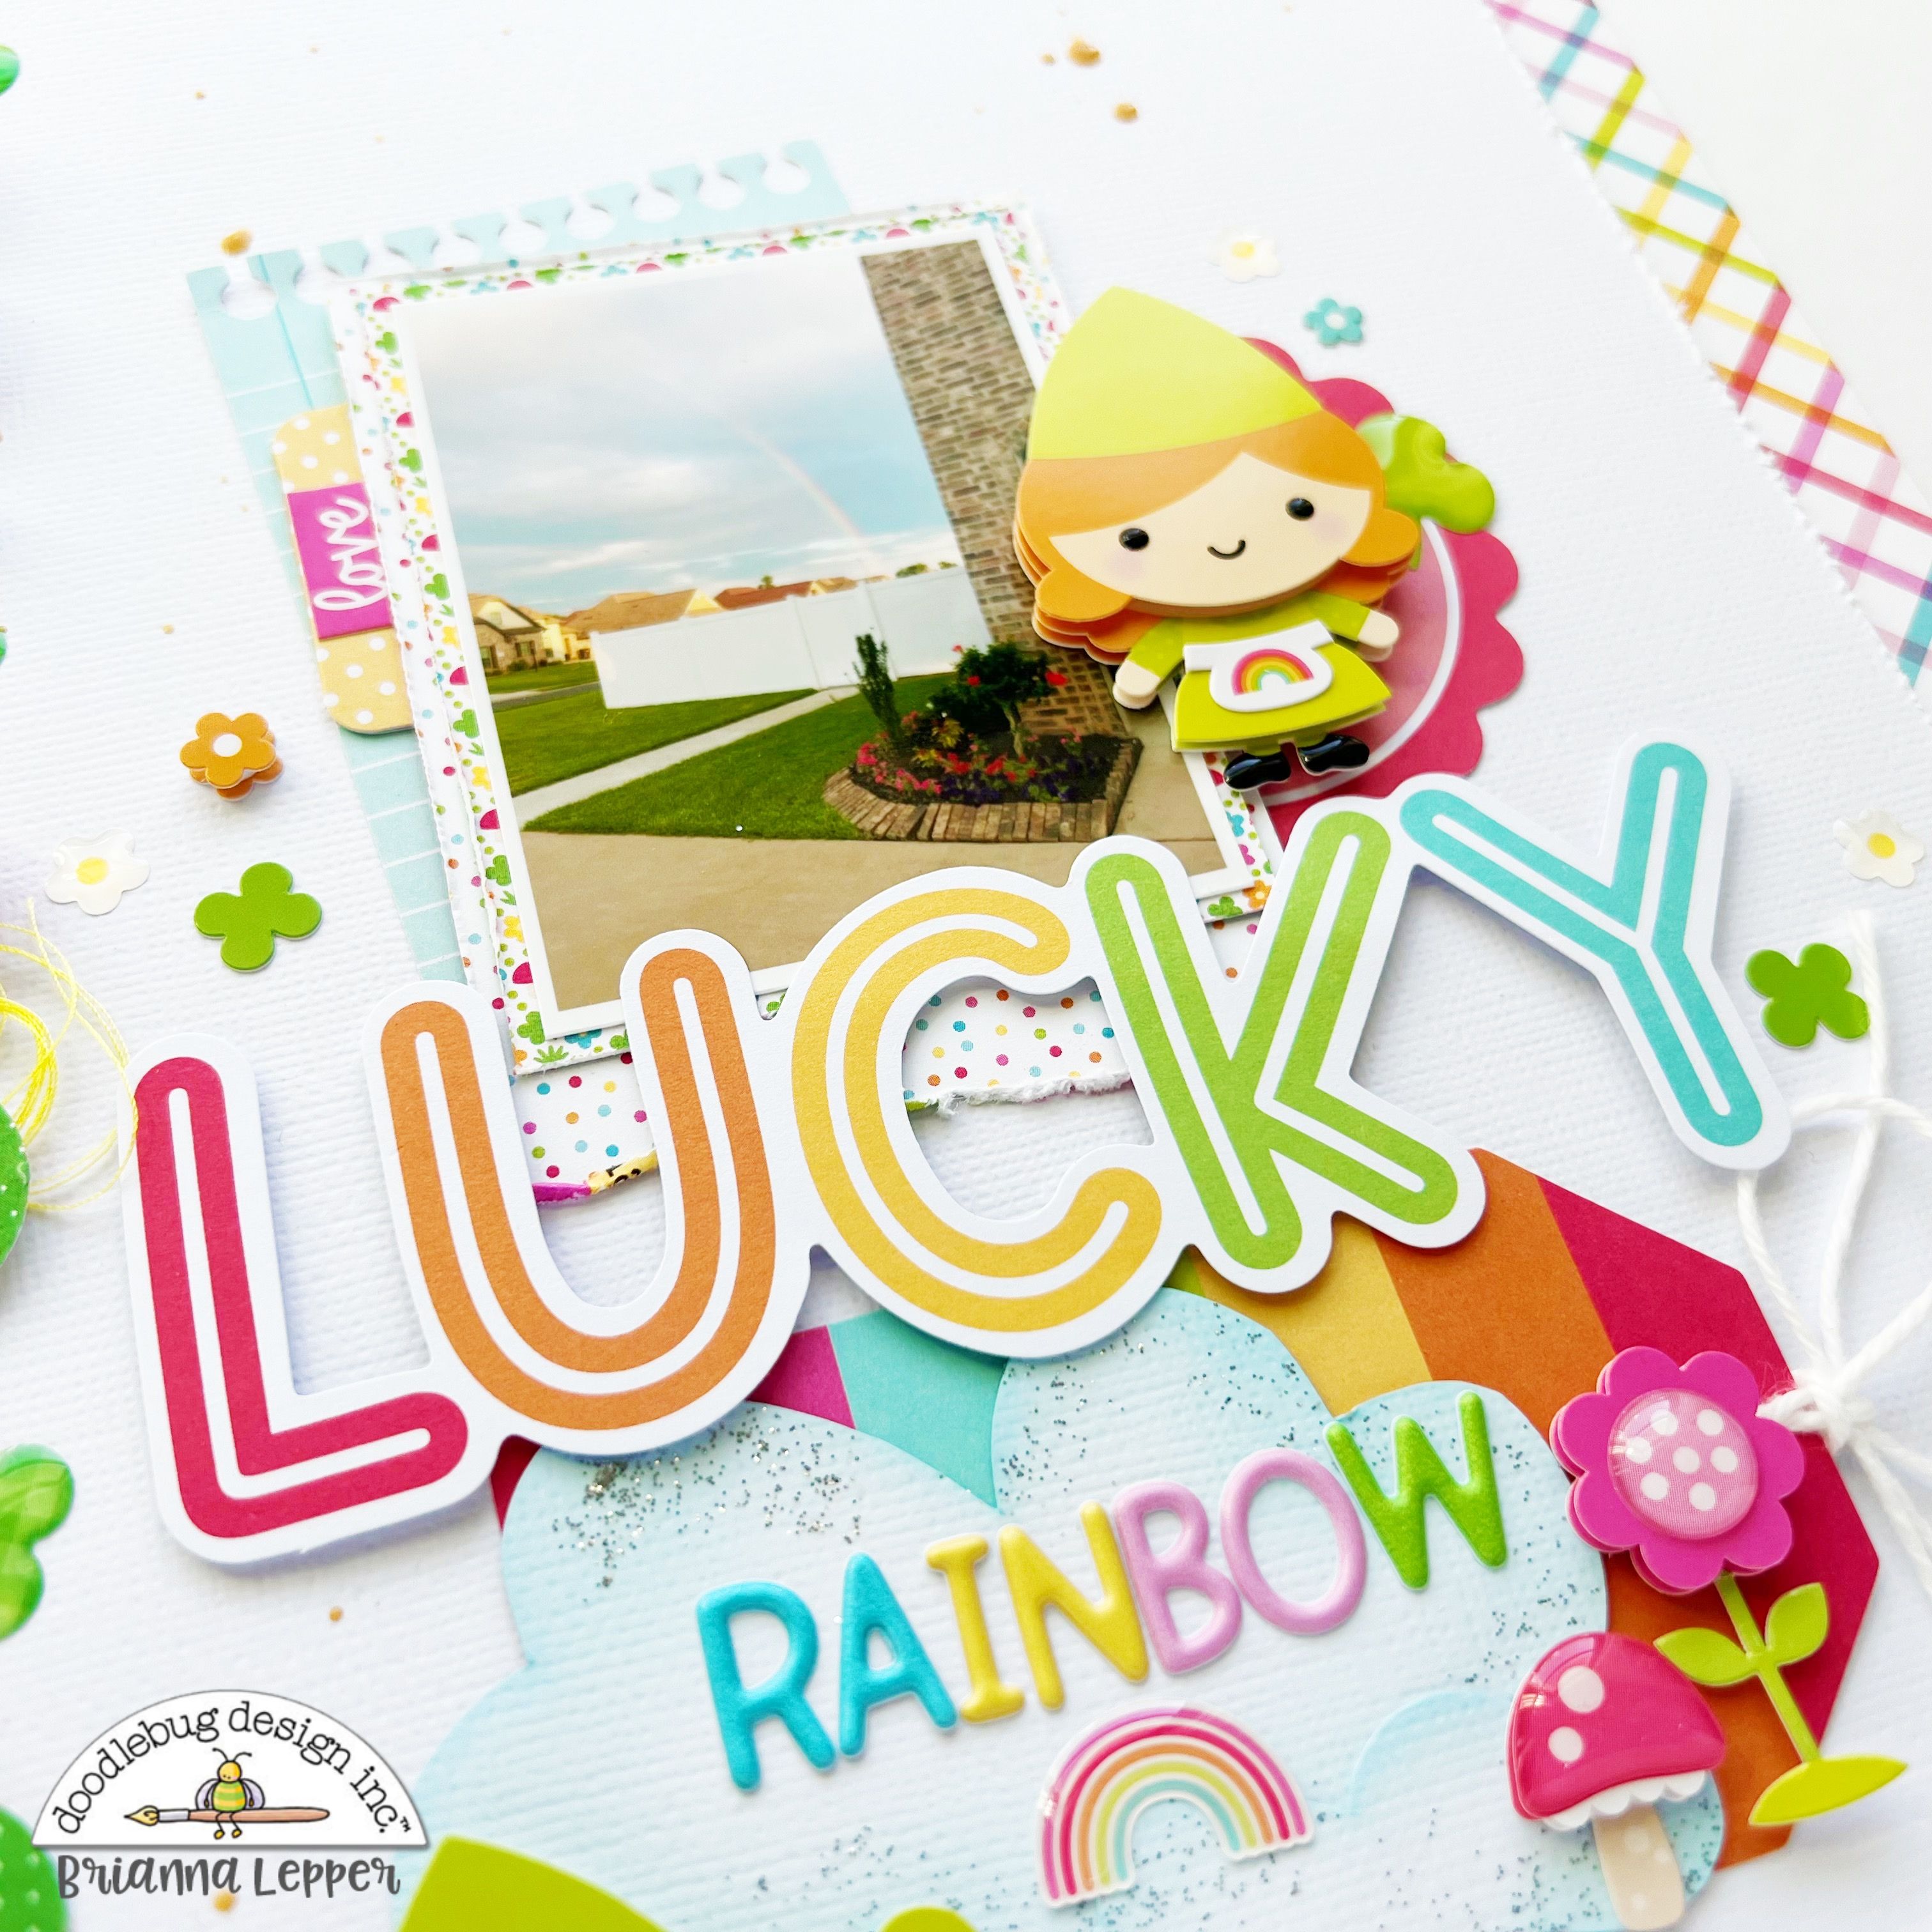
Next, I matted my photo using more papers from the 6x6 paper pad and layered a few Bits + Pieces behind it. Both the "Happy Go Lucky" and "Garden Gnome" Doodle Pops were perfect additions to this page so I added them both! They are so fun and bring a bit of whimsy to this whole design.


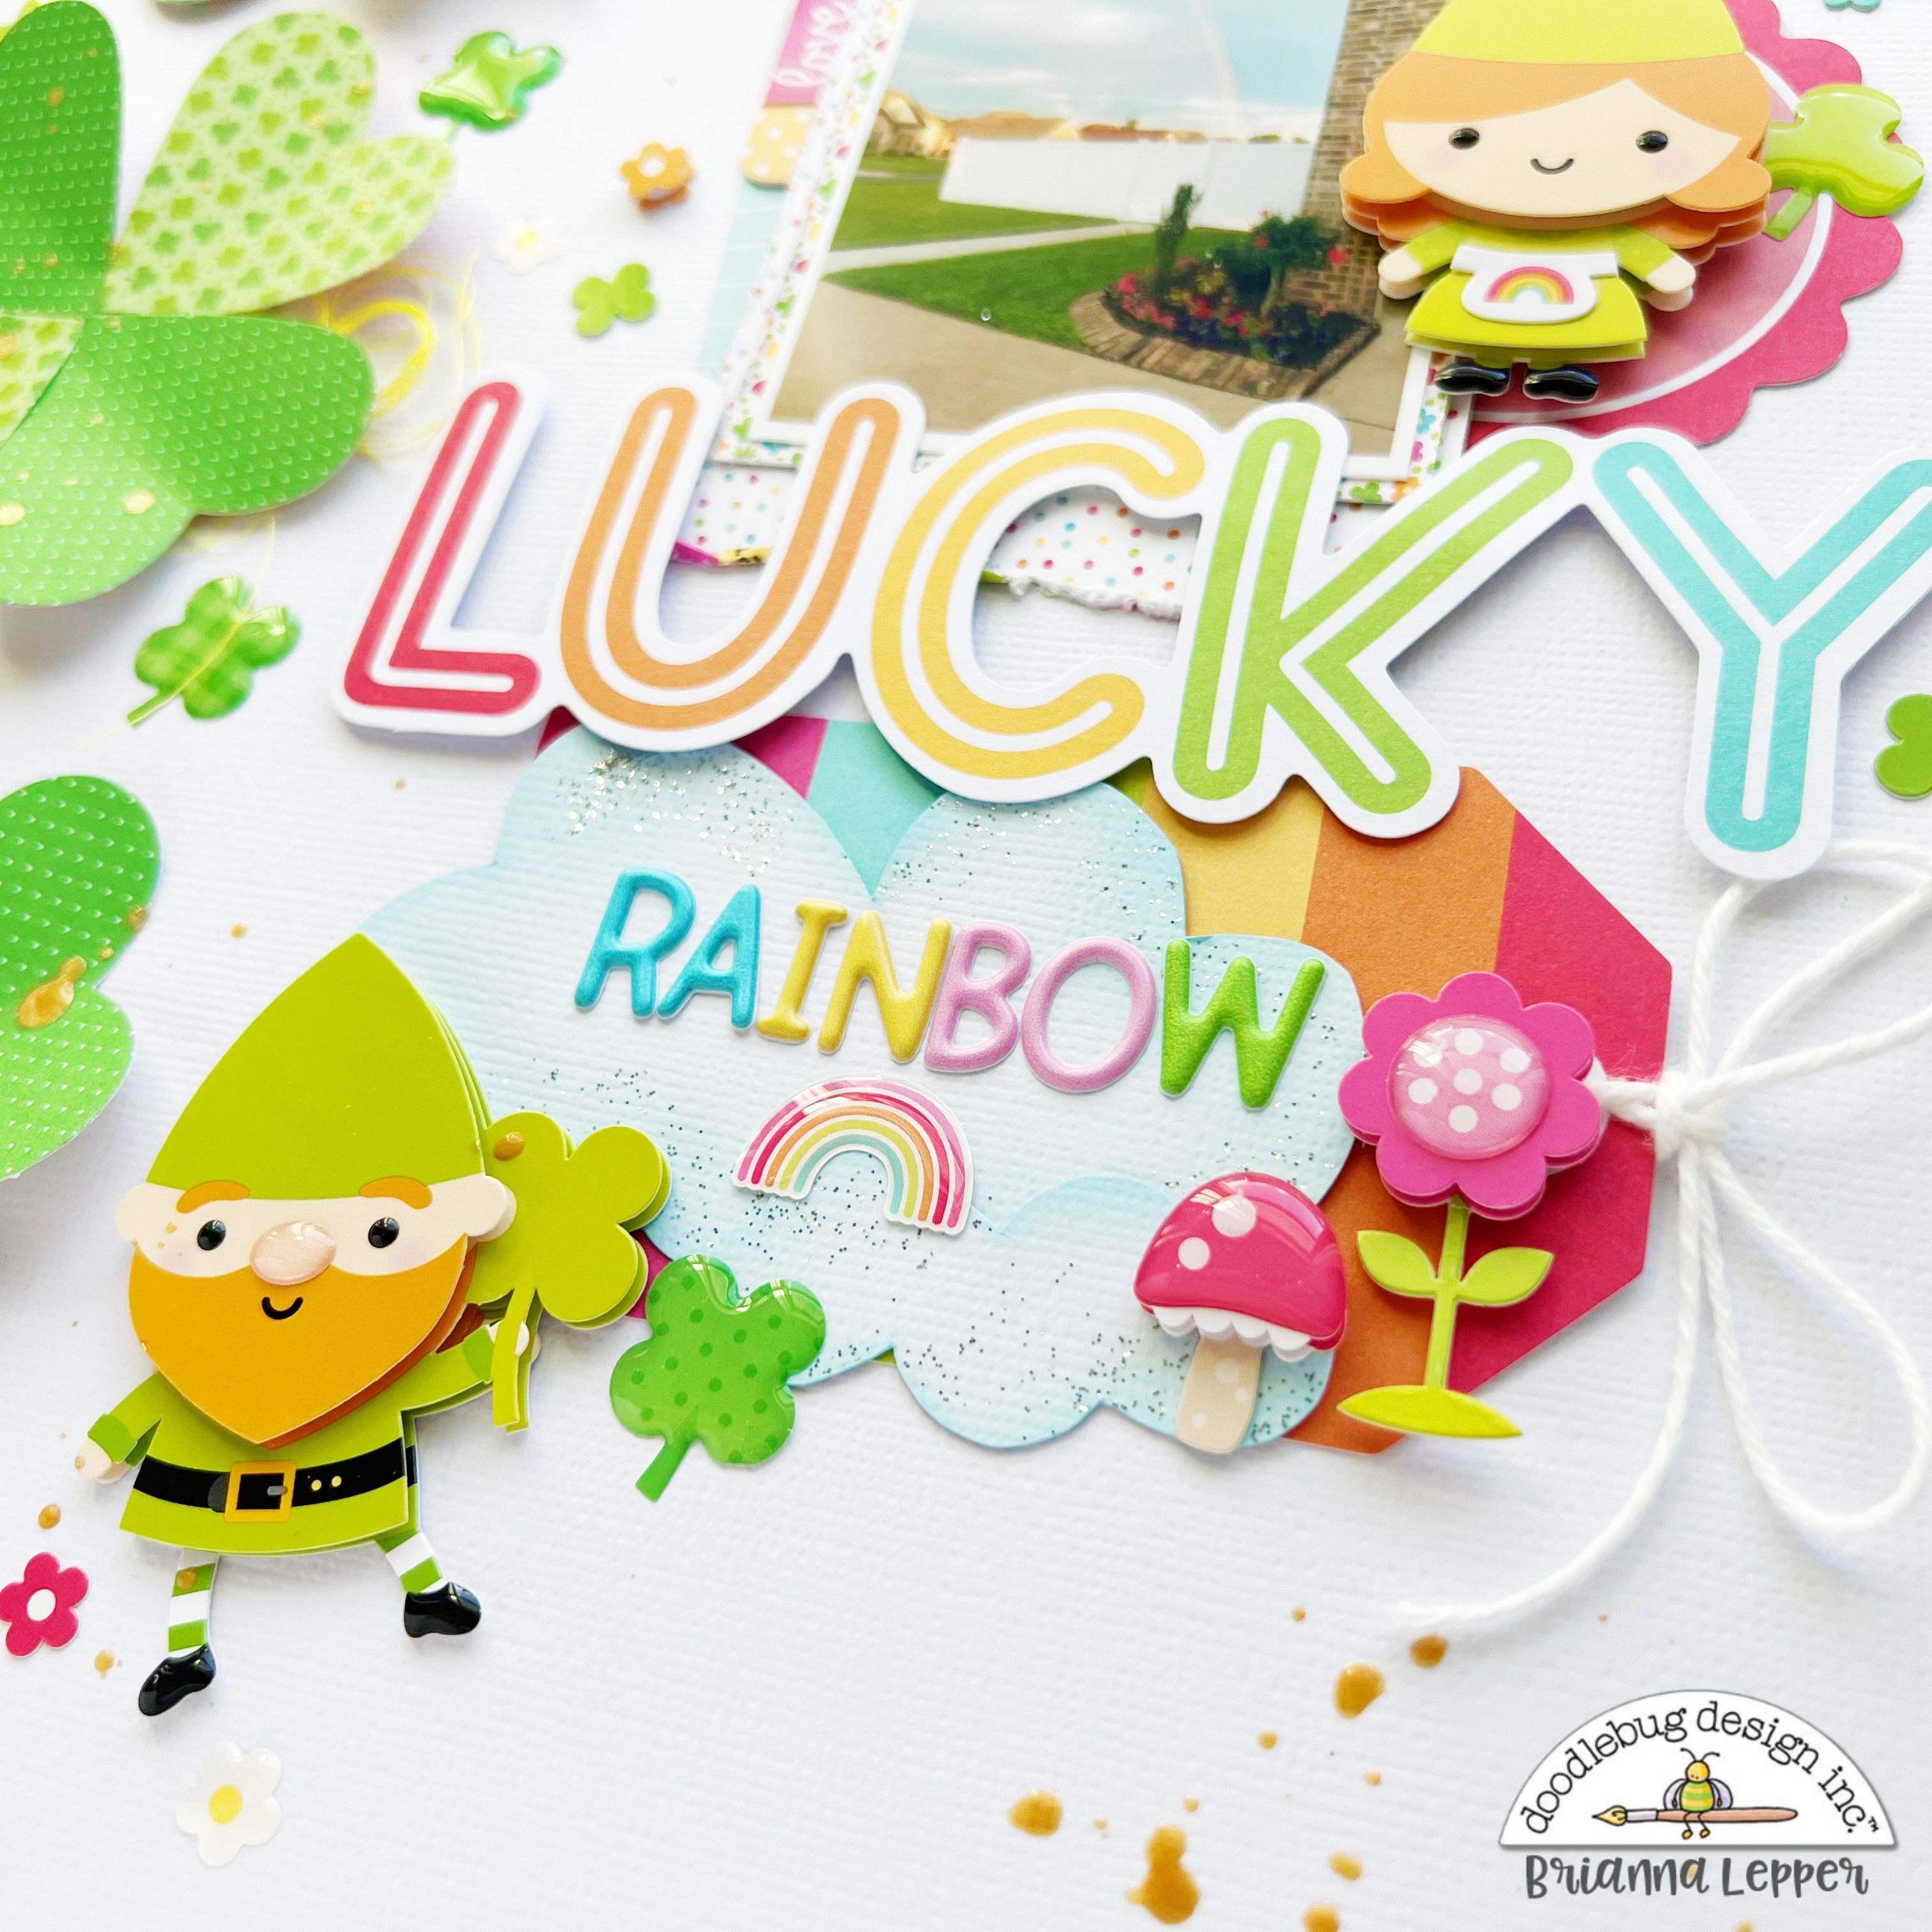
I wanted to add extra four leaf clovers to my layout, so I took the "Lots of Love" Shape Sprinkles and adhered them around the page. They are so cute and added even more pops of green.


Here's one last look at this colorful page!


Thank you so much for stopping by today, I hope that I've inspired you in some way! Have you made your own four leaf clovers with a heart punch before? They're so fun and easy to make and they go so well with this collection! See you in my next post friends!


DOODLEBUG PRODUCTS USED

Over The Rainbow Collection
Alphabet Soup Alphas
White Doodlebug Twine

OTHER

Heart Paper Punch
Gold Spray
Silver Stickles
Tumbled Glass Distress Oxide Ink
White Cardstock

Wednesday, August 31, 2022

SEASIDE SUMMER - SUMMER SUN FUN LAYOUT | with Erica

What do you do when you have smaller pieces of pattern paper left after a project? Get out your punches and start punching shapes!

I pulled out some of my heart paper punches and punched out a bunch of hearts with my leftover pattern papers. I distressed the edges and layered some of them adhering together with my mini stapler.

I used a piece of white textured cardstock as my base and trimmed it down to 11x11. I matted it on one of the gorgeous floral 12x12 papers from the Seaside Summer collection. I added some stamping to the background to add a pop of color and interest to the background.

Next I placed the punched hearts in a vertical design down the left side of my page. I popped some of the hearts up on foam adhesive and then placed my photos down.

For my title I used a few of the fun and colorful chit chat pieces and placed them under my photo. I tucked in some floral odds & ends to the right of my photos and then added in some sprinkles around the page! I love how colorful this layout turned out and the paper scraps did not go to waste!

The next time you have some paper scraps to use up try pulling out your punches or dies and cut out some shapes! Thanks so much for stopping by the Doodlebug Blog today!

DOODLEBUG PRODUCTS USED

Seaside Summer Collection

Thursday, July 14, 2022

MY HAPPY PLACE THIS IS US LAYOUT | with Lisa

I love collections that have amazing colors and that are super versatile and easy to use for every occasion or theme. The My Happy Place collection is like that for sure and I love the amazing color scheme. I decided to go with a layout this week and to scrap an old picture on which I had friends over at my house.


For this layout I wanted to use a maximum of all the patterned papers. An easy way to do that is to choose one of your punches and to punch out shapes from every paper. Here, I used a 1 inch and 1 1/2 inch square punch. I cut some of them in four, to have mini squares too. 


I wanted to place the squares a bit randomly on the page and to integrate the photo later. So I placed my squares on the layout, starting with the big ones, after distressing the edges and corners of each square. Then I placed the smaller ones, also layering them on the bigger ones. 


When I had everything placed on my background, I chose a place for the photo and matted it with some scraps of paper before adhering it to the layout with foam tape. 

I went through all the embellishments and chose enamel dots and enamel shapes, fussy-cut flowers and some mini Doodle Pops to decorate the squares and the page.


For my title, I chose one of the Chit & Chat word die cuts saying: "This is us" and I also cut out the letters "Home sweet Home" from a banner. To finish I splattered gold paint.


I hope you enjoyed the process and are excited to use this collection too...:)

YouTube | Facebook | Instagram


DOODLEBUG PRODUCTS USED

My Happy Place Collection


OTHER


Heidi Swapp Color Shine


Pin It button on image hover