Showing posts with label Shadowbox Insert Kit. Show all posts

Tuesday, September 3, 2024

HEY PUMPKIN PREVIEW WEEK - DAY 2 | with Tonya

We are back with Day 2 of our Hey Pumpkin Preview Week!  Today we are showcasing the fun new Hey Pumpkin Shadow Box Insert Kit.

Just like our other insert kits, this one comes with everything you need to design your own Doodlebug Hey Pumpkin collage!  Each kit comes with all of the stickers & sprinkles, a sheet of vellum to use as your base and a template that is easy to follow!

The template even tells you which icons to pop up!  Here is a close-up of all the cute little ghosts, spiders, pumpkins & kitties!


Pop your completed insert into one of our 8x8 Shadowbox Frames and you have the perfect Halloween decor piece!  

Be sure to stop by all this week for more fun sneak peeks of our Hey Pumpkin collection!  Have a great day!

DOODLEBUG PRODUCTS USED

Hey Pumpkin Shadow Box Insert Kit
Black 8x8 Shadowbox Frame


Sunday, December 3, 2023

GINGERBREAD KISSES WREATH | with Tya


Hello there friends! Welcome to December! Wow - has this year just flown by! For my post today, I am sharing a fun and festive home decor piece with you! It's just in time to add to your decorations this year! I love making all sorts of wreaths and knew when I saw the Gingerbread Kisses collection, I wanted to make one of these candy cane wreaths! I knew it would be a great way to showcase all the yummy candy in the collection.! I also repurposed the "Shadow Box Insert Kit" to be the decoration in the center of the wreath! You don't always have to put those in Shadow Boxes!

So to make my wreath I used the following products:

-Gingerbread Kisses Shadow Box Insert Kit

-Candy Canes- these are the "Elf" Movie-themed ones that are out in stores now. I loved how the candy cane colors are perfect matches for the Gingerbread Kisses collection!

-an 8 inch foam wreath form - picked this up at the Dollar Store

-(2) 10 inch circle canvases

-Buttons and white twine

-Red Dot Ribbon- 2 spools

-For the decorative tag on the left side of the wreath, I layered a flower, some mesh ribbon, a fun cookie decoration, some greenery, a button, and twine and the cute "Merry Christmas" banner is from the Chit Chat.

-burlap twine

- Hot glue

To start I laid out one of the circle canvases and then arranged my candy canes around the circle. I used hot glue to glue the bottom points onto the canvas and then glued the top corners of the candy canes to the one next to them.

I then added some white twine to some 1-inch buttons and hot glued them to the centers where the two candy canes meet.

Next, I assembled the Shadow Box kit as shown in their instructions, but used the second circle canvas as my background instead of a piece of paper. I centered the vellum sheet onto the center of the circle canvas and glued that to the top of the candy cane layer, which I previously did.  I then covered my foam wreath form with the red dot ribbon and hot glued that on top of my Shadow Box sticker layer.

I wanted to add a little bit more decoration to my wreath so I took a large kraft tag and layered it up with a striped flower, some mesh ribbon, a cute realistic looking cookie ornament, some greenery, a button tied with twine and the "Merry Christmas" banner which is from the Chit Chat die cuts. I had a sparkly red glitter bow in my stash that added to the left edge of the wreath. I glued the tag and all it's fun bits to the top of the glitter bow.

Finally I wrapped some burlap twine to two of the top candy cane bundles. I hot glued that really well and then made a loopy bow and hot glued that to the top of the twine I just wrapped. This serves as my hanger for the wreath.

I hope this wreath has inspired you to create your own fun and festive holiday decor piece! The "Gingerbread Kisses" collection was perfect for this candy-themed project, and I had so much fun making it. I encourage you to get creative and use your favorite holiday collection to put your own spin on this wreath. It's a great way to showcase your favorite holiday treats and add some cheer to your home this season. Happy crafting!


DOODLEBUG PRODUCTS USED

Gingerbread Kisses Shadow Box Insert Kit
Gingerbread Kisses Chit Chat Die Cuts

OTHER

Candy canes
2 Circle Canvases
Foam Wreath Form
Ribbon & Twine
Buttons
Hot Glue
Decorations for the tag

Monday, December 19, 2022

CANDY CANE LANE SHADOWBOX INSERT KIT | with Wanda

Hello my Doodlebug friends! Wanda here today to share another project with the super fun Candy Cane Lane Collection! Can you believe it's Christmas week? I hope you and your family have a wonderful holiday! My shadow box I am sharing today is up on the shelf in my craft room to bring some cheer. But it would also be great in the entry way or any room that needs fun and joy! I used the new Candy Cane Lane Shadow Box Kit and the brown frame to put this together. If you haven't made a Doodlebug Shadow Box yet, I really recommend it! I guarantee you will have some fun crafting! 

Here is my finished shadow box. I splattered on some white paint to make it look snowy and artsy! I used some stickers and embellishments to add a bit of extra interest to the bottom of the frame. I always like to add some matching decorations to my frame! It's hard to see, but I backed the vellum panel with blue snowflake 12x12 paper from the Candy Cane Lane Collection.

A

I just adore all the little houses in this kit!! I want to live in a pretty Christmas house! You can see that I also splattered white paint onto my finished panel. I used Diamond Stickles to add glittery accents to the rooftops and other areas. 

A

 So many pretty, sparkly gems in this kit - it makes it come alive and shimmer!

A


A

The color palette in this kit is just so cheery and sweet. I do love a pop of pink or aqua in with my Christmas colors! No one does it better than Doodlebug.

A


A

Wishing you a very Merry Christmas and a Happy New Year to come! Thank you for allowing me to come into your craft room all year and share my love of Doodlebug with you! See you soon!

Wanda SignatureBLOG | INSTAGRAM 


DOODLEBUG PRODUCTS USED

Candy Cane Lane Shadow Box Insert Kit
Candy Cane Lane Collection
Brown Shadow Box Frame

OTHER

White Paint
Stickles Diamond Glitter Glue
Foam Adhesive Squares

Monday, August 29, 2022

SEASIDE SUMMER SHADOWBOX INSERT KIT | with Wanda

Hi Doodlebug Friends! Wanda here with another super fun Seaside Summer project! Today I'm sharing my Shadow Box with the awesome ocean themed Seaside Summer insert! I jazzed up the shadow box by putting shells inside! And added a fun sentiment and a cutie pie toucan too!! I love these shadow boxes. I am already getting excited about making my Halloween one too! But, it's still August and hot summer days are still here - so let's keep summer crafting, right?! Happy Monday - hope you have a great week!

1

I used the Brown Doodlebug Shadow Box Frame along with the Seaside Summer Shadow Box Insert for this project. I also used Flower elements from other collections! One of the best things about Doodlebug is that everything mixes and matches so effortlessly across the collections. I added the "down by the seashore" sticker from the 12x12 Sticker Sheet from Seaside Summer. In this photo you can see the shells I put in the bottom of the box before I closed it up. It looks really cool!


1

 I used this cute Doodle Pop called Toucan Tango up on the top corner of my shadow box!

1

In case you're new to the Doodlebug Shadow Box Inserts: They come in a kit with the design page, a sheet of vellum, and everything you need to put it together! You simply line up the vellum on top of the design page, and add all your stickers and embellishments. The only thing you need is some foam tape or foam squares! In this photo is my finished piece before I put it into the box. I added a few jewels here and there on mine!

1


1

 I mean, seriously, how can you not smile, and pack up the car to head to the beach?! 

1

That's it for me for today! Take good care, and until I see you next time, happy crafting! 

1

MY BLOG | MY INSTAGRAM


DOODLEBUG SUPPLIES

Seaside Summer Collection
Seaside Summer Shadow Box Insert
Brown 8x8 Shadow Box Frame
12x12 Gingham Paper Pack
Mini Jewels

OTHER SUPPLIES

Foam Tape

Wednesday, August 3, 2022

SEASIDE SUMMER LIFE IS BETTER LAYOUT | with Erica

Hey friends! I am so excited to be sharing my first project using the adorable new Seaside Summer collection!

One of my favorite designs besides a grid is a large circular design in the middle of my page! The Shadow Box Insert Kits make it easy to create this! These sets can be used in many different ways and today I used the Seaside Summer Shadow Box kit on my 12x12 layout!

Each kit comes with easy directions to create this adorable project! Once all my pieces were adhered to the piece of vellum I attached it to a large circle and cut it out! I placed it on a piece of white cardstock that I trimmed down to 11x11 and then matted it onto some pattern from the Seaside Summer collection!

For my title I used to the Sunshine Alpha set in the colors swimming pool and bumblebee! I added a few of the new sprinkles to the title as well to add more color and fun to it! To finish off my layout I added my journaling and a few embellishments around my photo!

This layout came together so easy using the Seaside Summer Shadow Box kit! Thanks so much for stopping by the blog today!


YouTube | Instagram | Facebook | Blog

DOODLEBUG PRODUCTS USED

Seaside Summer Collection
Seaside Summer Shadow Box Insert Kit

Monday, July 4, 2022

MY HAPPY PLACE SHADOWBOX INSERT KIT | with Wanda

Hi Doodle-friends! Wanda here today to share a fun Shadow Box project with you! Aren't you loving all the projects made with My Happy Place Collection? I love this collection so much - it really speaks to me with the colors and themes. Today I put together the My Happy Place Shadow Box Insert and created a piece for the table in my entry way! If you haven't made one of the Shadow Box Kits yet, I encourage you to make one! They are so much fun to make. 

I swapped out my Cute and Crafty insert for the My Happy Place insert! Pinks and greens and aqua....with themes of home and heart. 

A

 In your shadow box kit you get everything you need to put this together! All you need to do is pick out your frame! You get the gems and stickers and Sprinkles.... I decided to add some tiny heart Sprinkles as well. Love!

A


A

I added a sticker from the 12x12 My Happy Place sticker sheet. I already had made the flowers for my prior insert!! It makes it so fun and pretty.

A


A

I used the pistachio and white polka dot paper from the My Happy Place coordinating Petite Prints to back my insert. Looks great with just a touch of a print behind the vellum.

A

That's it for today's project! I will be seeing you soon! I can't wait to create with the upcoming Seaside Summer Collection! Stay crafty!


A

MY INSTAGRAM | MY BLOG


DOODLEBUG PRODUCTS USED

My Happy Place Shadow Box Insert
8x8 Shadow Box Frame
Tiny Hearts Sprinkles
My Happy Place Collection Papers and Stickers 


Tuesday, May 31, 2022

SHADOWBOX INSERT KIT FAIRY GARDEN | with Nathalie

Who doesn't love a touch of cuteness in their home?!  Well, there is nothing cuter than the new Shadow Box Inserts from Doodlebug.  And to make it even cuter, I have chosen the new  Fairy Garden Insert to create a new décor piece for my dresser.


I followed the step-by-step instructions to create the vignette on top of the vellum piece from the kit


I chose different widths of foam adhesive when attaching some of the stickers to the vellum.  I love the play on dimension and different heights in the pieces.

I decided to cut the white cardstock into an circle to match the circumference of embellishments, then mounted it on a piece of Bubblegum petite prints.

To finish my piece, I am thinking about rotating the sentiment piece on the shadow box, so that it always feels new on my dresser. Make sure you check the new Shadow boxes and inserts from Doodlebug, you are going to love them!


.

Instagram | Blog | YouTube 


DOODLEBUG PRODUCTS USED

Fairy Garden Shadow Box Insert
8x8 Black Shadow Box Frame
Petite Print - Bubblegum
My Happy Place Chit Chat 


Tuesday, May 24, 2022

SHADOWBOX INSERT KIT SWEET SUMMER | with Karen

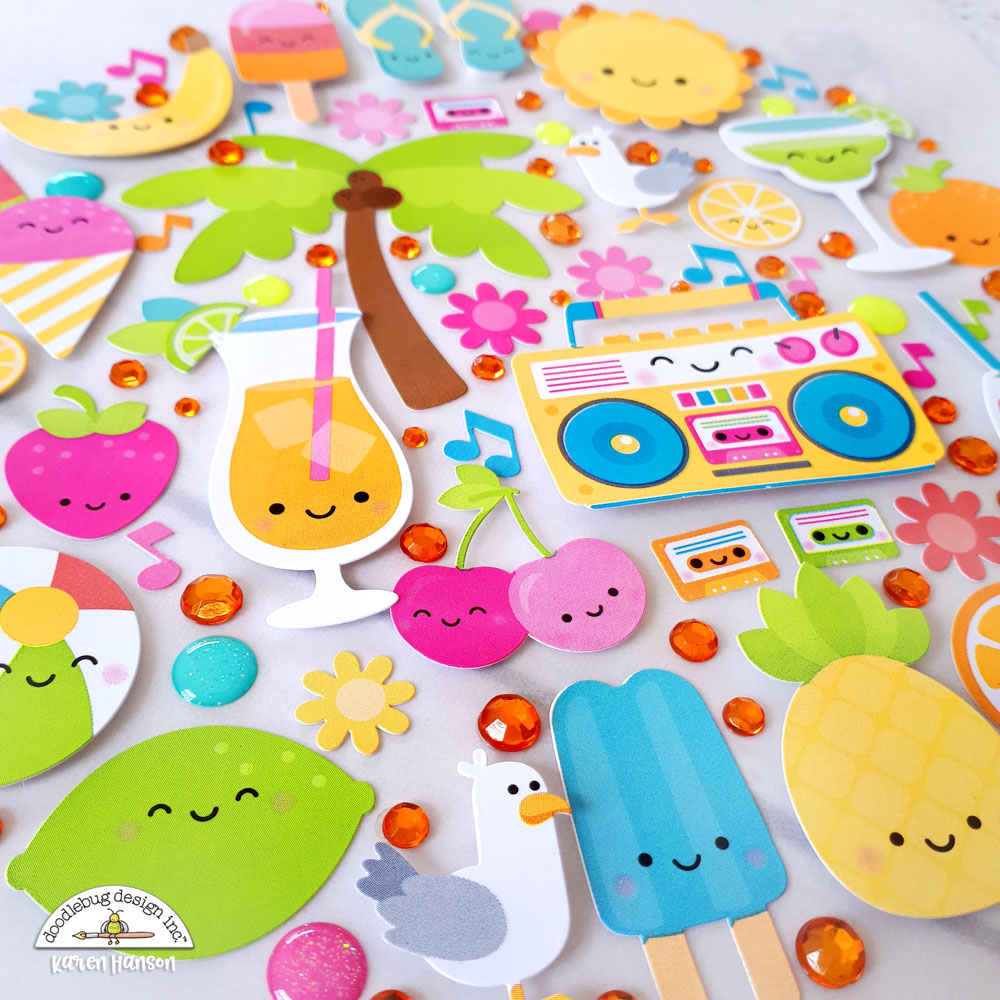
OOOOOOOOH Ya!!!!! I'm sorry - I didn't mean to start this post by yelling at you, but I am so excited to share today's post with you. I am totally and completely obsessed with Doodlebug's new Shadow Box inserts. And by obsessed, I am talking about "hoard all your Doodle-pops" obsessed. I know you know what I mean.

End-angled

Not only are these inserts filled with all the cute Doodlebug you can imagine, they are incredibly fun to put together. I may have ordered 10 and put together 7 of them the morning I opened them. The only reason I didn't do more is that my daughters stole the other 3 to do themselves. I see the perfect opportunity for a girl's crafting night with this product! Grab your foam adhesive and your favourite friends and you will be laughing and creating in no time - no crafting experience needed. Just follow the templates and voila!

Seagull

I mean, come on!!! The seagulls in the Sweet Summer insert are as cute as it gets.

Cassette-player

And while I may have had to explain what this was to my daughters, feeling old and nostalgic was made fun while crafting with this product.

Album-2

And here's my little tip for you - if you become a hoarder....ummmm, I mean "collector" of these inserts like I have already clearly become, Doodlebug's 8x8 albums are a perfect place to store and admire your inserts while you wait to move them into your shadow boxes for the season. Because you know you are going to want to have one for every season - or maybe every month! :)

Album-1

Thanks for stopping by!  Hugs,


BLOG | INSTAGRAM

Doodlebug Design Product:
Sweet Summer Shadow Box Insert
Doodlebug 8x8 album

Other Products:
Foam Adhesive

Monday, May 23, 2022

SHADOWBOX INSERT KITS CUTE & CRAFTY | with Wanda

Hello Doodlebug Friends and Fans! Wanda here today to share a super fun project with you! I am so excited to share my Cute and Crafty Shadowbox project today. Have you seen the awesome shadow boxes and inserts? What a cool concept! I knew right away I wanted to make one for my craft room. So of course I chose the Cute and Crafty Insert!! This came together so quickly and easily and it looks cute on the shelf in my room. I also think this would make an excellent gift. There are so many inserts - for a baby shower gift, or a Christmas gift, or for someone who loves Halloween! I also really think this could be a fun group project. Be sure to check out all of them!

I chose the brown frame for my project. I splattered on some white paint for a bit of an artistic look. You could also easily paint your frame any color - and I may paint mine - but I'll decide later! The frames come in white, black and brown. The insert pack comes with everything you need to put it together.

 I added some cute flowers and a sentiment from the Cute & Crafty Collection to the bottom corner of my frame! 

1

 These are all the items that come in your insert kit.

1

 The kit comes with a sheet of vellum and you place the pattern behind it and attach all the goodies!! I swapped out some of the stickers with glossy hearts and glossy flowers from other Sprinkles packs.

1

Once it's finished, replace the glass and put your choice of paper behind the design... it comes with a piece of white cardstock, but I chose pretty yellow 12x12 gingham! SO cheerful!

1


1

 How much fun is this??? SO FUN!!

1

Thanks for spending a bit of time here with me on the Doodlebug Blog! Wishing you oodles of creativity and happiness. I'll see you soon! 

Wanda Signature

MY BLOG | MY INSTAGRAM

DOODLEBUG PRODUCTS USED


Cute & Crafty Shadowbox Insert Kit
Doodlebug 8x8 Shadowbox Frame Brown
Cute & Crafty Bits & Pieces & Chit Chat Pieces
Gingham Linen Petite Prints 


Pin It button on image hover