Showing posts with label Twine. Show all posts

Thursday, March 1, 2018

So Punny Cut Files | I'm Cuckoo For You! Layout by Anita

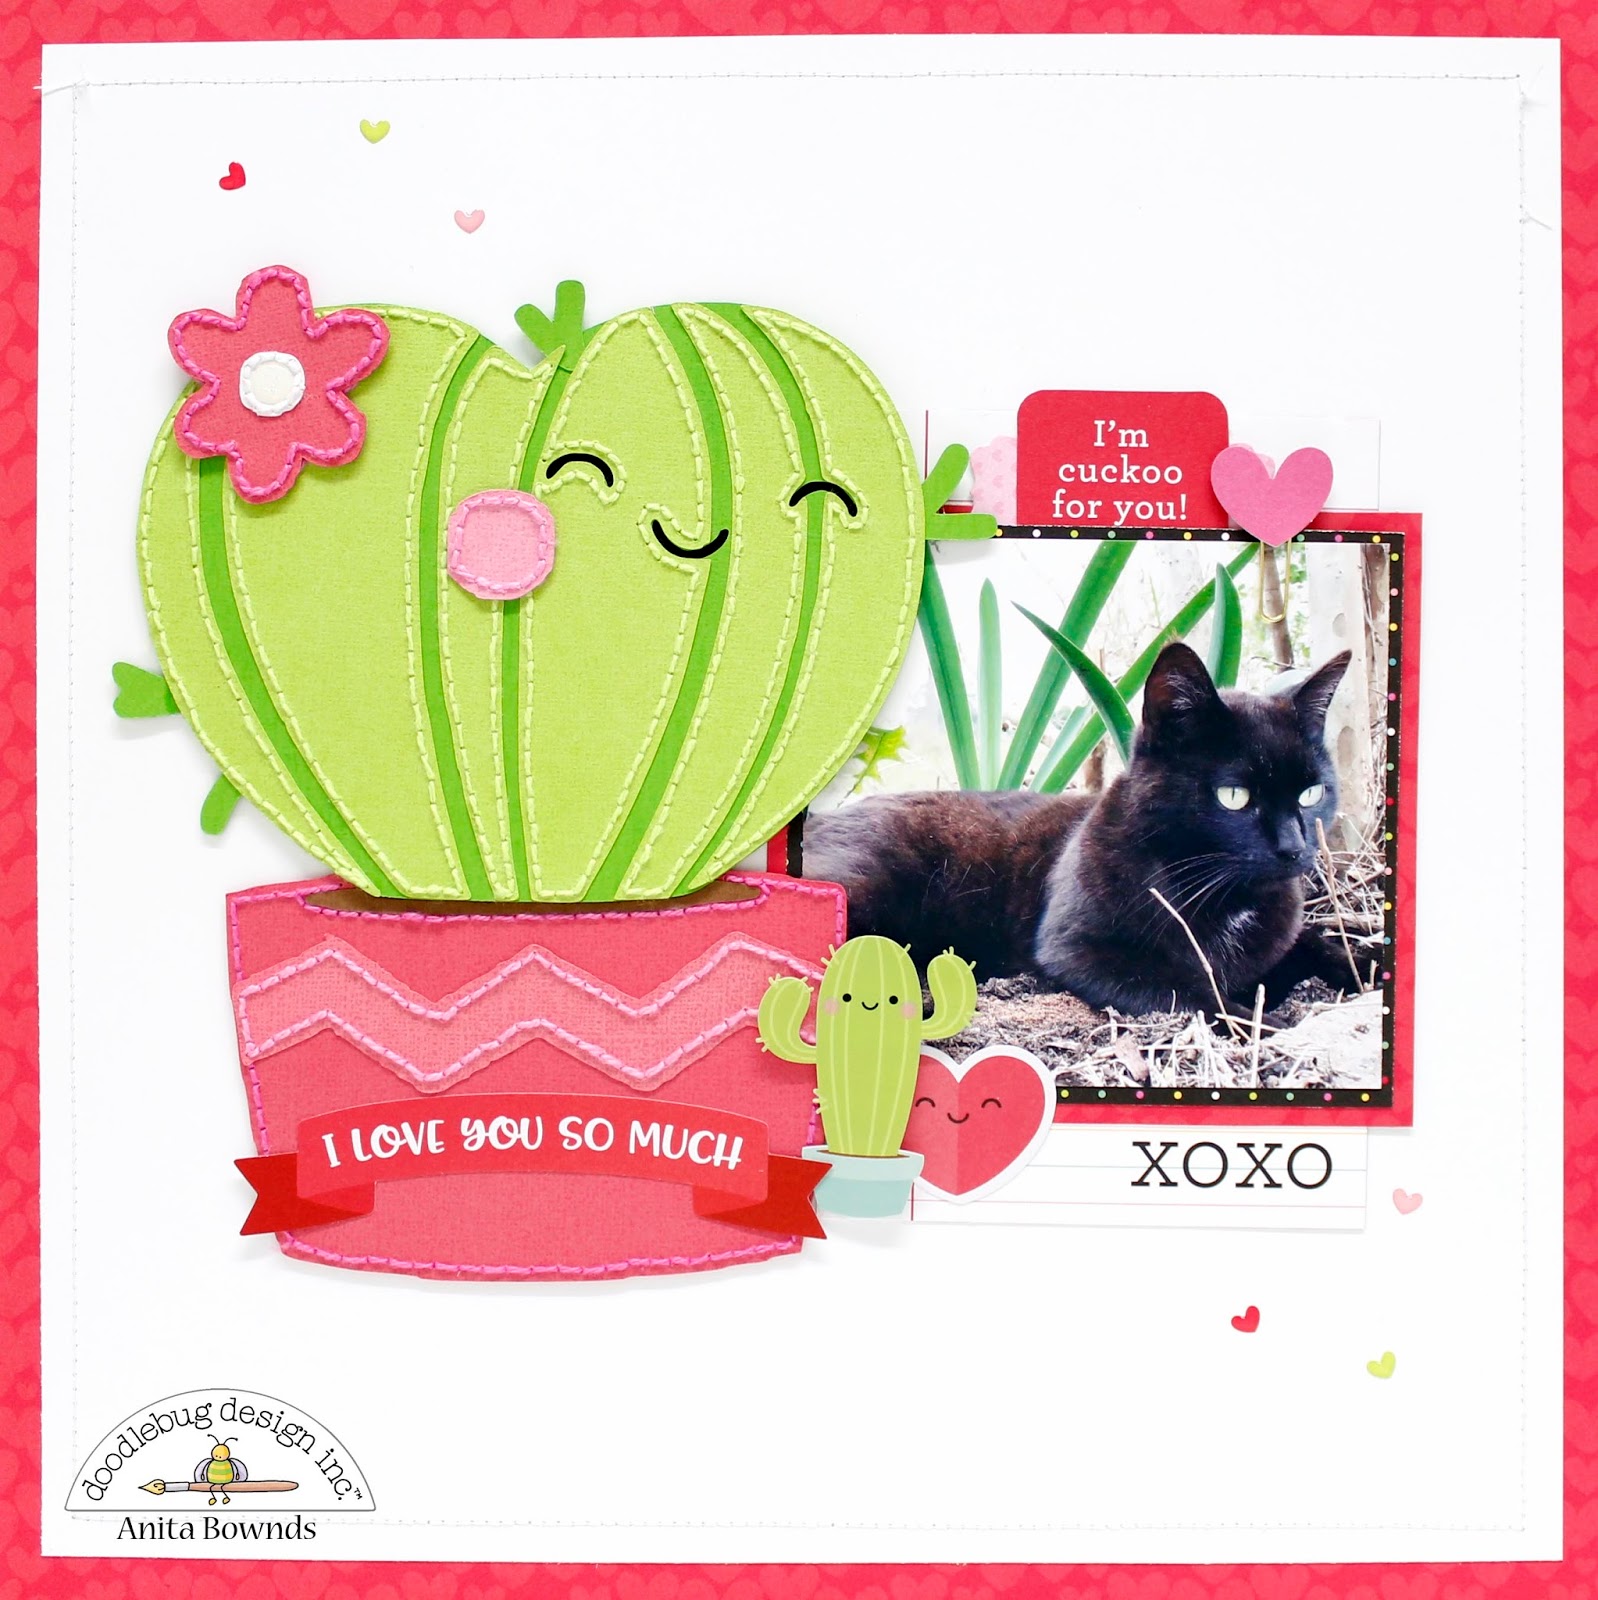
Who loves hand stitching? I wanted to try something a little different on this layout so I decided to handstitch around my cut files to add some extra fun and dimension. From the So Punny cut files I chose the little 'Love Heart Cactus' which is so cute don’t ya think? 

I hand stitched around the cut file using matching colors of Doodlebug twine which finished the piece of nicely.


Then I added the stitched cactus on the left hand side of my layout just tucking my photo slightly behind before adding a sticker from the Friends Icon Sticker Sheet and my title from the Odds and Ends pack on top of the stitched pot.


I also added a word die cut and heart from the Chit Chat pack at the top of my layout and a mini heart that I adhered to a paper clip. And to finish it off I add some of those cute Tiny Heart Sprinkles.


Here is a process video of how I created my layout.


Product used
3587 Bright Cardstock assortment 12x12
3588 Pastel Cardstock assortment 12x12
2983 doodle twine bright assortment
2986 doodle twine cupcake 
4542 lily white glitter sprinkles 
5834 tiny hearts shape sprinkles 
6013 so punny friends icon stickers 
5903 so punny odd and ends
5904 so punny chit chat 
5941 soy happy 
5940 gummi a kiss
5948 work of heart 
6008 so Punny 6x6 paper pad

Anita..xx
Blog - Youtube - Instagram

Tuesday, August 8, 2017

Stitching Challenge: School Girl Layout by Mendi

Hello Doodlebugs!  It's Mendi here today with a fun layout using hand-stitching with baker's twine.  As we transition to back to school I thought it would be fun to document some photos from a few years back.  
Doodlebug Design Cherry Themed Layout by Mendi Yoshikawa using Stitching with Baker's Twine
I took my inspiration from a cherry sequined top my daughter is wearing and die-cut just the cherry portion from the background of my page using THIS cutting file.  I then cut a generous piece of red cardstock an inch or two larger than the cherries.  I covered the entire piece of cardstock with adhesive using my ATG gun and added rows of Doodlebug's ladybug sequins, leaving the outside edge without sequins so I could adhered it to the back of my page.
Doodlebug Design Cherry Themed Layout by Mendi Yoshikawa using Stitching with Baker's Twine
When I was done, I added the remaining die-cut pieces cut using Doodlebug's Petite Prints papers and stitched around the outside edges with green and red baker's twine.  
Doodlebug Design Cherry Themed Layout by Mendi Yoshikawa using Stitching with Baker's Twine
To create my title I first printed it out in Microsoft Word using the Clicker Script font.  I then used some washi tape to temporarily adhere it to my layout and "traced" around it using my paper-piercer to form my stitching holes.
Doodlebug Design Cherry Themed Layout by Mendi Yoshikawa using Stitching with Baker's Twine
Here's a finished look at my title using Doodlebug's solid white baker's twine. I learned as I went that it helps to make the spacing between your holes a little larger and deeper to keep the thread from getting stuck and to keep the paper from tearing.  If my paper ever tore, I simply added some packing tape to the back and re-stitched that spot.  ;)
Doodlebug Design Cherry Themed Layout by Mendi Yoshikawa using Stitching with Baker's Twine
Thanks so much for visiting the blog today.  I hope I've inspired you to try some hand-stitching on your own projects.  It's seriously addicting!

Sunday, August 6, 2017

Stitch Challenge: Planner Love with Twine by Jomelle

Good Morning Doodlebug Fans! Jomelle here. Today I'm sharing my Stitch Challenge Project. This was another challenge for me because I had to think of a way to incorporate stitching using twines into my planner.

I decided to use the Bright assortment Doodle Twine. I manually add the holes by using the biggest needle I have at home and then I will thread the twines through.


Okay here we go. I wanted to try it first on the cardstock. I decided to use 2 different twine colors. Since I had to manually add the holes myself, it wasn't so easy to make the lines straight.


Here is the end product. I wanted to write something for my husband for his birthday. I punched holes on the side so I can add this note to my planner. Of course I will have him read this note on his birthday.


Here is my Monthly Layout for September.


I actually love how my stitching turned out on this layout. Since there were straight lines on the monthly, adding the holes in a straight line were easy to do.


For the blue lines next to the word September, I used a pencil first to draw in the swirl line then I added the stitching.


 The stitching project was challenging but super fun to do. I actually poke myself with the needle couple of times, but so worth it. Thank you for stopping by. Have a nice day!


Friday, August 4, 2017

Stitching Challenge: Life is Sweet by Traci Penrod

Hi Doodlebug friends!  It's Traci and I'm back to share my project for our stitching challenge.  So I have to be honest with you ... this one was tough for me!  I have one sister and when God was handing out the sewing gene, he gave it to her.  She's a wiz with a needle and a sewing machine.  Me?  Not so much! Another fun fact about me -- when I was little and would color in coloring books, I liked to use my crayons to outline everything in the picture.  I would rarely color the pictures in, so I'm not surprised that this is the project I came up with :)
I love all of the cute 12x12 designs that Doodlebug has started doing for each collection.  This one is from the Cream & Sugar collection (5498: sweet shoppe stripe double-sided cardstock).  I used a mouse pad underneath the paper, and a paper piercer, and randomly punched holes around each of the images.  
I did one image at a time so that all of the holes on the backside of the paper wouldn't get confusing.  
I grabbed up several colors of Doodle Twine and plopped down in front of my tv.  It was actually a relaxing way to spend an afternoon.
Although I struggled to come up with my project, I'm really happy with the way it turned out.  I framed the piece and it now hangs just below my Doodlebug pin collection in my craft room.  Hopefully I've inspired those of you who also lack the "sewing gene", to find a fun piece of paper and some Doodle Twine and get stitching!  Have fun!

Thursday, August 3, 2017

Stitching Challenge: Christmas Tags by Brigit

Hello Doodlebug Fans, it's Brigit here and I have a couple of Christmas tags to share with you today. For this Stitched Twine Challenge, I used a couple of cutting files from the Here Comes Santa Claus collection, you can get this from the Silhouette Online Store or Lori Whitlock's Online Shop in svg format.


I used three of the here comes santa claus ornament cut files and made cutouts for each tag using my Silhouette Cameo. Silhouette Studio has a nice rhinestone feature, I used that to create the holes for my stitches, size 1 spacing .2 worked perfectly for me.


The tags have three layers, top with the cutout and stitching on the gingham, patterned paper for the middle and a shadow layer using textured cardstock.


For the stitching, I used a simple back stitch and on the chunky twine I knotted and frayed the ends.


The little tags were printed then cut with my Cameo, which I layered onto another tag cut from silver sprinkles vellum.

Doodlebug products used

ladybug doodle twineladybug chunky twineladybug textured cardstocklimeade doodle twinelimeade chunky twinegrasshopper textured cardstockhere comes santa claus 6 x 6 paper padhere comes santa claus icon stickerssilver sprinkles vellumlily white gingham linen petite print, studio files - tag set, ornament 1, ornament 2, ornament 3, holly berries, svg files - pocket tag set, ornaments, holly berries

Thanks for stopping by and have a wonderful day!


Wednesday, August 2, 2017

Stitching Challenge: Potted Kitty Layout by Anita Bownds

Hi there, doodlebug peeps..
Today I'm sharing a layout of our little kitty Luna who has taken over a pot I was going to put seedlings in 
I'm so glad I didn't because she would have squished them lol....


I started by marking out where I wanted my butterflies to be with a lead pencil then poked the holes 
Then I added the washi tape to the top and bottom of my layout then using the twine and a needle I stitched 
Using my cameo I cut 8 butterflies out 4 small and 4 big and layered them on top of each other and then adding a button in the middle 


Then I cut some bits of patterned paper to go in the middle of my page 
Then I gathered other little bits cutting the different sizes to stager them for layering behind my photo 
Using the spring things odds and ends I added a few die cuts on the left hand side of my photo 


Tucked in a doily and a mini paper clip and added the title and I was done 
You can watch my layout process video here


4495 cupcake mini paper clips |4605 lily white mini paper doilies 
2983 bright assortment Doodle twine| 2479 lily white boutique buttons 
3647 beetle black love letter cardstock stickers |4802 dot assortment washi tape 
5052 cupcake Swiss dot |5061 lemon Swiss dot 
5634 pixie dust |5616 party hearty
5635 rainbow ribbons |5485 spring things odds and ends 

Monday, July 31, 2017

Stitching Challenge: Birthday Tag by Virginia

One of my favorite go-to items in my scrapbooking stash is twine!  Love that Doodlebug has chunky twine and lighter weight twine, both types available in a rainbow of happy colors!


For my project, I wrapped some chunky twine around the middle portion of a tag for a fun textured foundation.

I stitched a few buttons onto the tag using the lighter weight twine.


I chose some cute embellishments from the Fairy Tales collection (love the happy faces on the icons) and the title 'happy' to finish the tag.


Tuesday, June 4, 2013

Tuesday Tutorial: Writing with Twine


If you are like me, you LOVE the rainbow of colors offered in the Doodlebug Design collections --- doodle twine included.  And, if you're like me, you might be stumped at ways to use all those cute colors of doodle twine.   

Today, I'm going to show you how to write with doodle twine.   

Yes, write.  It is super easy to do with the simplest of products.   

Gather the following: 
  • your favorite doodle twine
  • a scrap piece of paper
  • a pen or pencil 
  • an awl, paper piercer of stylus 
  • liquid glue 
  • embellishments to decorate your twine-written title 
Once you have your supplies gathered, you'll need to decide on a word to write.  For this tutorial, I chose SUMMER as my kiddos' will be enjoying summer vacation in two and a half days.   Summer, already.  

On that small scrap piece of paper, practice writing your word.   It's just get a feel of how you want it to look and to use as a visual reminder.   You'll use liquid glue to write a few letters at a time. 


Now, take your doodle twine and start following the glue lines as if you were writing with a pen.  


You are using glue and it will be sticky, so have an awl, paper piercer or stylus handy to help hold the twine to the paper.

Continue with the glue and twine until you've completed writing your word. 


Once you've finished writing your word, let glue dry a bit, then add embellishments.   I used a doodle pop flower sticker and some adhesive pearls to dress up my word.


 So, push your creativity and show off your handwriting -- in twine.

Next up, you could even try the same with adhesive pearls and rhinestones.   How about writing a letter or a word with a line of mini brads?

If you try twine-writing or use doodle twin in your crafty creations, please share with us.  We'd love to see your work.  

Friday, November 16, 2012

Happy Mail Challenge 4: Twine

Welcome to Happy Mail Challenge 4: Tie some twine on your Happy Mail card and send it to someone you love (click here to read about Happy Mail). Come play with us and link up your own creations of incorporating TWINE into your Happy Mail over on BPC website. Here's some ideas on what you could create. 


Now you do not "have to" knit your twine like Melinda did, but WOW this is one way of incorporating twine on your Happy Mail!!
by Melinda Spinks
 Use it to accent around an opening to your card.
by Jing Jing Nickle
Sherry Cartwright created this fun holiday Happy Mail and told us, "I love sending and receiving something fun in the mail.  Bills or advertisements just don't cut it.  So, this year, I started sending some happy mail [a la Stacy Julian, Big Picture Classes and Doodlebug Design].   I used the Happy Mail challenge 4 -- tie it up with twine! as a starting point for this card.  I used white doodle twine and tied it in a simple bow.  Nothing fancy, but still delightful."

by Sherry Cartwright

Here's the card Monique created for this challenge. She made a Christmas card using the twine from the North Pole collection:


Go take the challenge and send some happy mail!
Pin It button on image hover