Showing posts with label patterned paper. Show all posts

Thursday, March 19, 2020

PATTERNED PAPER & PUNCHES ON A LAYOUT | with Erica

Do you love to use a lot of pattern paper but struggle when trying to make it work on your page? One way I love to get a lot of color and patterns on a page is to use my paper punches! I have a stash of punches that I have had for years and recently I have been pulling them out more and more to use on my projects. One of my favorite punches right now is my 2 3/8 scallop punch! I went through the Simply Spring 6x6 paper pad and punched out a stack of scallops. There are many ways to arrange the scallops on a page so just have fun and create something that makes you happy. Once I had my scallops arranged I used my Therm O Web adhesive runner to stick them into place. I did bend up the edges a bit so they had some dimension.
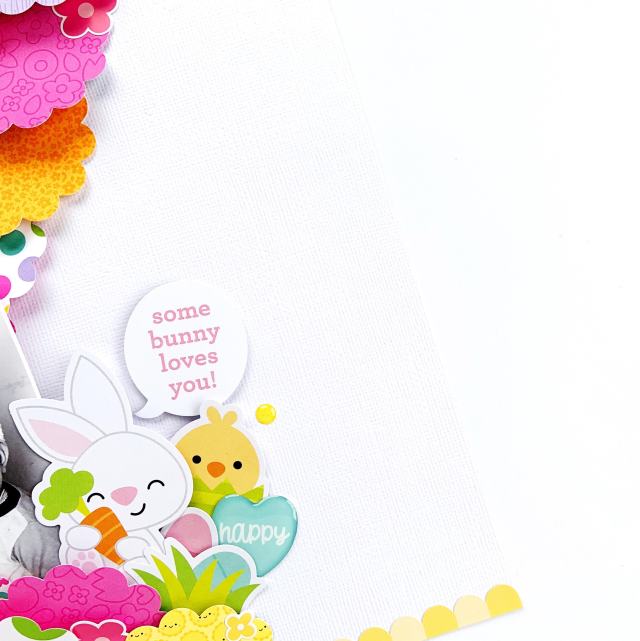
I pulled out the Hoppy Easter odds & ends to embellish around my photo. I thought these would be perfect to go with the photo of our little Liam wearing some bunny ears. I also pulled in a heart epoxy flair from Scrappin Happy Studio. Layering up the odds & ends to create a little scene around my photo adds dimension and interest! I think it turned out super cute and love how some things are popped up more than others! Next time you get started on a project think about pulling out some of your paper punches! Thanks so much for stopping by the blog today! I hope you found some inspiration using pattern papers and punches.


 Have a wonderful day! 


Doodlebug Products Used:
Simply Spring 6x6 Paper Pad
Lily White Textured Cardstock
Simply Spring this & that cardstock stickers
Simply Spring mini icon stickers
Hoppy Easter odds & ends
Glitter Sprinkles valentine assortment
Other
2 3/8 Scallop Paper Punch
Scrappin Happy Studio Epoxy Flair
Therm O Web adhesive

Tuesday, August 6, 2019

I❤️TRAVEL LAYOUT | with Tegan

I have so many travel pictures and I was so excited to use the adorable new Doodlebug Design I Heart Travel collection I almost didn't know where to start! I decided to start with the very first photo from my last trip. While it isn't the most fun photo from our trip that I have, it helps tell a story. I had never been stuck at the airport before, so it was fun to document this experience!
​ I started by cutting 7 inch strips from the back of the Plaid to be Here patterned paper and adhering them to my white background while leaving enough space for my title. I used the Skinny Alphabet Stickers in Beetle Black to make the title in between my strips of paper. I then adhered my white background on to the red Set Sail Patterned Paper and trimmed off the excess so a small border remained. I then adhered this piece to the super fun and adorable I Heart Travel patterned paper!
​ I embellished the top corner of the layout with Odds & Ends pieces (airplane and cloud) and the super cute Sunny Skies Cute Clips! And I love the little pops of color that the Sprinkles enamel dots add!
​ I embellished my photo with more Odds & Ends die cut pieces, Sunny Skies Cute Clips, Icons Stickers, and Sprinkles! I added the sunglasses sticker onto the sun die cut to give him a 'cool' (wink, wink!) new look.

​ Thank you for joining me today! I hope I have inspired you to grab some of the adorable new I Heart Travel collection and start documenting your most recent vacation! 

Doodlebug Products Used:
​ I Heart Travel collection: I Heart Travel Patterned Paper, Set Sail Patterned Paper, Plaid to be Here Patterned Paper, Odds & Ends, Icons Stickers, This & That Sticker Sheet, Picture Perfect Shape Sprinkles, Travel Assortment Sprinkles
​ Sunny Skies Cute Clips
​ Skinny Alphabet -  Beetle Black

​​BLOG | INSTAGRAM | FACEBOOK​​​

Thursday, February 28, 2019

LOTS O' LUCK - Beautiful Skirt Layout | with Caroli

I love clothes, specially dresses and skirts, so when I found this polka dots and clovers skirt I really fell crazy in love with it. 
Midi skirts are my current wardrobe obsession, and this one is my absolute favorite, so when I saw Lot's Of Luck collection I knew it was perfect for documenting my pretty clovers skirt. All the clovers and green were the perfect fit for my photos. 


I went for a simple design with central columns and used plenty of diecuts from the Odds&Ends package, my favorite item from all Doodlebug Design collections. 


I love when scrapbooking is an excuse to do something in real life, like this time, when using the beautiful Lots O' Luck collection was the excuse to dress up, feel gorgeous and pose like a model in the hedge of my neighbor :)
I hope you like this simple design, maybe you also have a fave outfit you would like to document, just do it! This is the kind of stuff you will surely forget about in few more years and scrapbooking is such a precious tool to treasure your happy memories.

 Thank you for stopping by today!
BLOG  |  YOUTUBE  |  INSTAGRAM


Tuesday, February 19, 2019

LOTS O' LUCK - Lucky Layout | with Jana

When my children were little Pat the Leprechaun would visit us every St. Patrick's Day. He would leave a string of poetic clues for my children to follow around the house. At the end, they would find a bag of green goodies for each of them. This was such a fun family tradition, and one I couldn't wait to document with the adorable Lots O' Luck collection. Jana Eubank Doodlebug Lots O Luck Lucky Scrapbook Layout 1 900 I used my digital die cutting machine to create the title in a rainbow of Doodlebug Textured cardstocks. I used a couple of embossing folders from my stash to give them an embossed pattern before adhering it to my page using foam squares. Jana Eubank Doodlebug Lots O Luck Lucky Scrapbook Layout 2 900.jpg The Gold Sugar Coated cardstock mat on this photo really helps it to stand out as a focal point on my page! Jana Eubank Doodlebug Lots O Luck Lucky Scrapbook Layout 3 900 I used my computer to type my journaling inside a circle sized to fit inside the scalloped circle sticker from the This & That Stickers. In the lower left corner of the page I paired the leprechaun from the Odds & Ends pack with the Good Luck shamrock Doodlepop to create a sweet little scene. I love the gold-foiled accents on all of the components of this collection! Jana Eubank Doodlebug Lots O Luck Lucky Scrapbook Layout 4 900 In the bottom right corner of the page, I added a pot of gold, a rainbow, and a couple of shiny gold coins accented with the Gold Sprinkles. Jana Eubank Doodlebug Lots O Luck Lucky Scrapbook Layout 5 900 This page was a BLAST to put together and makes me want to resurrect our "Pat the Leprechaun" tradition this year, even though my kids are older. It was so much fun! Have a happy day!

  SUPPLIES:
Doodlebug Textured Cardstock
 Petite Prints: Lily White Floral-Graph
Gold Sugar Coated Cardstock
Lots O' Luck Collection: 12x12 Paper Pack
So Charming Paper
Bonnie Lass Paper
Lots O' Luck Paper
Rainbows End Paper
Good Luck Doodle-pop
Odds & Ends Icons Sticker
This & That Sticker
Bright Assortment Matte Sprinkles
Gold Sprinkles

Monday, December 3, 2018

Christmas Town Layout | with Caroli

Hello there! You know I love Christmas, I must have told you about it like a hundred times already! But since I live in South America, my Christmas is always in summer, so I don't get to experience the "real" white wintery season.
For this reason, I've decided to celebrate in June, while in the middle of my winter, that way there's only six months to wait for the 'real' Christmas. And, I can wear my ugly Christmas sweaters and drink hot cocoa with marshmallows without worrying about the  heat :)
This is what this layout is all about, it documents the Six Months until Christmas party I throw with my friends each year.
I decided to create a big title diet using this tutorial I shared here before. I filled the letter with different patterned papers and also used come Abigail alphabet to make the title more interesting.
I created a horizontal cluster of embellishments using Odds & Ends and Chit Chat packages, and also some Doodle Pops. With the help of some Sprinkles I added an extra cute detail to some of the critters.

I completed the title with a word I cut using my Silhouette Cameo machine and free font Sacramento. Some seeing machine stitching and I'm done!
I love how simple but yet fun this page came out, the bright Christmas colors pop from the white background and I used a lot of patterned paper :) 

I hope you got inspired to work on some Christmas layout with Christmas Town collection, have a lovely day!
BLOG  |  YOUTUBE  |  INSTAGRAM

Sunday, December 2, 2018

Christmas Town 'Noel Banner | with Brigit

I've been busy getting my Christmas decorations up and needed a little something on a small section of wall and thought a cute Christmas Town Noel banner would be perfect!

To create the banner I used the Christmas town cut file tree with snow file from Lori Whitlock's shop, you can also get these files from the Silhouette Design Store.

For the cardstock I used 12 x 12 sheets of ho ho ho, christmas cookies, snow much fun and lily white textured for the bottom layer.

I decorated the trees with some christmas town odds and ends and christmas assortment sprinkles.

I added some lily white chunky sugar coating glitter to the snow caps on the trees.

For the noel letters I used the lily white skinny cs stickers, I also added some limeade chunky twine bows on each end of the banner.

Thanks for stopping by and have a wonderful day!

Friday, November 30, 2018

Christmas Town Advent Calendar | with Jennifer

Hello Doodlebug friends. Are you ready for Christmas? Well, today I have an advent calendar to share that will hopefully make the wait to the big day a bit more fun. This project features the Christmas Town collection, that is so, so cute. I especially love the Kraft paper addition to some of the papers. The paper color inspired the gingerbread styled house I created with the DB cutting file.
The house was made from layers of foam board. Chipboard was used for the details like the windows, door frame and door. I added some simple shaped trees in the background and some colorful Christmas trees on either side of the house.

The frame that holds the advent boxes is a refurbished piece. It originally had small doors with magnets, but most of them were missing or broken. So I decided to remove all the doors, give the frame a fresh coat of paint and make chipboard boxes to fit inside each slot.
Using the "Festive Flurry" page from the 6x6 paper pad and some coordinating papers from the collection, I was able to get most of the boxes done. Since box 24 and 25 were larger I used some cardstock and a few die-cuts to complete the countdown.
I simply adore the little blue bird sticker and found the perfect spot for her at the side of the house.

Both the round and snowflake sprinkles add more color, dimension and shine to the piece, which I love.
To give the wreath a more realistic look, I cut it out 4 times. I then layered the pieces together and scrunched it up a little, before adding the bow.
The Santa die-cut was mounted to chipboard then a few Doodlepop stickers were added for some more dimension.
Thanks for stopping by and I hope your "Countdown to Christmas" is a stress free one! :)

Tuesday, April 3, 2018

Down On The Farm | Treat Sleeves by Brigit

Down on the Farm has the cutest paper designs, I absolutely love all the farm animals in this collection. I made a couple of quick treat sleeves to show off the adorable double-sided patterned paper.


I used a couple sheets from the 12 x 12 paper pack and the stitched sleeve die from My Creative Time to create these cute treat holders.


The first one I used the chicken coop paper and added a couple of chicks from the icon sticker sheet. I also used a speech bubble from the chit chat pack and some sprinkles from the hen and chicks pack.


Here I used the eieio sheet with a banner from the chit chat pack and a couple of sprinkles from the farm friends pack.


For the last one, I used the utterly cute sheet with the cow from the icon sticker sheet and a speech bubble from the chit chat pack, so adorable!

That's for stopping by and have a wonderful day!
Pin It button on image hover