Saturday, December 22, 2018

Christmas Town - Santa Socks Layout | with Melinda

Take one packet of Odds & Ends die-cut pieces and whip up a collage style Christmas tree to act as the backdrop for your festive photos. There are so many wonderful icons to choose from and they work perfectly alongside the Chit Chat die-cut pieces too.
By adding foam pop dots behind all the die-cuts and photos it creates dimensional interest. And to soften the edges around the Christmas tree shape I added a few white ink splatters.

I created the title using the word 'Santa' from the Chit Chat die-cut pack and then added the word 'socks' using the 'Skinny' alpha stickers. I also added a wee heart sprinkle in red to tie the two word together.


With only a couple more days until Christmas, make sure you have all your camera equipment charged and ready to go as we quite often get so busy on the day that we tend to forget all about the photos.

Friday, December 21, 2018

Christmas Town Planner Pages | with Jennie

It's The Most Wonderful Time of the Year!  So, shouldn't the memory keeping and planning reflect that?  I think the answer is for sure, yes!  So that is exactly what I did with the Christmas Town collection in my memory planner.  [My memory planner is a BIG Happy Planner® that I use to add photos and decorations to document our daily activities] I am in love with how it all came together -- it's so cute and has me in the spirit. Let's take a look.

As usual, I added photos then I decorated around them.  I created three distinct clusters in a triangle formation [visual triangle] and had so much fun combining patterned papers from the Christmas Town 6x6 paper pad and the Odds and Ends.  I love the scale of the die cuts in my big Happy Planner®, they work together perfectly.

On this right hand side I loved the Candy Cane Lane paper layered with itself - it's just perfect.  I punched two pieces from that one paper and it turned out so well! So festive, especially with the Santa & his sleigh.

As you can see, the Mini Icon stickers are perfect for highlighting important things!

I include all of the things, including the radar. Because rain was a big deal this week, it even caused school to be closed for two days!

I cannot get enough of the the layering on these pages!  And, the Mini Icon Stickers!  I'm thinking of all of the ways to use them for all of the things to document our everyday.

Are you doing any kind of daily planning or memory keeping?  How are you using the Doodlebug Christmas Town, or other collections, in those projects?  Make sure you share with us, we'd love to see!

BLOG | INSTAGRAM  


Thursday, December 20, 2018

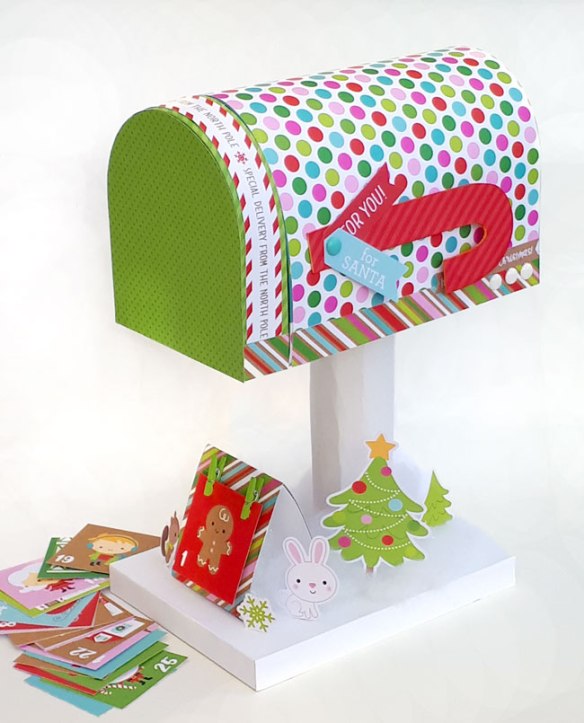
Christmas Town 3D Mail Box | with Karen

I have a confession to make - I just don't know where November and half of December went! How can we possibly be so close to Christmas?! Even with this cute December calendar I created with the new; Christmas Town collection, it still seem to have snuck up on me. Perhaps I should have outfitted it with a warning siren! Or perhaps I should have spent a bit more time prepping for the season and a little less time crafting for it - ahahahahahahaha!
  Well, prepared or not, Christmas will be here in no time, and I sure have been enjoying working with this new collection. This little home decor piece was created with a variety of products from the collection - everything from 12x12 pieces of patterned papers to chunky brads to mini clothespins!  
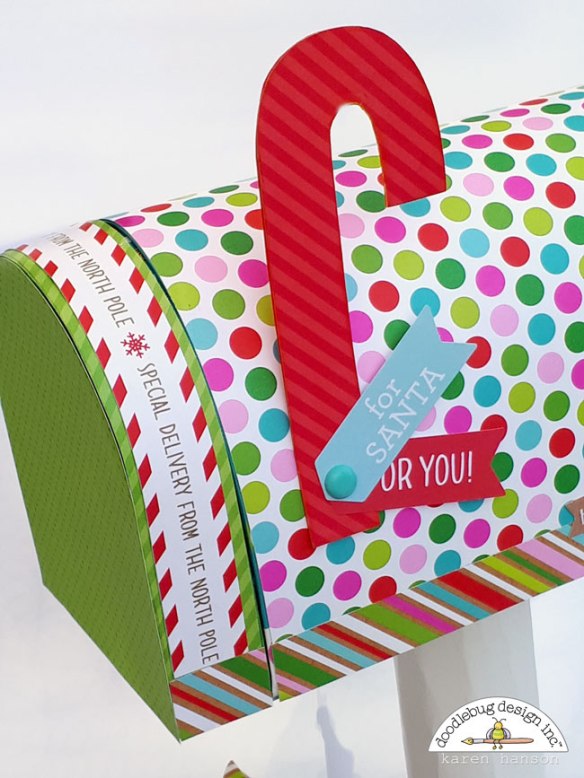
And while it is a cute piece that I can use to decorate my space, complete with a working notification flag/candy cane...  
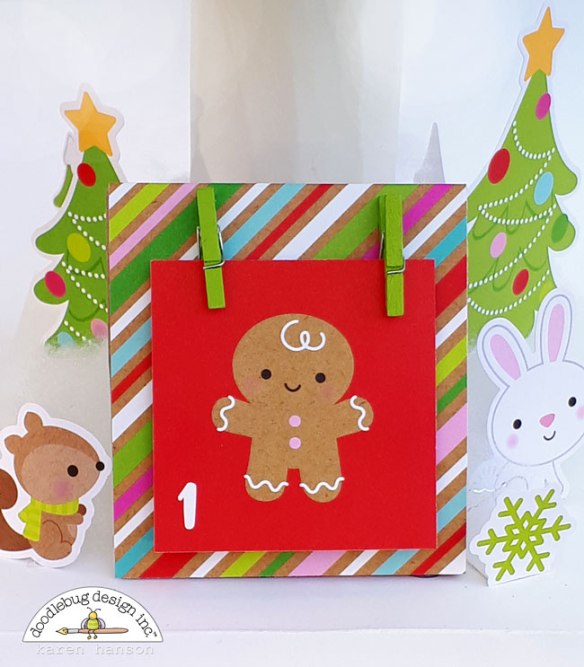
...it is also a little calendar that my daughters can change the date on each day! The Festive Flurry sheet is a perfect fit for creating a calendar without a lot of fuss - just cut and go - and the mini clothespins are a perfect way to keep them attached! A little bit of hot glue attached to a sturdy triangular base did the trick!  
And the mailbox itself creates a cute little place to store all of the dates! Believe it of not, it was actually the Berry Christmas cardstock sheet that actually inspired the project! There was a little strip on the paper that read "Special Delivery from the North Pole" that made me think of all the fun times my girls have writing letters to Santa. A mailbox seemed like a good fit, and so the project was born!
With pieces like these adorable characters from the Odds and Ends pack...  
 And adorable Chunky Brads and sentiments from the Chit Chat pack... ...embellishing this little mailbox was a breeze! In fact, once construction was complete, adding all the details that make this mailbox tell a little story took under an hour! And while the mailbox has been filled this year with everything from letters to Santa to an Elf on a Shelf that decided it was a good hiding place, a pretty package of cards and envelopes from the assortment package fits the bill as well!  
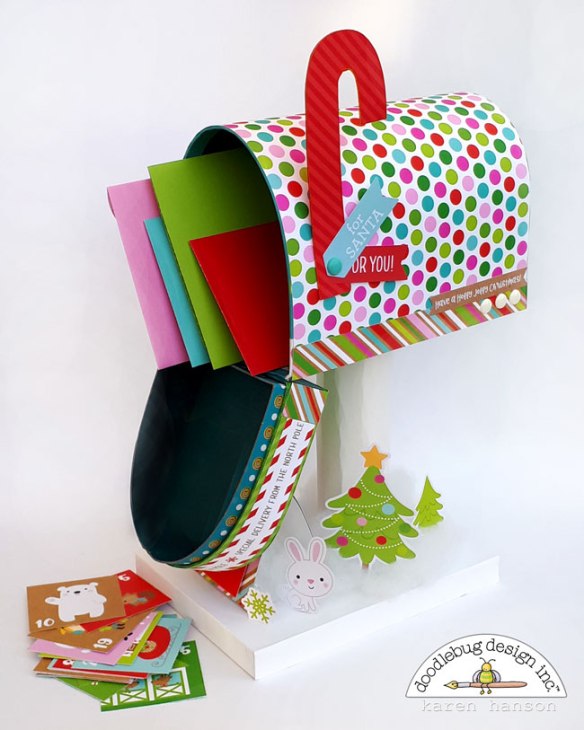
If you are anything like me and have found that the season has snuck up on you - fear not! With a cute collection like this one on your crafty table, you will either be creating beautiful things for Christmas in no time or, like me, just be pro-craftinating your way right to the last minute! Either way, you'll be having some Doodlebug fun! Wishing you all the best for a wonderful holiday season! Big hugs to you and yours,


Pin It button on image hover