Saturday, September 2, 2023

HELLO AGAIN GOOD TIMES LAYOUT | with Tarrah

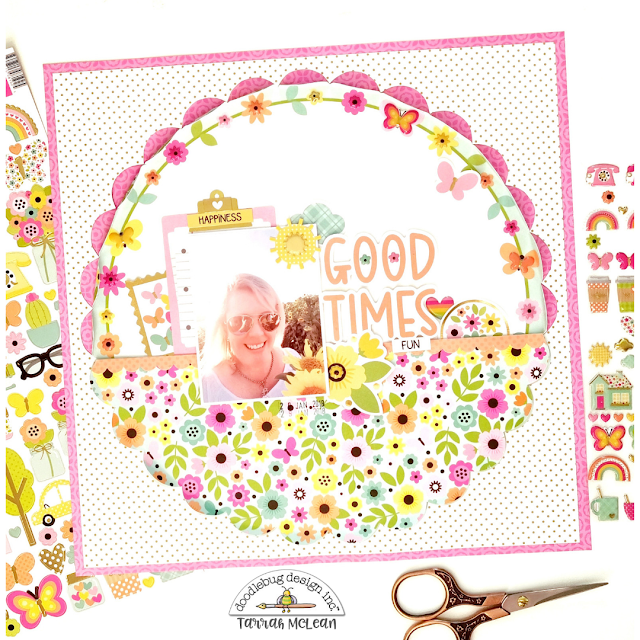
You can't go past a pretty round design on a scrapbook layout right? Especially when it comes to using the gorgeous Hello Again collection!  All the florals and butterflies are so gorgeous! I just love them! The photo that I am documenting suited this collection perfectly!


I took 2 sheets of the Forever Flowers paper and completely fussy cut the scalloped circle. I then cut this piece in half and set it aside. I took the other sheet and using my craft knife, I carefully and partially cut the scallops out on the top only. I trimmed this whole piece to measure 11' x 11' and adhered it to the Pink Poppies paper. I then bent back the scallops that I had cut out to reveal some of the pink in the background paper. I then took the half piece I cut first, flipped it over and adhered this piece using craft foam, to the bottom half of the scalloped circle, I placed craft foam adhesive to the bottom parts of the circle only so that I could create a sort of pocket to tuck items in.


I took one of the scalloped border stickers from the This and That Cardstock Stickers and placed it along the straight edge of the pocket. I placed my photo on the left side of the page, layering a few Bits and Pieces cardstock pieces behind. I adhered a sun cardstock die-cut piece and a puffy sun on top in the top right corner of my photo. I adhered my title to the right of my photo using craft foam pieces to add some dimension to my page. I tucked in one of the round die-cuts and also placed a rainbow puffy heart. I love the small flowers that I added to the holes in the O's in the word 'Good'.


In the bottom corner of my photo, I layered one of the yellow die-cut flowers and added a small yellow puffy flower to the centre. I love how this looks here at it appears to be a continuation of the yellow flowers from the photo. I took a few more of the word and phrase stickers from the This and That Cardstock stickers and placed them around my layout to help tell the story.


On the flowers and butterflies in the wreath at the top, I layered each with a coordinating puffy shape suited to what was printed on the paper. I love how this just adds some more interest, texture and dimension to my layout. If you look closely at these close-up pictures, you can see where I have cut the scallops and folded them back to reveal the pink paper underneath. Lastly I stamped the date stamp and my layout was finished.

I love how my layout turned out and I hope you enjoyed reading about how I created it?! Thanks so much for stopping by today! Happy creating!


DOODLEBUG PRODUCTS USED

Hello Again collection

OTHER

Date stamp
Black ink

Friday, September 1, 2023

SWEET & SPOOKY GIVEAWAY WINNERS!

 WE HAVE WINNERS!

Thank you to everyone who liked, commented and shared our Sweet & Spooky giveaway!
We appreciate each and every comment, we have the best followers!

Congratulations to the winners! Please send your mailing details to kathleen@doodlebug.ws.

This collection is shipping to stores now!

Have a great day!

HELLO AGAIN CUTE TAGS | with Niella

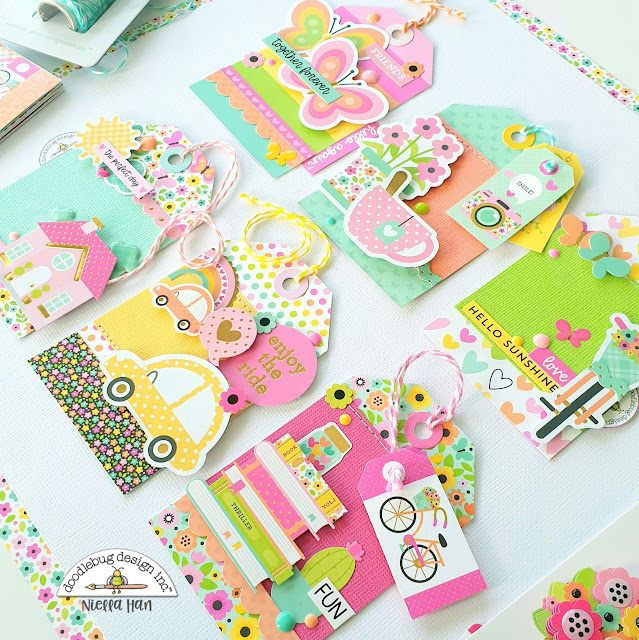
Hello Again crafty crew, happy September! How time has flown by - there seems to never be enough crafty time right! So let's get into today's crafty inspo; TAGS! Whether you create tags for gifting, stocking up on for future use or for accent extras for crafting with or just because - tags are fun, quick, easy and you can use them for other projects! I had so much fun creating these with the Hello Again collection, the colors and accents are super cute!


First, I've cut some tags using the 6x6" Hello Again paper pad, the smaller patterns on the paper always look so darling! Next, I cut the middle bands from the matching textured cardstock, stitched them on and then added on ephemera from the Odds & Ends, Icon stickers and mixed in some Mini Icons!


To add extra dimension and interest; I've dotted around Puffy Icons and Shape Sprinkles! Finishing off the tags, I pulled out the extra sweetness This & That sticker sheet and used the trims, words and phrases.


Don't they look super adorable all together! I love the added touch of the Doodle Twine to set off the full look of these tags! Add in extra interest by adding a mini tag and knotting off the twine. Fun!


Thank you for popping by today and hope you've gained some more inspiration :-) Remember to tag us in on your Doodlebug Design projects - we love seeing what you create! Until next time crafty crew; doodle dee!


DOODLEBUG PRODUCTS USED

Hello Again Collection
Doodle Twine
Textured cardstock

OTHER
machine stitching
foam squares


Pin It button on image hover